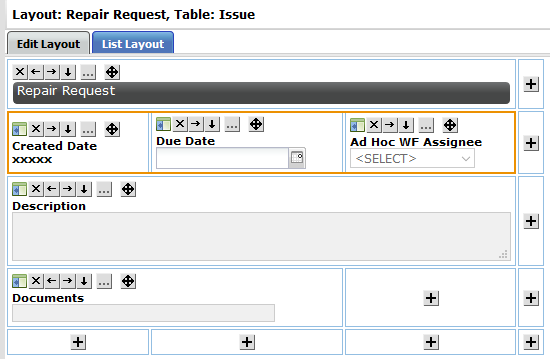
Our best practice recommendation is to format your form layouts so that they do not exceed three cell widths in total width. This will ensure that your form displays correctly with the increased font size. In the screen shot below, the form layout is three cell widths in total width.
To navigate to the Manage Forms page:
-
Select Admin in the toolbar in the upper-right corner of the window.
The System Administrator Dashboard page opens.
-
Click Manage Forms link in the Company Administration column.
The Manage Forms page opens.
-
Follow a procedure below.
Common Form Elements
Bidding Forms
 Change Order Forms
The Change Order work flow is used by vendors to submit change orders.
We highly recommend that you include instructions in your form layouts.
Add Form Type
To add your change order form type:
-
Click Add Form Type.
The Add Form Type window opens.
-
Enter Change Order in the Name field.
Form names cannot end with a number.
-
Enter a description of the form in the Description field.
Add descriptions to every template, layout, or field you create in Lucernex, so future administrators understand the purpose and context of each item.
-
Select the Default option.
-
Enter CO in the Sequence Prefix field.
-
Select the Global Sequence Numbers? check box.
This setting gives forms a unique identifier per form across the system.
-
If you want to allow replies on the form, select the Yes option for the Allow Reply setting.
-
Select the Work Flow Field Set check box.
-
Select the check boxes for each entity type this form should be available in.
-
Select the portfolio you want this form type to be available for from the Available for the following Portfolios / Capital Programs field.
All Portfolios / Capital Programs is the default. Multiple options are available.
-
Select Add.
The window closes. The bid package form type appears in the Forms table.
Add Form Layouts
Since the change order work flow is kicked off by the Submit Change Order form, the Submit Change Order form layout requires slightly different settings from the other form layouts.
Submit Change Order Form Layout
Before a form can be used, you must build a layout.
To add a form layout:
-
Click Add Layout link in the Actions column of the form type to which you want to add a layout.
The Add Layout window opens.
-
Enter Submit Change Order in the Page Layout Name field.
-
Enter a description of the layout in the Description field.
Add descriptions to every template, layout, or field you create in Lucernex, so future administrators understand the purpose and context of each item.
-
Select Yes for the Allow Edit setting.
-
Select the Yes option for the Allow users to create this form? setting.
This setting allows users to kick off the work flow by creating the form.
-
If you want to base the layout of this form on another layout, select the layout from the Initialize layout from existing layout field.
-
If you want to specify a minimum width for this layout, enter the width in the Minimum window width in pixels field.
The system will auto-size the form for you. We recommend viewing the form prior to setting a minimum width.
-
If you anticipate that your users will be viewing this form on a mobile device, select the Large Text for Mobile check box.
This setting increases the size of text in forms when the form is viewed on a tablet. This setting improves the experience of users working in the field.
Our best practice recommendation is to format your form layouts so that they do not exceed three cell widths in total width. This will ensure that your form displays correctly with the increased font size. In the screen shot below, the form layout is three cell widths in total width.
-
Select the portfolio you want this form layout to be available for from the Available for the following Portfolios / Capital Programs field.
All Portfolios / Capital Programs is the default. Multiple options are available.
-
Click Add Layout.
The Add Layout window closes. The layout appears as a child item to the form type when you click
 next to the form type name.
Other Form Layouts
The rest of the form layouts for the change order forms have the same settings. Follow these procedures twice.
Before a form can be used, you must build a layout.
To add a form layout:
-
Click Add Layout link in the Actions column of the form type to which you want to add a layout.
The Add Layout window opens.
-
Enter the page layout name in the Page Layout Name field.
You will need to make two form layouts. Use the following names for the layouts:
-
Review Change Order
-
Update Budget - Change Order
-
-
Enter a description of the layout in the Description field.
Add descriptions to every template, layout, or field you create in Lucernex, so future administrators understand the purpose and context of each item.
-
Select Yes for the Allow Edit setting.
-
Select the No option for the Allow users to create this form?setting.
This setting limits the forms to only being used in work flows.
-
If you want to base the layout of this form on another layout, select the layout from the Initialize layout from existing layout field.
-
If you want to specify a minimum width for this layout, enter the width in the Minimum window width in pixels field.
The system will auto-size the form for you. We recommend viewing the form prior to setting a minimum width.
-
If you anticipate that your users will be viewing this form on a mobile device, select the Large Text for Mobile check box.
This setting increases the size of text in forms when the form is viewed on a tablet. This setting improves the experience of users working in the field.
Our best practice recommendation is to format your form layouts so that they do not exceed three cell widths in total width. This will ensure that your form displays correctly with the increased font size. In the screen shot below, the form layout is three cell widths in total width.
-
Select the portfolio you want this form layout to be available for from the Available for the following Portfolios / Capital Programs field.
All Portfolios / Capital Programs is the default. Multiple options are available.
-
Click Add Layout.
The Add Layout window closes. The layout appears as a child item to the form type when you click
next to the form type name. -
Repeat these steps for the second form layout.
Edit Fields
To add custom fields to your change order forms:
-
Click Edit Fields link in the Actions column of the form type whose fields you want to manage.
The Edit Fields window opens.
-
Click Add Report / Form Field.
The Add Report / Form Field window opens.
-
Follow a procedure below.
Approver Comments
To create the Approver Comments field:
-
Select the Custom Field option.
-
Enter Approver Comments in the Field Name field.
-
Enter Approver Comments in the Integration Name field.
-
Select the No option for the Required setting.
-
Select Memo from the Form Field Type field.
-
Select Add.
The window closes. The field appears in the Edit Fields window.
Change Order Budget Total
To create the Change Order Budget Total field:
-
Select the Mathematical Operation Field option.
-
Click Add Number/Currency math link.
The Mathematical Operations Builder window opens.
-
Enter Change Order Budget Total in the Field name on report field.
-
Select Change Order Detail: Budget Cost: Total from the Available Fields field.
The field name referenced here is the total of your Budget Cost column in your approver-facing custom list.
-
Click >>.
The field moves to the Current operation field.
-
Select Submit.
The Mathematical Operations Builder window closes.
-
Select Add.
The window closes. The field appears in the Edit Fields window.
Change Order Detail (custom list)
Before you create this field, you must first create budget custom list. Your custom list will need two layouts: a vendor-facing ("submittal") layout, and an approver-facing ("impact budget") layout.
Each layout attached to your custom list will appear in the custom list's sub-folder in the fields menu in the Page Layout Editor.
To create the Change Order Detail field:
-
Select the Custom Field option.
-
Enter Change Order Detail in the Field Name field.
-
Enter ChangeOrderDetail in the Integration Name field.
-
Select Custom List from the Form Field Type field.
-
Select your Change Order Detail custom list from the Custom Lists field.
-
Select Add.
The window closes. The field appears in the Edit Fields window.
Change Order Reason
To create the Change Order Reason field:
-
Select the Custom Field option.
-
Enter Change Order Reason in the Field Name field.
-
Enter ChangeOrderReason in the Integration Name field.
-
Select Drop Down from the Form Field Type field.
-
Select Custom Drop Downs from the Drop Down Types field.
-
Select your Change Order Reason custom field from the Drop Downs field.
-
Select Add.
The window closes. The field appears in the Edit Fields window.
Change Order Total
To create the Change Order Total field:
-
Select the Mathematical Operation Field option.
-
Click Add Number/Currency math link.
The Mathematical Operations Builder window opens.
-
Enter Change Order Total in the Field name on report field.
-
Select Change Order Detail: Change Order Amount: Total from the Available Fields field.
The field name referenced here is the total of your Amount column in your vendor-facing custom list.
-
Click >>.
The field moves to the Current operation field.
-
Select Submit.
The Mathematical Operations Builder window closes.
-
Select Add.
The window closes. The field appears in the Edit Fields window.
-
Build Layouts
The way you format your forms is entirely dependent upon your needs. The expanding sections below describe the fields often used in these forms.
We highly recommend that you include instructions in your form layouts.
Build a Form Layout
Make sure to save your changes frequently by clicking the Save Layout at the bottom of the Layout Builder window.
To build a form layout:
-
Click
next to the form type whose layout you want to build. The layouts associated with the form type appear as child items.
-
Click Build Layout link in the Actions column for the layout you want to build.
The Layout Builder opens in a window.
-
Follow the appropriate procedures on the Page Layout Editor page.
The fields that are required or commonly used in these forms can be found in the expanding sections below.
Submit Change Order
The following table lists required and commonly used fields for your Submit Change Order form layout.
Apply the Is Required? or Read-only in Edit Form settings by following these procedures.
| Field Name | Menu Path | Required for form? | Is Required? setting | Read-only in Edit form | Notes |
|---|---|---|---|---|---|
| Form Header | Sub Layouts | No | No | Yes | |
| Form Footer | Sub Layouts | No | No | Yes | |
| Change Order Submittal |
Available Fields > Forms > Change Order > Change Order Detail Each layout attached to your custom list will appear in the custom list's sub-folder. |
Yes | Yes | No | This is your vendor-facing budget custom list. See the Edit Fields section above to learn how to add a custom list to your form type. |
| Change Order Total | Available Fields > Forms > Change Order | No | No | No | This is a custom field. See the Edit Fields section above to learn how to create this field. |
| Change Order Reason | Available Fields > Forms > Change Order | No | Yes or No | No | This is a custom field. See the Edit Fields section above to learn how to create this field. |
| Created Date | Available Fields > Forms > All | Yes | No | Yes | |
| Creator | Available Fields > Forms > All | Yes | No | Yes | |
| Description | Available Fields > Forms > All | Yes | No | No | |
| Documents | Available Fields > Forms > All | Yes | No | No | |
| Number | Available Fields > Forms > All | Yes | Yes | Yes | |
| Title | Available Fields > Forms > All | Yes | Yes | No |
Review Change Order
The following table lists required and commonly used fields for your Review Change Order form layout.
Apply the Is Required? or Read-only in Edit Form settings by following these procedures.
| Field Name | Menu Path | Required for form? | Is Required? setting | Read-only in Edit form | Notes |
|---|---|---|---|---|---|
| Form Header | Sub Layouts | No | No | Yes | |
| Form Footer | Sub Layouts | No | No | Yes | |
| Approver Comments | Available Fields > Forms > Change Order | Yes | No | No | This is a custom field. See the Edit Fields section above to learn how to create this field. |
| Change Order Submittal |
Available Fields > Forms > Change Order > Change Order Detail Each layout attached to your custom list will appear in the custom list's sub-folder. |
Yes | No | Yes |
This is your vendor-facing budget custom list. See the Edit Fields section above to learn how to add a custom list to your form type. |
| Change Order Total | Available Fields > Forms > Change Order | No | No | No | This is a custom field. See the Edit Fields section above to learn how to create this field. |
| Change Order Reason | Available Fields > Forms > Change Order | No | No | Yes |
This is a custom field. See the Edit Fields section above to learn how to create this field. |
| Created Date | Available Fields > Forms > All | Yes | No | Yes | |
| Creator | Available Fields > Forms > All | Yes | No | Yes | |
| Description | Available Fields > Forms > All | Yes | No | Yes | |
| Documents | Available Fields > Forms > All | Yes | No | No | |
| Number | Available Fields > Forms > All | Yes | Yes | Yes | |
| Title | Available Fields > Forms > All | Yes | Yes | Yes | |
| Number of Change Orders | Available Fields > Specialized Forms > Purchase Order | No | No | Yes | This field allows you to see how many change orders have been created for the related purchase order. |
Update Budget - Change Order
The following table lists required and commonly used fields for your Update Budget - Change Order form layout.
Apply the Is Required? or Read-only in Edit Form settings by following these procedures.
| Field Name | Menu Path | Required for form? | Is Required? setting | Read-only in Edit form | Notes |
|---|---|---|---|---|---|
| Form Header | Sub Layouts | No | No | Yes | |
| Form Footer | Sub Layouts | No | No | Yes | |
| Approver Comments | Available Fields > Forms > Change Order | Yes | No | No | This is a custom field. See the Edit Fields section above to learn how to create this field. |
| Change Order Budget Total | Available Fields > Forms > Change Order | No | No | No | This is a custom field. See the Edit Fields section above to learn how to create this field. |
| Change Order Impact Budget |
Available Fields > Forms > Change Order > Change Order Detail Each layout attached to your custom list will appear in the custom list's sub-folder. |
Yes | Yes | No |
This is your approver-facing budget custom list. See the Edit Fields section above to learn how to add a custom list to your form type. |
| Change Order Total | Available Fields > Forms > Change Order | No | No | No | This is a custom field. See the Edit Fields section above to learn how to create this field. |
| Change Order Reason | Available Fields > Forms > Change Order | No | No | Yes |
This is a custom field. See the Edit Fields section above to learn how to create this field. |
| Created Date | Available Fields > Forms > All | Yes | No | Yes | |
| Creator | Available Fields > Forms > All | Yes | No | Yes | |
| Description | Available Fields > Forms > All | Yes | No | Yes | |
| Documents | Available Fields > Forms > All | Yes | No | No | |
| Number | Available Fields > Forms > All | Yes | Yes | Yes | |
| Title | Available Fields > Forms > All | Yes | Yes | Yes |
Payment Application Forms
The Payment Application work flow is used by vendors to submit invoices for payment.
We highly recommend that you include instructions in your form layouts.
Add Form Type
To add your payment application form type:
-
Click Add Form Type.
The Add Form Type window opens.
-
Enter Payment Application in the Name field.
Form names cannot end with a number.
-
Enter a description of the form in the Description field.
Add descriptions to every template, layout, or field you create in Lucernex, so future administrators understand the purpose and context of each item.
-
Select the Default option.
-
Enter INV in the Sequence Prefix field.
-
Select the Global Sequence Numbers? check box.
This setting gives forms a unique identifier per form across the system.
-
If you want to allow replies on the form, select the Yes option for the Allow Reply setting.
-
Select the Work Flow Field Set check box.
-
Select the check boxes for each entity type this form should be available in.
-
Select the portfolio you want this form type to be available for from the Available for the following Portfolios / Capital Programs field.
All Portfolios / Capital Programs is the default. Multiple options are available.
-
Select Add.
The window closes. The bid package form type appears in the Forms table.
Add Form Layouts
Since the payment application work flow is kicked off by the Submit Payment Application form, the Submit Payment Application form layout requires slightly different settings from the other form layouts.
Submit Payment Application Form Layout
Before a form can be used, you must build a layout.
To add the Submit Payment Application form layout:
-
Click Add Layout link in the Actions column of the form type to which you want to add a layout.
The Add Layout window opens.
-
Enter Submit Payment Application in the Page Layout Name field.
-
Enter a description of the layout in the Description field.
Add descriptions to every template, layout, or field you create in Lucernex, so future administrators understand the purpose and context of each item.
-
Select Yes for the Allow Edit setting.
-
Select the Yes option for the Allow users to create this form? setting.
This setting allows users to kick off the work flow by creating the form.
-
If you want to base the layout of this form on another layout, select the layout from the Initialize layout from existing layout field.
-
If you want to specify a minimum width for this layout, enter the width in the Minimum window width in pixels field.
The system will auto-size the form for you. We recommend viewing the form prior to setting a minimum width.
-
If you anticipate that your users will be viewing this form on a mobile device, select the Large Text for Mobile check box.
This setting increases the size of text in forms when the form is viewed on a tablet. This setting improves the experience of users working in the field.
Our best practice recommendation is to format your form layouts so that they do not exceed three cell widths in total width. This will ensure that your form displays correctly with the increased font size. In the screen shot below, the form layout is three cell widths in total width.
-
Select the portfolio you want this form layout to be available for from the Available for the following Portfolios / Capital Programs field.
All Portfolios / Capital Programs is the default. Multiple options are available.
-
Click Add Layout.
The Add Layout window closes. The layout appears as a child item to the form type when you click
next to the form type name.
Other Form Layouts
The rest of the form layouts for the payment application forms have the same settings. Follow these procedures three times, until the remaining three form layouts are created.
Before a form can be used, you must build a layout.
To add a form layout:
-
Click Add Layout link in the Actions column of the form type to which you want to add a layout.
The Add Layout window opens.
-
Enter the page layout name in the Page Layout Name field.
You will need to make three form layouts. Use the following names for the layouts:
-
Review Payment Application
-
Approve Payment Application
-
Update Budget - Payment Application
-
-
Enter a description of the layout in the Description field.
Add descriptions to every template, layout, or field you create in Lucernex, so future administrators understand the purpose and context of each item.
-
Select Yes for the Allow Edit setting.
-
Select the No option for the Allow users to create this form? setting.
This setting limits these forms to only being used in work flows.
-
If you want to base the layout of this form on another layout, select the layout from the Initialize layout from existing layout field.
-
If you want to specify a minimum width for this layout, enter the width in the Minimum window width in pixels field.
The system will auto-size the form for you. We recommend viewing the form prior to setting a minimum width.
-
If you anticipate that your users will be viewing this form on a mobile device, select the Large Text for Mobile check box.
This setting increases the size of text in forms when the form is viewed on a tablet. This setting improves the experience of users working in the field.
Our best practice recommendation is to format your form layouts so that they do not exceed three cell widths in total width. This will ensure that your form displays correctly with the increased font size. In the screen shot below, the form layout is three cell widths in total width.
-
Select the portfolio you want this form layout to be available for from the Available for the following Portfolios / Capital Programs field.
All Portfolios / Capital Programs is the default. Multiple options are available.
-
Click Add Layout.
The Add Layout window closes. The layout appears as a child item to the form type when you click
next to the form type name. -
Repeat these steps until all three form layouts for this work flow are created.
Edit Fields
To add custom fields to your payment application forms:
-
Click Edit Fields link in the Actions column of the form type whose fields you want to manage.
The Edit Fields window opens.
-
Click Add Report / Form Field.
The Add Report / Form Field window opens.
-
Follow a procedure below.
Some of the fields below require that you create other fields first. The fields appear in the order that you should create them.
There are several fields in this form type that pull data from a report. This report will be provided to you by your Professional Services representative at implementation.
Approver 1 Comments
To create the Approver 1 Comments field:
-
Select the Custom Field option.
-
Enter Approver 1 Comments in the Field Name field.
-
Enter Approver1Comments in the Integration Name field.
-
Select the No option for the Required setting.
-
Select Memo from the Form Field Type field.
-
Select Add.
The window closes. The field appears in the Edit Fields window.
Approver 2 Comments
To create the Approver 2 Comments field:
-
Select the Custom Field option.
-
Enter Approver 2 Comments in the Field Name field.
-
Enter Approver2Comments in the Integration Name field.
-
Select the No option for the Required setting.
-
Select Memo from the Form Field Type field.
-
Select Add.
The window closes. The field appears in the Edit Fields window.
Payment Application Detail (custom list)
Before you create this field, you must first create budget custom list. Your custom list will need two layouts: a vendor-facing ("submittal") layout, and an approver-facing ("impact budget") layout.
Each layout attached to your custom list will appear in the custom list's sub-folder in the fields menu in the Page Layout Editor.
To create the Payment Application Detail field:
-
Select the Custom Field option.
-
Enter Payment Application Detail in the Field Name field.
-
Enter PaymentApplicationDetail in the Integration Name field.
-
Select Custom List from the Form Field Type field.
-
Select your Payment Application Detail custom list from the Custom Lists field.
-
Select Add.
The window closes. The field appears in the Edit Fields window.
Change Orders
To create the Change Orders field:
-
Select the Mathematical Operation Field option.
-
Click Add Number/Currency math link.
The Mathematical Operations Builder window opens.
-
Enter Change Orders in the Field name on report field.
-
Select Payment Application Details: Change Orders: Total from the Available Fields field.
-
Click >>.
The field moves to the Current operation field.
-
Select Submit.
The Mathematical Operations Builder window closes.
-
Select Add.
The window closes. The field appears in the Edit Fields window.
Contract Amount
To create the Contract Amount field:
-
Select the Mathematical Operation Field option.
-
Click Add Number/Currency math link.
The Mathematical Operations Builder window opens.
-
Enter Contract Amount in the Field name on report field.
-
Select Payment Application Details: Contract Amount: Total from the Available Fields field.
-
Click >>.
The field moves to the Current operation field.
-
Select Submit.
The Mathematical Operations Builder window closes.
-
Select Add.
The window closes. The field appears in the Edit Fields window.
Contract Sum to Date
Before you create this field you must first create the Change Orders and Contract Amount fields.
To create the Contract Sum to Date field:
-
Select the Mathematical Operation Field option.
-
Click Add Number/Currency math link.
The Mathematical Operations Builder window opens.
-
Enter Contract Sum to Date in the Field name on report field.
-
Select Contract Amount from the Available Fields field.
-
Click >>.
The field moves to the Current operation field.
-
Click Plus operator.
A plus symbol appears in the Current operation field.
-
Select Change Orders from the Available Fields field.
-
Click >>.
The field moves to the Current operation field.
The Current operation should now contain Contract Amount + Change Orders.
-
Select Submit.
The Mathematical Operations Builder window closes.
-
Select Add.
The window closes. The field appears in the Edit Fields window.
Current Pay Application Amount
To create the Current Pay Application Amount field:
-
Select the Mathematical Operation Field option.
-
Click Add Number/Currency math link.
The Mathematical Operations Builder window opens.
-
Enter Current Pay Application Amount in the Field name on report field.
-
Select Payment Application Details: Current Pay Application Amount: Total from the Available Fields field.
-
Click >>.
The field moves to the Current operation field.
-
Select Submit.
The Mathematical Operations Builder window closes.
-
Select Add.
The window closes. The field appears in the Edit Fields window.
Previously Paid Pay Applications
To create the Previously Paid Pay Applications field:
-
Select the Mathematical Operation Field option.
-
Click Add Number/Currency math link.
The Mathematical Operations Builder window opens.
-
Enter Previously Paid Pay Applications in the Field name on report field.
-
Select Previously Paid Pay Applications from the Available Fields field.
-
Click >>.
The field moves to the Current operation field.
-
Select Submit.
The Mathematical Operations Builder window closes.
-
Select Add.
The window closes. The field appears in the Edit Fields window.
Total Completed to Date
Before you create this field you must first create the Previously Paid Pay Applications and Current Pay Application Amount fields.
To create the Total Completed to Date field:
-
Select the Mathematical Operation Field option.
-
Click Add Number/Currency math link.
The Mathematical Operations Builder window opens.
-
Enter Total Completed to Date in the Field name on report field.
-
Select Previously Paid Pay Applications from the Available Fields field.
-
Click >>.
The field moves to the Current operation field.
-
Click Plus operator.
A plus symbol appears in the Current operation field.
-
Select Current Pay Application Amount from the Available Fields field.
-
Click >>.
The field moves to the Current operation field.
The Current operation should now contain Previously Paid Pay Applications + Current Pay Application Amount.
-
Select Submit.
The Mathematical Operations Builder window closes.
-
Select Add.
The window closes. The field appears in the Edit Fields window.
Balance to Complete
Before you create this field you must first create the Contract Sum to Date and Total Completed to Date fields.
To create the Balance to Complete field:
-
Select the Mathematical Operation Field option.
-
Click Add Number/Currency math link.
The Mathematical Operations Builder window opens.
-
Enter Balance to Complete in the Field name on report field.
-
Select Contract Sum to Date from the Available Fields field.
-
Click >>.
The field moves to the Current operation field.
-
Click Minus operator.
A minus symbol appears in the Current operation field.
-
Select Total Completed to Date from the Available Fields field.
-
Click >>.
The field moves to the Current operation field.
The Current operation should now contain Contract Sum to Date - Total Completed to Date.
-
Select Submit.
The Mathematical Operations Builder window closes.
-
Select Add.
The window closes. The field appears in the Edit Fields window.
Retainage Percent
To create the Retainage Percent field:
-
Select the Custom Field option.
-
Enter Retainage Percent in the Field Name field.
-
Enter RetainagePercent in the Integration Name field.
-
Select the No option for the Required setting.
-
Select Percent from the Form Field Type field.
-
Select Add.
The window closes. The field appears in the Edit Fields window.
Retainage to Date
Before you create this field you must first create the Total Completed to Date and Retainage Percent fields.
To create the Balance to Complete field:
-
Select the Mathematical Operation Field option.
-
Click Add Number/Currency math link.
The Mathematical Operations Builder window opens.
-
Enter Retainage to Date in the Field name on report field.
-
Select Total Completed to Date from the Available Fields field.
-
Click >>.
The field moves to the Current operation field.
-
Click Multiplication operator.
A multiplication symbol appears in the Current operation field.
-
Select Retainage Percent from the Available Fields field.
-
Click >>.
The field moves to the Current operation field.
The Current operation should now contain Total Completed to Date x Retainage Percent.
-
Select Submit.
The Mathematical Operations Builder window closes.
-
Select Add.
The window closes. The field appears in the Edit Fields window.
Total Completed Less Retainage
Before you create this field you must first create the Total Completed to Date and Retainage to Date fields.
To create the Total Completed Less Retainage field:
-
Select the Mathematical Operation Field option.
-
Click Add Number/Currency math link.
The Mathematical Operations Builder window opens.
-
Enter Total Completed Less Retainage in the Field name on report field.
-
Select Total Completed to Date from the Available Fields field.
-
Click >>.
The field moves to the Current operation field.
-
Click Subtraction operator.
A minus symbol appears in the Current operation field.
-
Select Retainage to Date from the Available Fields field.
-
Click >>.
The field moves to the Current operation field.
The Current operation should now contain Total Completed to Date - Retainage to Date.
-
Select Submit.
The Mathematical Operations Builder window closes.
-
Select Add.
The window closes. The field appears in the Edit Fields window.
-
Build Layouts
The way you format your forms is entirely dependent upon your needs. The expanding sections below describe the fields often used in these forms.
We highly recommend that you include instructions in your form layouts.
Build a Form Layout
Make sure to save your changes frequently by clicking the Save Layout at the bottom of the Layout Builder window.
To build a form layout:
-
Click
next to the form type whose layout you want to build. The layouts associated with the form type appear as child items.
-
Click Build Layout link in the Actions column for the layout you want to build.
The Layout Builder opens in a window.
-
Follow the appropriate procedures on the Page Layout Editor page.
The fields that are required or commonly used in these forms can be found in the expanding sections below.
Submit Payment Application
The following table lists required and commonly used fields for your Submit Payment Application form layout.
Apply the Is Required? or Read-only in Edit Form settings by following these procedures.
| Field Name | Menu Path | Required for form? | Is Required? setting | Read-only in Edit form | Notes |
|---|---|---|---|---|---|
| Form Header | Sub Layouts | No | No | Yes | |
| Form Footer | Sub Layouts | No | No | Yes | |
| Balance to Complete | Available Fields > Forms > Payment Application | No | No | No |
This is a custom math field. The value this field displays is dependent upon values in your budget and values in your custom list. See the Edit Fields section above to learn how to create this field. |
| Change Orders | Available Fields > Forms > Payment Application | No | No | No | This is a custom math field. The value this field displays is dependent upon values in your custom list. See the Edit Fields section above to learn how to create this field. |
| Contract Amount | Available Fields > Forms > Payment Application | No | No | No | This is a custom math field. The value this field displays is dependent upon values in your custom list. See the Edit Fields section above to learn how to create this field. |
| Contract Sum to Date | Available Fields > Forms > Payment Application | No | No | No | This is a custom math field. The value this field displays is dependent upon values in your custom list. See the Edit Fields section above to learn how to create this field. |
| Created Date | Available Fields > Forms > All | Yes | No | Yes | |
| Creator | Available Fields > Forms > All | Yes | No | Yes | |
| Current Application | Available Fields > Forms > Payment Application | No | No | No | This is a custom math field. The value this field displays is dependent upon values in your custom list. See the Edit Fields section above to learn how to create this field. |
| Description | Available Fields > Forms > All | Yes | No | No | |
| Documents | Available Fields > Forms > All | Yes | No | No | |
| Pay Application Submittal |
Available Fields > Forms > Payment Application > Payment Application Details Each layout attached to your custom list will appear in the custom list's sub-folder. |
Yes | No | No | This is your vendor-facing budget custom list. See the Edit Fields section above to learn how to add a custom list to your form type. |
| Previous Applications | Available Fields > Forms > Payment Application | No | No | No | This is a custom math field. The value this field displays is dependent upon values in your budget and values in your custom list. See the Edit Fields section above to learn how to create this field. |
| Retainage Percent | Available Fields > Forms > Payment Application | No | No | No | This is a custom field. See the Edit Fields section above to learn how to create this field. |
| Retainage to Date | Available Fields > Forms > Payment Application | No | No | No | This is a custom math field. The value this field displays is dependent upon values entered in the form. See the Edit Fields section above to learn how to create this field. |
| Title | Available Fields > Forms > All | Yes | Yes | No | |
| Total Completed Less Retainage | Available Fields > Forms > Payment Application | No | No | No | This is a custom math field. The value this field displays is dependent upon values entered in the form. See the Edit Fields section above to learn how to create this field. |
| Total Completed to Date | Available Fields > Forms > Payment Application | No | No | No | This is a custom math field. The value this field displays is dependent upon values in your budget and values in your custom list. See the Edit Fields section above to learn how to create this field. |
Review Payment Application
The following table lists required and commonly used fields for your Review Payment Application form layout.
Apply the Is Required? or Read-only in Edit Form settings by following these procedures.
| Field Name | Menu Path | Required for form? | Is Required? setting | Read-only in Edit form | Notes |
|---|---|---|---|---|---|
| Form Header | Sub Layouts | No | No | Yes | |
| Form Footer | Sub Layouts | No | No | Yes | |
| Approver 1 Comments | Available Fields > Forms > Payment Application | Yes | No | No | This is a custom field. See the Edit Fields section above to learn how to create this field. |
| Approver 2 Comments | Available Fields > Forms > Payment Application | Yes | No | Yes |
This is a custom field. See the Edit Fields section above to learn how to create this field. |
| Balance to Complete | Available Fields > Forms > Payment Application | No | No | No |
This is a custom math field. The value this field displays is dependent upon values in your budget and values in your custom list. See the Edit Fields section above to learn how to create this field. |
| Change Orders | Available Fields > Forms > Payment Application | No | No | No | This is a custom math field. The value this field displays is dependent upon values in your custom list. See the Edit Fields section above to learn how to create this field. |
| Contract Amount | Available Fields > Forms > Payment Application | No | No | No | This is a custom math field. The value this field displays is dependent upon values in your custom list. See the Edit Fields section above to learn how to create this field. |
| Contract Sum to Date | Available Fields > Forms > Payment Application | No | No | No | This is a custom math field. The value this field displays is dependent upon values in your custom list. See the Edit Fields section above to learn how to create this field. |
| Created Date | Available Fields > Forms > All | Yes | No | Yes | |
| Creator | Available Fields > Forms > All | Yes | No | Yes | |
| Current Application | Available Fields > Forms > Payment Application | No | No | No | This is a custom math field. The value this field displays is dependent upon values in your custom list. See the Edit Fields section above to learn how to create this field. |
| Description | Available Fields > Forms > All | Yes | No | Yes | |
| Documents | Available Fields > Forms > All | Yes | No | No | |
| Pay Application Submittal |
Available Fields > Forms > Payment Application > Payment Application Details Each layout attached to your custom list will appear in the custom list's sub-folder. |
Yes | No | Yes |
This is your vendor-facing budget custom list. See the Edit Fields section above to learn how to add a custom list to your form type. |
| Previous Applications | Available Fields > Forms > Payment Application | No | No | No | This is a custom math field. The value this field displays is dependent upon values in your budget and values in your custom list. See the Edit Fields section above to learn how to create this field. |
| Retainage Percent | Available Fields > Forms > Payment Application | No | No | Yes |
This is a custom field. See the Edit Fields section above to learn how to create this field. |
| Retainage to Date | Available Fields > Forms > Payment Application | No | No | No | This is a custom math field. The value this field displays is dependent upon values entered in the form. See the Edit Fields section above to learn how to create this field. |
| Title | Available Fields > Forms > All | Yes | No | Yes | |
| Total Completed Less Retainage | Available Fields > Forms > Payment Application | No | No | No | This is a custom math field. The value this field displays is dependent upon values entered in the form. See the Edit Fields section above to learn how to create this field. |
| Total Completed to Date | Available Fields > Forms > Payment Application | No | No | No | This is a custom math field. The value this field displays is dependent upon values in your budget and values in your custom list. See the Edit Fields section above to learn how to create this field. |
| Number of Pay Apps | Available Fields > Specialized Forms > PurchaseOrder | No | No | Yes | This field tells you how may payment applications have been submitted against the related purchase order. |
Approve Payment Application
The following table lists required and commonly used fields for your Approve Payment Application form layout.
Apply the Is Required? or Read-only in Edit Form settings by following these procedures.
| Field Name | Menu Path | Required for form? | Is Required? setting | Read-only in Edit form | Notes |
|---|---|---|---|---|---|
| Form Header | Sub Layouts | No | No | Yes | |
| Form Footer | Sub Layouts | No | No | Yes | |
| Approver 1 Comments | Available Fields > Forms > Payment Application | Yes | No | Yes |
This is a custom field. See the Edit Fields section above to learn how to create this field. |
| Approver 2 Comments | Available Fields > Forms > Payment Application | Yes | No | No | This is a custom field. See the Edit Fields section above to learn how to create this field. |
| Balance to Complete | Available Fields > Forms > Payment Application | No | No | No |
This is a custom math field. The value this field displays is dependent upon values in your budget and values in your custom list. See the Edit Fields section above to learn how to create this field. |
| Change Orders | Available Fields > Forms > Payment Application | No | No | No | This is a custom math field. The value this field displays is dependent upon values in your custom list. See the Edit Fields section above to learn how to create this field. |
| Contract Amount | Available Fields > Forms > Payment Application | No | No | No | This is a custom math field. The value this field displays is dependent upon values in your custom list. See the Edit Fields section above to learn how to create this field. |
| Contract Sum to Date | Available Fields > Forms > Payment Application | No | No | No | This is a custom math field. The value this field displays is dependent upon values in your custom list. See the Edit Fields section above to learn how to create this field. |
| Created Date | Available Fields > Forms > All | Yes | No | Yes | |
| Creator | Available Fields > Forms > All | Yes | No | Yes | |
| Current Application | Available Fields > Forms > Payment Application | No | No | No | This is a custom math field. The value this field displays is dependent upon values in your custom list. See the Edit Fields section above to learn how to create this field. |
| Description | Available Fields > Forms > All | Yes | No | Yes | |
| Documents | Available Fields > Forms > All | Yes | No | No | |
| Pay Application Submittal |
Available Fields > Forms > Payment Application > Payment Application Details Each layout attached to your custom list will appear in the custom list's sub-folder. |
Yes | No | Yes |
This is your vendor-facing budget custom list. See the Edit Fields section above to learn how to add a custom list to your form type. |
| Previous Applications | Available Fields > Forms > Payment Application | No | No | No | This is a custom math field. The value this field displays is dependent upon values in your budget and values in your custom list. See the Edit Fields section above to learn how to create this field. |
| Retainage Percent | Available Fields > Forms > Payment Application | No | No | Yes |
This is a custom field. See the Edit Fields section above to learn how to create this field. |
| Retainage to Date | Available Fields > Forms > Payment Application | No | No | No | This is a custom math field. The value this field displays is dependent upon values entered in the form. See the Edit Fields section above to learn how to create this field. |
| Title | Available Fields > Forms > All | Yes | No | Yes | |
| Total Completed Less Retainage | Available Fields > Forms > Payment Application | No | No | No | This is a custom math field. The value this field displays is dependent upon values entered in the form. See the Edit Fields section above to learn how to create this field. |
| Total Completed to Date | Available Fields > Forms > Payment Application | No | No | No | This is a custom math field. The value this field displays is dependent upon values in your budget and values in your custom list. See the Edit Fields section above to learn how to create this field. |
Update Budget - Payment Application
The following table lists required and commonly used fields for your Update Budget - Payment Application form layout.
Apply the Is Required? or Read-only in Edit Form settings by following these procedures.
| Field Name | Menu Path | Required for form? | Is Required? setting | Read-only in Edit form | Notes |
|---|---|---|---|---|---|
| Form Header | Sub Layouts | No | No | Yes | |
| Form Footer | Sub Layouts | No | No | Yes | |
| Approver 1 Comments | Available Fields > Forms > Payment Application | Yes | No | Yes |
This is a custom field. See the Edit Fields section above to learn how to create this field. |
| Approver 2 Comments | Available Fields > Forms > Payment Application | Yes | No | Yes |
This is a custom field. See the Edit Fields section above to learn how to create this field. |
| Balance to Complete | Available Fields > Forms > Payment Application | No | No | No |
This is a custom math field. The value this field displays is dependent upon values in your budget and values in your custom list. See the Edit Fields section above to learn how to create this field. |
| Change Orders | Available Fields > Forms > Payment Application | No | No | No | This is a custom math field. The value this field displays is dependent upon values in your custom list. See the Edit Fields section above to learn how to create this field. |
| Contract Amount | Available Fields > Forms > Payment Application | No | No | No | This is a custom math field. The value this field displays is dependent upon values in your custom list. See the Edit Fields section above to learn how to create this field. |
| Contract Sum to Date | Available Fields > Forms > Payment Application | No | No | No | This is a custom math field. The value this field displays is dependent upon values in your custom list. See the Edit Fields section above to learn how to create this field. |
| Created Date | Available Fields > Forms > All | Yes | No | Yes | |
| Creator | Available Fields > Forms > All | Yes | No | Yes | |
| Current Application | Available Fields > Forms > Payment Application | No | No | No | This is a custom math field. The value this field displays is dependent upon values in your custom list. See the Edit Fields section above to learn how to create this field. |
| Description | Available Fields > Forms > All | Yes | No | Yes | |
| Documents | Available Fields > Forms > All | Yes | No | No | |
| Pay Application Impact Budget |
Available Fields > Forms > Payment Application > Payment Application Details Each layout attached to your custom list will appear in the custom list's sub-folder. |
Yes | No | No |
This is your approver-facing budget custom list. See the Edit Fields section above to learn how to add a custom list to your form type. |
| Previous Applications | Available Fields > Forms > Payment Application | No | No | No | This is a custom math field. The value this field displays is dependent upon values in your budget and values in your custom list. See the Edit Fields section above to learn how to create this field. |
| Retainage Percent | Available Fields > Forms > Payment Application | No | No | Yes |
This is a custom field. See the Edit Fields section above to learn how to create this field. |
| Retainage to Date | Available Fields > Forms > Payment Application | No | No | No | This is a custom math field. The value this field displays is dependent upon values entered in the form. See the Edit Fields section above to learn how to create this field. |
| Title | Available Fields > Forms > All | Yes | No | Yes | |
| Total Completed Less Retainage | Available Fields > Forms > Payment Application | No | No | No | This is a custom math field. The value this field displays is dependent upon values entered in the form. See the Edit Fields section above to learn how to create this field. |
| Total Completed to Date | Available Fields > Forms > Payment Application | No | No | No | This is a custom math field. The value this field displays is dependent upon values in your budget and values in your custom list. See the Edit Fields section above to learn how to create this field. |
Budget Snapshot Value
A Budget Snapshot Value on a form captures the current total of a budget column. For example:
-
James, a system administrator, adds an Approved Budget Snapshot Value to a Facilities Invoice form. This field is configured to display the total value of the Approved budget column.
-
Scott adds the form to a facility.
-
The Approved Budget Snapshot Value pre-populates with the current value of the Approved budget column.
This field type can be imported and exported.
To add a budget snapshot value field to your budget form:
-
Click Edit Fields link in the Actions column of the form whose fields you want to manage.
The Edit Fields window opens.
-
Click Add Report / Form Field.
The Add Report / Form Field window opens.
-
Select the Custom Field option.
-
Enter the field name in the Field Name field.
-
Enter the name this field should have in the database in the Integration Name field.
-
Select Budget Snapshot Value from the Form Field Type field.
The Budget Column Type becomes editable.
-
Select the budget type whose values you want to appear in the budget snapshot from the Budget Column Type field.
-
Select Add.
The window closes. The field appears in the Edit Fields window.