The User Interface
Click a link to view related topics:
Menu Bar
The menu bar displays menus for performing various tasks in TMS. Menus are organized by modules (Work Orders, Assets, Schedules, Reporting, Modules, Tools, and Setup). For example, the Work Orders menu contains commands for creating, editing, and querying. The common menu structure makes the application easier to learn and use.

Tool Bar
Tool bar icons allow you to access frequently used functions without having to go through the menu. The icons that are shown in light gray are unavailable at this time.

Tool Tips
If you hover your mouse over a tool bar button, the button's function appears.

Tabs
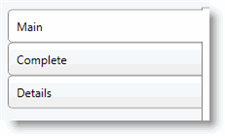
TMS was designed with a tabbed interface which organizes modules and lets you move through the application quickly. In the screen shot below, the Main tab of the Work Order New screen is on top.

Buttons
|
Button |
Description |
|---|---|
|
|
New displays a new screen, depending on where you are in the application. |
|
|
Save validates fields and saves records or updates made to an existing record. |
|
|
Query displays the query form where you can enter defining criteria to limit search results. |
|
|
Open Query allows you to choose a saved query. |
|
|
Click Delete to remove an item. |
|
|
Quick Print allows you to print a series of records or a single record. |
|
|
Reload Original Values reverses all changes you made at once. This button also clears advanced query criteria. |
|
|
Undo reverses your last action. |
|
|
Redo reverses the Undo action, after you click Undo . |
|
|
Execute runs the query based upon your selection criteria. |
|
|
Reporting opens the Report Viewer. |
|
|
Duplicate allows you to copy assets, work orders |
|
|
First takes you to the first record in a set of query results. |
|
|
Previous takes you to the record that is prior to the current record you have selected in a set of query results. |
|
|
Next takes you to the record that is after the current record you have selected in a set of query results. |
|
|
Last takes you to the last record in a set of query results. |
|
|
Custom Help launches the Custom Help Viewer. See the Custom Help section. |
|
|
Help displays the HTML help topics for TMS. |
|
|
Advanced Query displays an additional query window where you have the ability to enter additional query conditions. |
|
|
Lookup displays additional query screens. |
|
|
Click the drop-down menu arrow for a list of validated data for a specific field. |
|
|
Click Is Default next to the Form toolbar drop-down menu to make a standard or custom form your default form. |
|
|
The Home button takes you back to the screen set as your Start Up Module. See the User Preferences topic. |
|
|
The Favorites button and the gold star that sits to the right of it are related to your User Favorites. See the Favorites topic. |
|
|
The Copy Item Link button allows you to copy a direct link to the record currently open to your clipboard. You can then paste this link into an email or other medium. |
|
|
The External Links button opens links to outside applications. See the External Links section below for more information. |
Use Custom Help
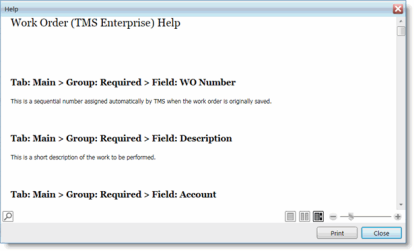
The Custom Help button shown in the table above allows you to open the Custom Help Viewer. This displays the field-level help that comes with TMS, and also any customized help content that your TMS system administrator has set up in the system.
The buttons at the bottom, from left to right are:
-
Find - Allows you to search the Custom Help for a word or phrase.
-
Page Mode - Shows the help in a single page, and you have paging buttons that let you flip through the customized help.
-
Two Page Mode - Shows two pages of the help, which you can page through.
-
Scroll Mode (currently shown) - Shows the help in one scrollable page.
-
Zoom slider - Adjusts the current "zoom" level.
-
Print - Prints the customized help shown in the window.
-
Close - Closes the Custom Help Viewer.
Additional Interface Notes
Save Changes Prompts
Any time you make changes to a record, if you forget to save your changes before navigating away from the module, you will see a prompt that will ask if you want to save your changes. This ensures you don't lose changes by accident.
Spell Check in Text Fields
Multi-line text fields in TMS OnLine/OnSite include a spell check feature that will underline words that appear to be spelled incorrectly. If you click the underlined word, you will be able to choose from a list of suggested spellings. Words that are not listed in the spell checker's dictionary, but you know to be correct, can just be ignored.
Examples of fields where you will see the spell checker feature employed are:
-
Completion Comments
-
Requester Comments
-
Time Charge Comments
Time Field Validation
The AM and PM areas of time fields in the application are validated for proper formatting (for example, AM or PM). If an entry other than AM or PM is entered, the field will be defaulted to AM.
Preset Values in Calendar Fields
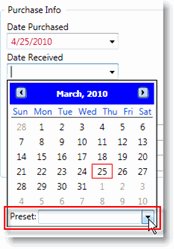
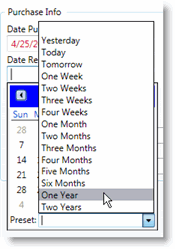
If you click the arrow on a calendar field, when the calendar expands, you will notice a Preset drop-down menu at the bottom of the calendar. When you click this drop-down menu, you will see a list of several preset values.


These preset values are based on the system date. If you select One Year, for example, and the system date is 4/1/2010, then will insert 4/1/2011 into the date field.
External Link Button
Throughout the application's Edit screens, for the standard TMS modules, you will see the button below:

Clicking the down arrow will expand a list of "external links", if any were set up for the given module and segment. These links allow you to open an external website in a separate window from the application window. Depending on how the link was set up, certain information about the TMS record you currently have open might be passed to the external site.
External links for association with these buttons are set up on the External Link Setup screen (Setup > General > External Link Setup). See the TMS OnLine/OnSite System Administrator Guide for more information on setting these links up.
Site, Building, and Location Fields
If the Populate Site, Building, and Location fields from Location Description option is enabled in TMS (Setup > General > Options), you can type just part of a location into the Location Description field (for example, typing "nor" indicates you want to see all entries that begin with those letters). When you tab off or click off the field, a child window will open with a list of locations that match your criteria.
Wildcards are also supported in the following manner:
-
If you enter “nor*”, you will see all results where description starts with the letters “nor”, or the full description is “nor”.
-
If you enter “*nor”, you will see all results where the description ends with the letters “nor”, or the full description is “nor”.
-
If you enter “n*h”, you will see all results that start with “n” and end with “h”, including “nh”, “north”
These rules apply to any screen where the Site, Building, and Location codes appear, but only when the Location Description you entered is not unique. (In the event that the criteria you enter into the field matches a Site, Building, and Location exactly, the location fields will populate with those associated values.)


