Create and Edit PM Schedules
From the Asset Edit screen, you can view, modify, and create PM schedules for an asset by clicking PM Info in the list of links at the bottom of the screen. (See the Asset Edit topic for information on reaching the Asset Edit screen.)
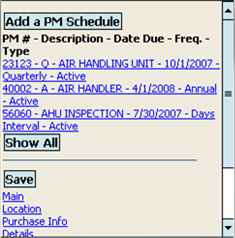
View Current PM Schedules
When you click PM Info on the Asset Edit screen, you are taken to a list of all active PM schedules for the asset. If you want to see all PM schedules associated with the asset, regardless of status, click Show All.
Modify a PM Schedule
To modify an existing PM schedule, click its link on the PM Info list screen. You are taken to the PM Schedule Edit screen. Modify any of the fields you need to update.
When you're done, click Save to save your changes and then click Back to Asset at the bottom of the screen to return to the Asset Edit screen.
Create a New PM Schedule for the Asset
If you need to create a new PM schedule for the asset that you have opened in Asset Edit, click the PM Info link at the bottom of the Asset Edit screen.
To create a new PM from the PM Info screen, follow these steps:
-
Click Add a PM Schedule
-
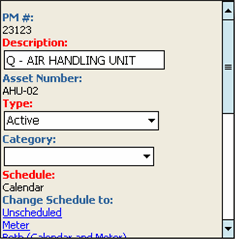
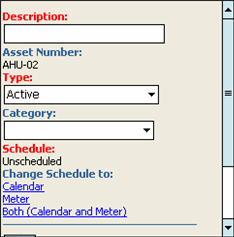
This opens the PM Schedule New screen, which requires you to enter a Description for the PM schedule.
-
A Type code is also required, the default is Activewhich you can change if needed.
-
It is optional to select a Category from the drop-down menu.
-
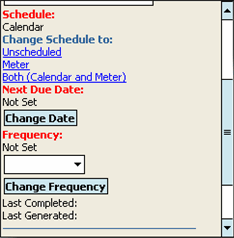
A Schedule type is also required, the default is Unscheduled which you can change if there needs to be a schedule by clicking Calendar, Meter, or Both.
-
The screen will display different fields below the Schedule links, depending on which link you select
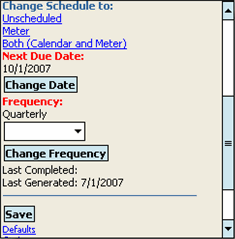
For example: If you choose Calendar you will be prompted to choose the Next Due Date and Frequency and then click Change Frequency to save your settings (see screen shot below).
-
Click Save to save the PM schedule.
The screen changes to the PM Schedule Edit screen. Return to the Asset Edit screen by clicking Back to Asset at the bottom of the screen.