Group and Sort Fields on a Report
Grouping and sorting data on a report offers the capacity to improve the organization of the information and provide summative data elements within the report.
To group and sort your data by a field on the report. Follow these steps.
-
Open your report definition with Reports > Edit or search for your report definition with Reports > Query.
-
Select the Report Layout tab.
-
Click the Grouping button in the editor toolbar.
-
The Grouping dialog opens. Click the Add button.
-
Group Name is "New Group" by default. Change this if needed.
-
Select the field to group by in the Group By Field drop-down menu.
-
In the Sort drop-down menu, you can select None, Ascending, or Descending.
-
The Show Header and Show Footer options are checked by default. With these options checked, TMS will create a new header and footer for the group. If you don't want TMS to do this, clear one or both boxes.
-
Click Save.
Example
As an example, we will create a group for the Type data field on the report, sort it alphabetically, and provide group totals by Type.
To create a field grouping on the report, follow these steps:
-
Within the Report Layout tab, click the Grouping button in the editor toolbar.

The Grouping dialog box will appear.
-
Click the Add button to create a new group and enable the group editing fields.
-
Within the Group Name field, New Group is the default name.
This can be changed to give a more accurate representation of the information that will be grouped (in this case, the Type data).
-
The Group By field drop-down will list all of the data fields provided by the data source.
In this example, the Type field will be used.
-
The Sort field offers the options None, Ascending, and Descending.
Considering in this example that the Type data will be sorted alphabetically, select the Ascending option.
-
The Show Header and Show Footer options are checked by default.
With these options checked, TMS will create a new header and footer section for the group on the report. If either of these new sections will be unneeded, the checkboxes may be cleared at any time.
-
Click the Save button to save the new group and close the Grouping dialog box.
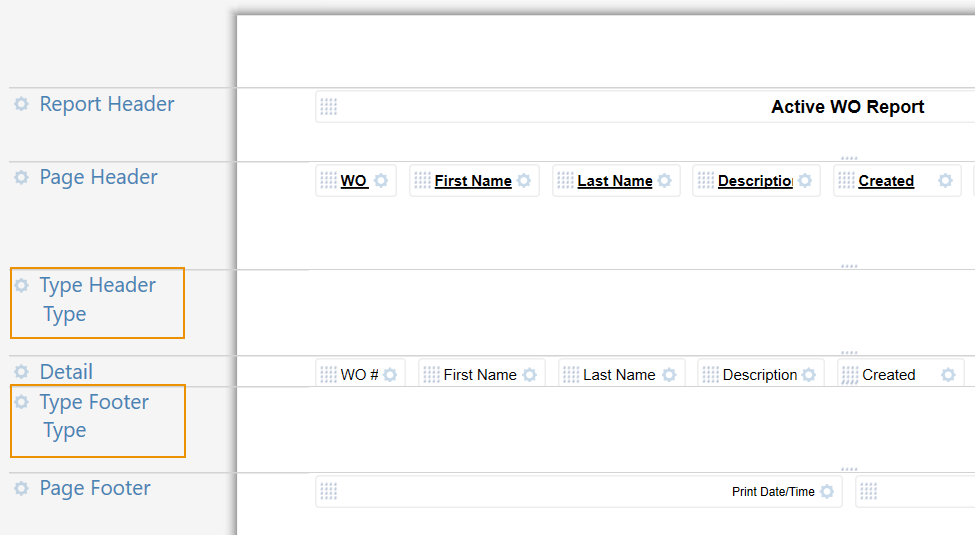
When the new grouping has been created (with the Show Header and Show Footer options enabled), the page layout pane will present the new sections.
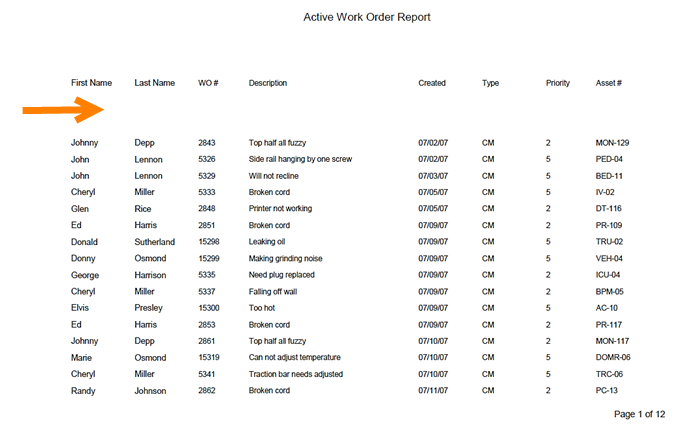
By adding a grouping and including the new header and footer sections, the previewed report will reflect an additional space before each type’s section, and sort them in alphabetical order, due to the Ascending option selected in the grouping (in this case, CM is the first type).
Change the Grouping Order
If you have your report data grouped by multiple fields, you can change the order of the grouping by selecting a group's name in the list of Groups. Then, click the Move Up or Move Down button to change the group's place in the grouping sequence.
Create Aggregate Data from Grouped Fields
When you group your report data, you can also choose to aggregate the data in the group's header or footer. An example of aggregated data is the count of work orders by their department. To aggregate data based on this example, follow these steps.
-
Create a new grouping definition, with the Show Header and Show Footer boxes checked. We'll group by Account.
-
Click the down arrow next to Data Fields in the elements pane.
-
Click and drag the Account field into the Group Header.
-
Change the properties for the field, like making it bold.
-
Click and drag the WO Number data field to the Group Footer.
-
Click the Properties button for the field.
-
In the Aggregate drop-down menu, select Count.
-
Change any other properties as needed.
-
Close the Properties box.
-
Click the down arrow next to Available Fields.
-
Click and drag the Label field over to a spot next to the WO Number data field.
-
Click the Properties button for the Label field.
-
Enter a new Label, such as "Count of WOs by Dept".
-
Change any other properties as needed.
-
Close the Properties box.
-
Click Save.
Other examples of aggregated data are displaying total count of work orders or a sum of time charges. The steps for these examples are the same as the steps above, with somewhat different data field and Aggregate choices.
Edit a Grouping Header
Within a grouping header section, label and data fields may be used to visibly categorize the sections.
The following steps will reflect one approach.
-
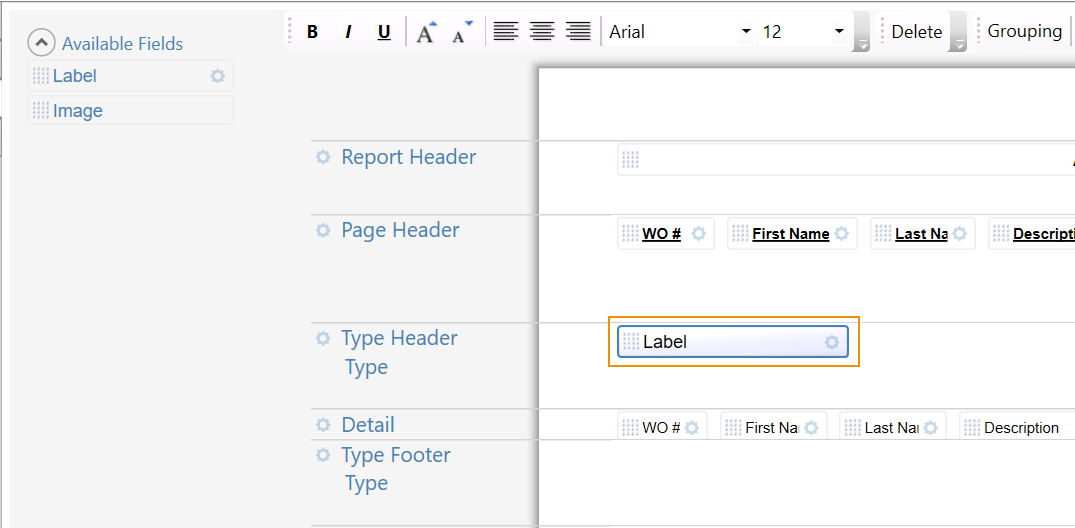
Expand the Available Fields section within the elements pane and drag the Label field to the group header section.
Once added, the field maybe resized or repositioned as needed.
-
Once added, click the gear icon to rename the field from Label (default field name) to Work Order Type.
-
Expand the Data Fields section within the elements pane and drag the Type data field to the group header section, next to the label field.
As before, the field maybe resized and formatted.
-
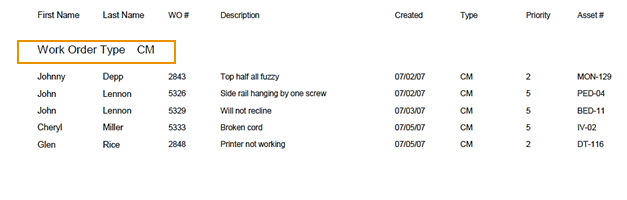
On a report preview , the new label and data field will display above each respective section.

Edit a Grouping Footer
Within a grouping footer section, label and data fields may be used to provide aggregate data.
The following steps will reflect one approach.
-
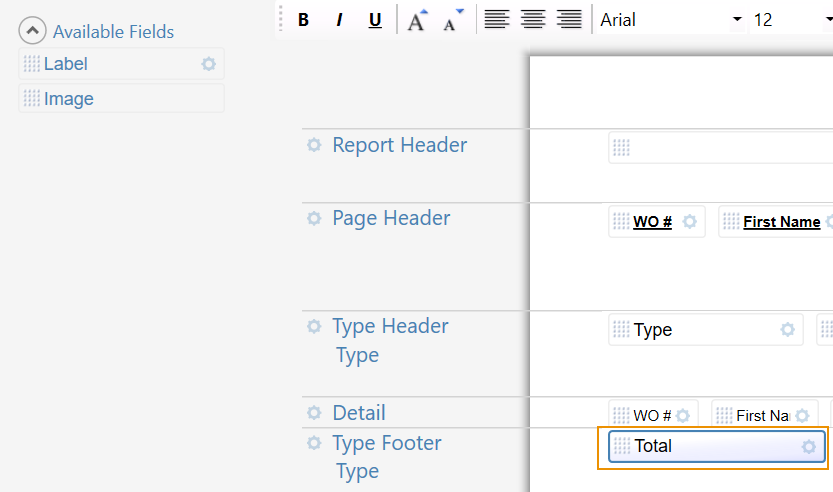
Expand the Available Fields section within the elements pane and drag the Label field to the group footer section.
Once added, the field may be resized or repositioned, as needed.
-
Once added, click the gear icon to rename the field from Label(default field name) to Total.
-
Expand the Data Fields section within the elements pane and drag the Type data field to the group footer section, next to the label field.
As before, the field may be resized and formatted.
-
Click the gear icon on the Type data field.
-
Within the Type data field options, the Aggregate drop-down offers the options Average, Count, Max, Min, and Sum.
In this case, select the Count option to provide a total number for each Type section.
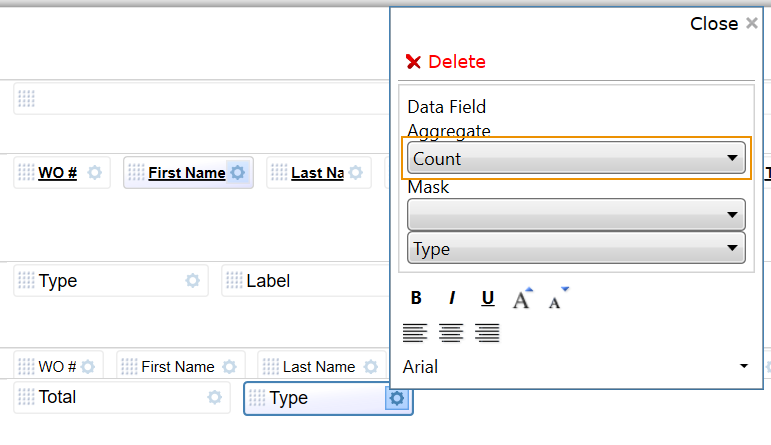
The Mask field controls how the resultant numbers will be displayed, whether with decimal places, in percentages, or as currency. In this example, the strictly numerical option (without decimals) will be selected.
-
Click the Close option to finish the selections and close the data field options dialog box.
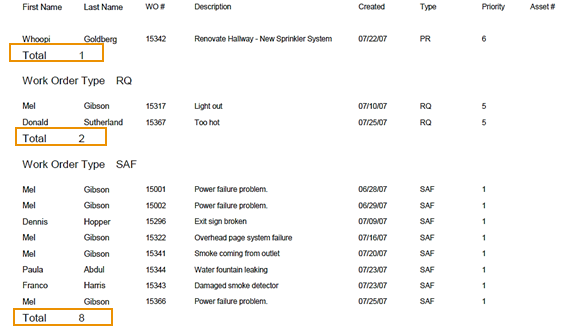
On a report preview, the new label and data field will display below each respective section.