View and Print a Data Source
After you create a new data source or perform a search for existing data sources, you might have a need to preview and then print the data gathered by the data source. To first preview a data source and then print it, follow these steps.
-
Navigate to the Data Source Edit screen by one of these methods:
-
Querying for and selecting a data source record.
-
Selecting the Edit item from the Data Sources menu and entering a valid Data Source Name.
-
Creating and saving a new data source.
-
-
On the Data Source Edit screen, you have the choice of previewing the report as a PDF or sending it to Microsoft Excel. (In both cases, you must have the applicable software, Adobe Acrobat Reader or Microsoft Excel, for these functions to work.)
-
To preview the report as a PDF, click the Print Preview toolbar button. The pop-up window below will appear.

-
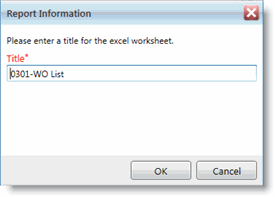
To send the report to Excel, click the To Excel toolbar button. The pop-up window below will appear.

-
-
Whether you clicked the Print Preview button or To Excel, enter a Title.
-
If you clicked Print Preview, you also will see a Template drop-down menu. This drop-down menu is optional and lists Template-type report definitions that have already been created. (See the Report Definitions section for more information.) If you want to define how the data source should look, select a Template.
-
Click OK to launch the data source in Adobe Acrobat Reader or Microsoft Excel.
-
To print the report, click the Print button in Adobe Reader or Excel.
About Exporting to Microsoft Excel
If the data you export to Excel equals more that 64,000 records in total, you might receive an error in Microsoft Excel and be unable to export the data. This is a limitation set by Microsoft.
In the event that this error occurs, we suggest you filter your data so that it equals less than 64,000 records and try to export the data to Excel again.
