View-type Data Source
The last data source Type is View. This type is typically utilized for Query Results screens. For this example, create a view that shows work orders ranked by Type and Priority. To do so, follow these steps.
-
Go to Data Sources > New.
-
Enter a Name for your data source, such as "Work Orders by Type and Priority".
-
Enter a Description for the data source, such as "Work Orders Ranked by Type and Priority Code".
- In the Segment drop-down menu, select the segment in which this data source should appear.
- In the Type drop-down menu, select View.
-
Select the Module. Select Work Orders.
-
Select the Category. Select General.
-
Select the Sub Category drop-down menu. Select General for the data source.
- In the Status drop-down menu, select ACTIVE.
-
Click Save.
-
When the screen changes to the Data Source Edit screen, select a Saved Query.
-
Next, select the Data Source Editor tab.
-
Add fields to the Column Area drop zone to make up your data set criteria. For this example, select these fields:
-
WO Number (from Common Fields > Required)
-
WO Description (from Common Fields > Required)
-
Type Code (from Common Fields > Required)
-
Priority Code (from Common Fields > Required)
-
-
Finally, set field options as necessary. For the Priority column, select Descending for the Sort By option from the Options menu.
-
Click Save to finalize the data source.
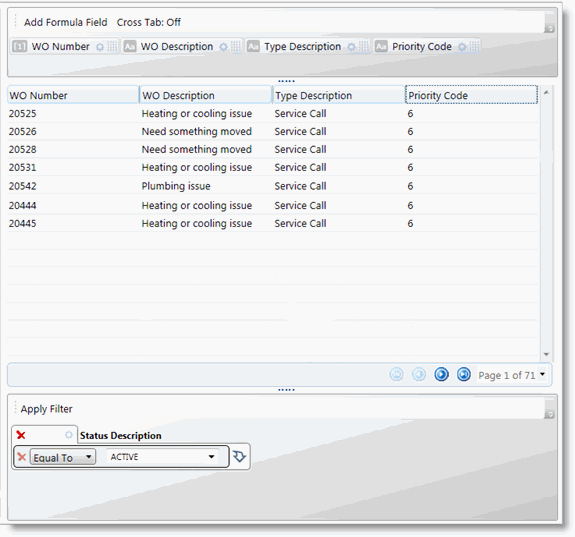
If you followed this example, with the same fields and criteria, your Data Source Editor tab looks like this:
The column width in the grid defaults to a standard size. You are able to change the column width when editing your data source and those changes will be reflected on the query results screen.

