Asset WO Create Wizard
One feature available from the Asset Edit screen is the Asset Work Order Create Wizard. This wizard helps you create a similar group of work orders for as many assets as you select. This is useful if you want to assign a specific procedure to many assets without creating individual work orders for each asset.
To use the Asset Work Order Create Wizard, follow these steps:
- Use the Asset Query to retrieve whatever assets you would like to create work orders for.
- In the Asset
Query Results screen, click the
Asset WO Create button
 . You
are presented with the Asset WO Create
Wizard overview screen.
. You
are presented with the Asset WO Create
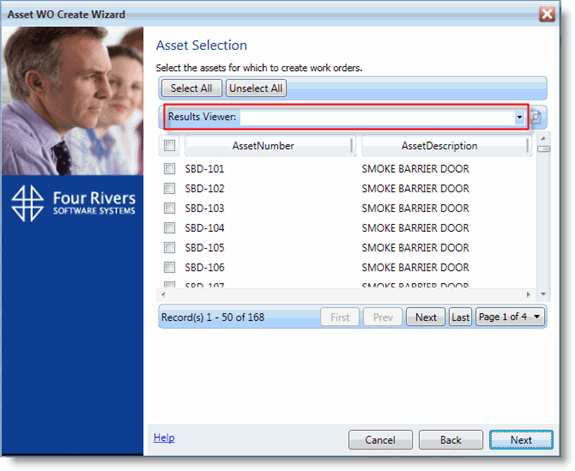
Wizard overview screen. - Click Next. The Asset Selection screen opens.
- The Asset Selection screen contains the assets you retrieved in Step 1. Select at least one asset from the list that you want to create a work order for. To sort the results, click the Results Viewer drop-down arrow and select a report in the list.
- Click Next. The Work Order Information screen opens.
-
Enter a Description.
- If you would like the asset number appended to the beginning of the work order's description (for example, if you would like the SBD-101 - Interim Inspection), check the Include asset number in work order description option below the Description field.
- Select codes for the Skill, Type, Status, and Priority.
- Click Next. The Procedure and Instructions screen opens.
- Under the Procedure and Instructions screen, if you want to assign a Procedure to the work order, check the Use a specific procedure option and enter a procedure in the Procedure Number field. Otherwise, check Use no procedure.
- Type in any necessary Requester Comments for the work orders.
- Click Next. If you want to assign a specific resource to this work order, check Use a specific assignment and enter the resource in the Assignment field. Otherwise, check Use first active asset contact as assignment.
- Click Next. The Account Information screen opens.
- Select how you want the Account Code assigned to your work orders. You can choose between using the accounts from the individual assets or using a specific account number.
- Click Next. The Location Information screen opens. If you would like to specify a Location, select one from the drop-down menu and select the Use values defined for above for all work orders to add this Location code to all of the work orders.
- Click Next. You are presented with the Asset Work Order Create Confirmation screen.
- Click the Create WOs button to create the new work orders. When the wizard is complete, you are presented with the Asset Work Order Create Complete screen.
- Click Close to exit the wizard.
You can select assets from multiple segments to create a work order, as long as the assets share a Common Segment.