The Asset Import Wizard
There are two parts to using the Asset Import Wizard. First, you must prepare the .CSV file. Then you run the Asset Import Wizard in TMS.
Prepare the .CSV File
TMS provides a .CSV file as a template for you. The first four columns are always ExampleAssetSegment, ExampleAsset, ExampleWOSegment, ExampleWO. ExampleAssetSegment, ExampleAsset, and AssetNumber are required. You can delete any of the other columns if you don't want to use them.
In the screen shot below, notice the column headings and values. For this example, you import the asset IV-301 into Segment 2. The asset example is asset IV-200 and the Example WO is 25152.
For this example, add 10 new IV pumps using IV-200 as the example asset and work order 25152 as the example work order.
If the example asset is in the Shared segment and the example work order is part of a different segment, then you must include a segment for the example work order. Otherwise, the example work order must be in the same segment as the example asset. In the example above, notice that the ExampleAssetSegment and ExampleWOSegment are both 2.
If any of your data begins with zeros, be sure to format your cells as Text before entering that data.
-
In Excel, select the cells to be formatted.
-
In the main menu, click Format > Cells.
-
In the Format Cells window, select Text.
-
Click OK.
Run the Asset Import Wizard
To run the Asset Import Wizard, follow these steps:
-
Add the rest of the assets you want to import using the Asset Import Wizard to the .CSV file.
-
Click Save.
The .CSV file should look like the screen shot below.
-
In the Save As pop-up window, make sure you Save as Type CSV (Comma delimited) (*csv).
You might see a warning from Excel that says your CSV file might contain features that are not compatible with CSV (Comma delimited). Do you want to keep the workbook in this format?
-
Click Yes.
Now that our CSV file is ready, the next step is to import these assets using the wizard.
-
In TMS, go to Tools > Data Maintenance > Assets > Asset Import.
The Asset Import Wizard overview screen opens. This screen explains the functionality and basic requirements of the Asset Import Wizard. There are links to a list of valid column headings, asset import help, and a copy of the .CSV file template. You can also review the Asset Import Log.
-
Click Next to indicate the file to import.
You are presented with the File screen. This is where you browse to (or enter the path) to the .CSV file you want to import.
-
Click the Browse button to find your .CSV file.
The Validate button initializes the validation of the assets to import on the .CSV file. While TMS validates the assets, you see a progress screen.
-
Click the Validate button.
The Complete Asset Import page appears. This screen tells you the number of assets that were validated for import.
-
Click the Import button.
The Asset Import Completed page appears. This screen tells you the import process is complete, the number of work orders TMS created, the work order numbers, and if there were any errors while saving data to the database. There is a link to the Asset Import Log.
-
Click Close to exit the Asset Import Wizard.
The Failed Validation Screen
This screen tells you if asset validation fails. It contains a link to the Asset Import Log for further information on the problems with the .CSV file. You will see this screen after you click the Validate button. The screen shot below is an example of the failed validation screen.
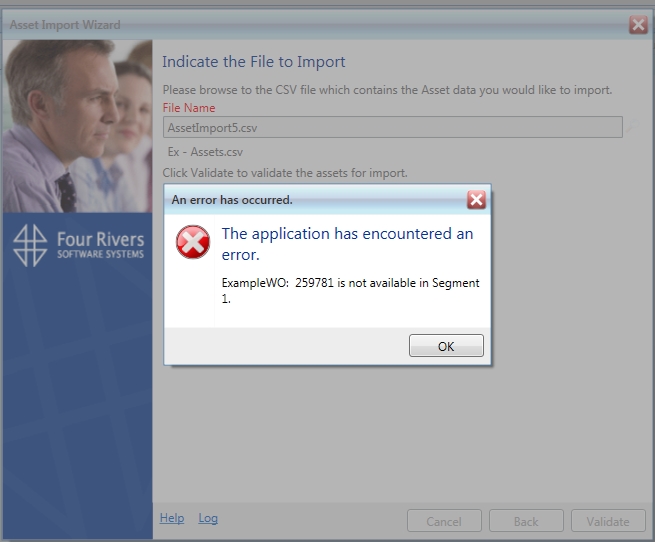
You can leave this screen open while you correct the problem on your spreadsheet and save it, and then click Back to validate the spreadsheet again.