Edit the Dispatch Form Properties
After you save a new Dispatch form, you are taken to the Form Designer Edit screen. You can also reach the screen by going to Setup > Dispatch > Edit > [form name].
On the Form Designer Edit screen, you can set field and field label properties with the Properties Editor. You can access the Properties Editor by right-clicking in a field group and selecting Properties, or by selecting the Open Properties button in the Form Designer toolbar.
Here are some of the most common adjustments you might want to make:
Change Fonts
To change the font or font color for a field or field group's label or input, follow these steps:
-
Select the field group or inidividual field for which you want to set the font
-
Select the Font tab
-
Under Font, select Verdana
-
Under Font Style, select Bold
-
Under Size, select 14
-
Under Color, select the down arrow to open the color picker. See the section below for more information on the color picker control.
-
Select a dark blue color
-
Click Apply to save your changes and close the editor
Change Font Colors
If you open the Properties Editor window and click the Font tab, you'll see a Color drop-down menu. Click the down arrow to open the color picker.
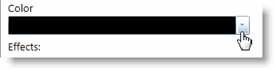
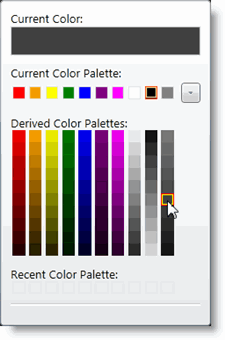
When the color picker first opens, the Current Color field shows the color that is currently selected (indicated by the orange box around the color, under the Current Color Palette label).
If you hover your mouse cursor over a different color, the color at the top of the color picker will change to that color. The label preview is also updated with the color you are hovering over so that you can see what it will look like in that font color.
The Current Color Palette consists of the colors currently in use. Clicking the down arrow next to this group expands the group to show more colors in the current palette.
Selecting any color in the current palette or under the Recent Color Palette (recently selected colors) will automatically close the picker. To close it without selecting a different color, click the arrow in the drop-down menu or click elsewhere on the Properties Editor.
Make a Field Required
Fields that are not required by TMS in order to save a new record can also be made required inside the Properties Editor.
To make a field required, follow these steps:
-
Select the field to make required from tree on the left side of the screen
-
Under Mode Specific Options in the main area of the editor, select the check box next to Set Field To Required.
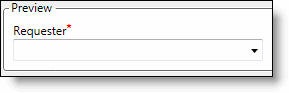
In the Preview, a red asterisk (*) appears to indicate that the field is required.
-
Click Apply to save your changes and close the editor
Customize a Calendar Field
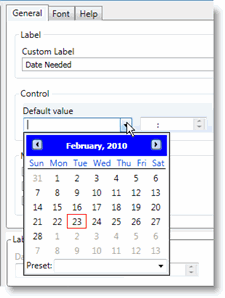
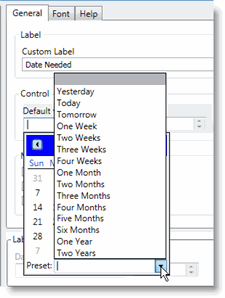
When you add a calendar field to a form, you have the ability to set a default date with a preset value. Take for example, if we added the Date Needed field to a Work Orders module form. If we right-click the field and select Properties, as we have done with other fields above, we see on the General tab there is a Default Value field. We click the date drop-down menu and see that there is a Preset drop-down menu below the calendar. If we click the Preset drop-down menu, we can choose from several preset date options.
Change the Form/Queue Name
If you want to rename your Dispatch form, you can do so in the Properties Editor window.
To change the form or queue name, follow these steps:
-
In the Properties Editor, select the form name at the top of the tree on the left side of the editor
-
In the Name field in main area of the editor, enter a new name for the form
-
Click Apply to commit your change and close the editor