Bucket Administration: Unassigned Queue
There are a number of ways to get your Markups into RedEye. One of these methods involves scanning drawings that were printed with a QR code, and sending them via email to a dedicated RedEye email address for automatic processing.
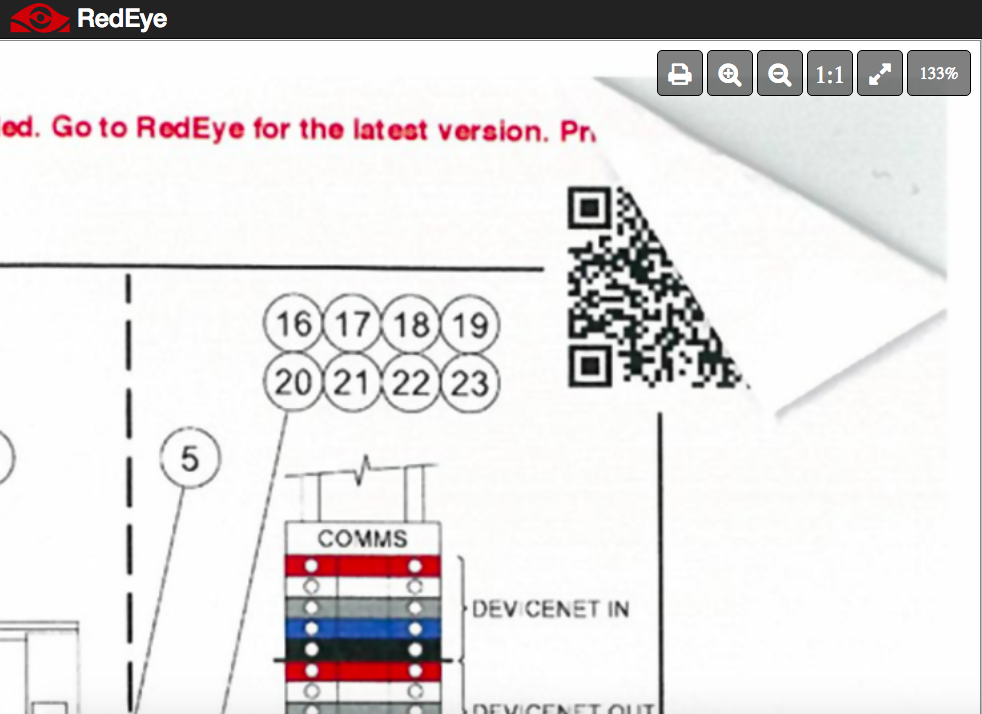
Sometimes artefacts may be sent to this email address for processing that cannot be placed automatically, or that do not belong in RedEye. For example, the QR code may be damaged or obscured, or a user may accidentally send other documents to the RedEye email address in error.
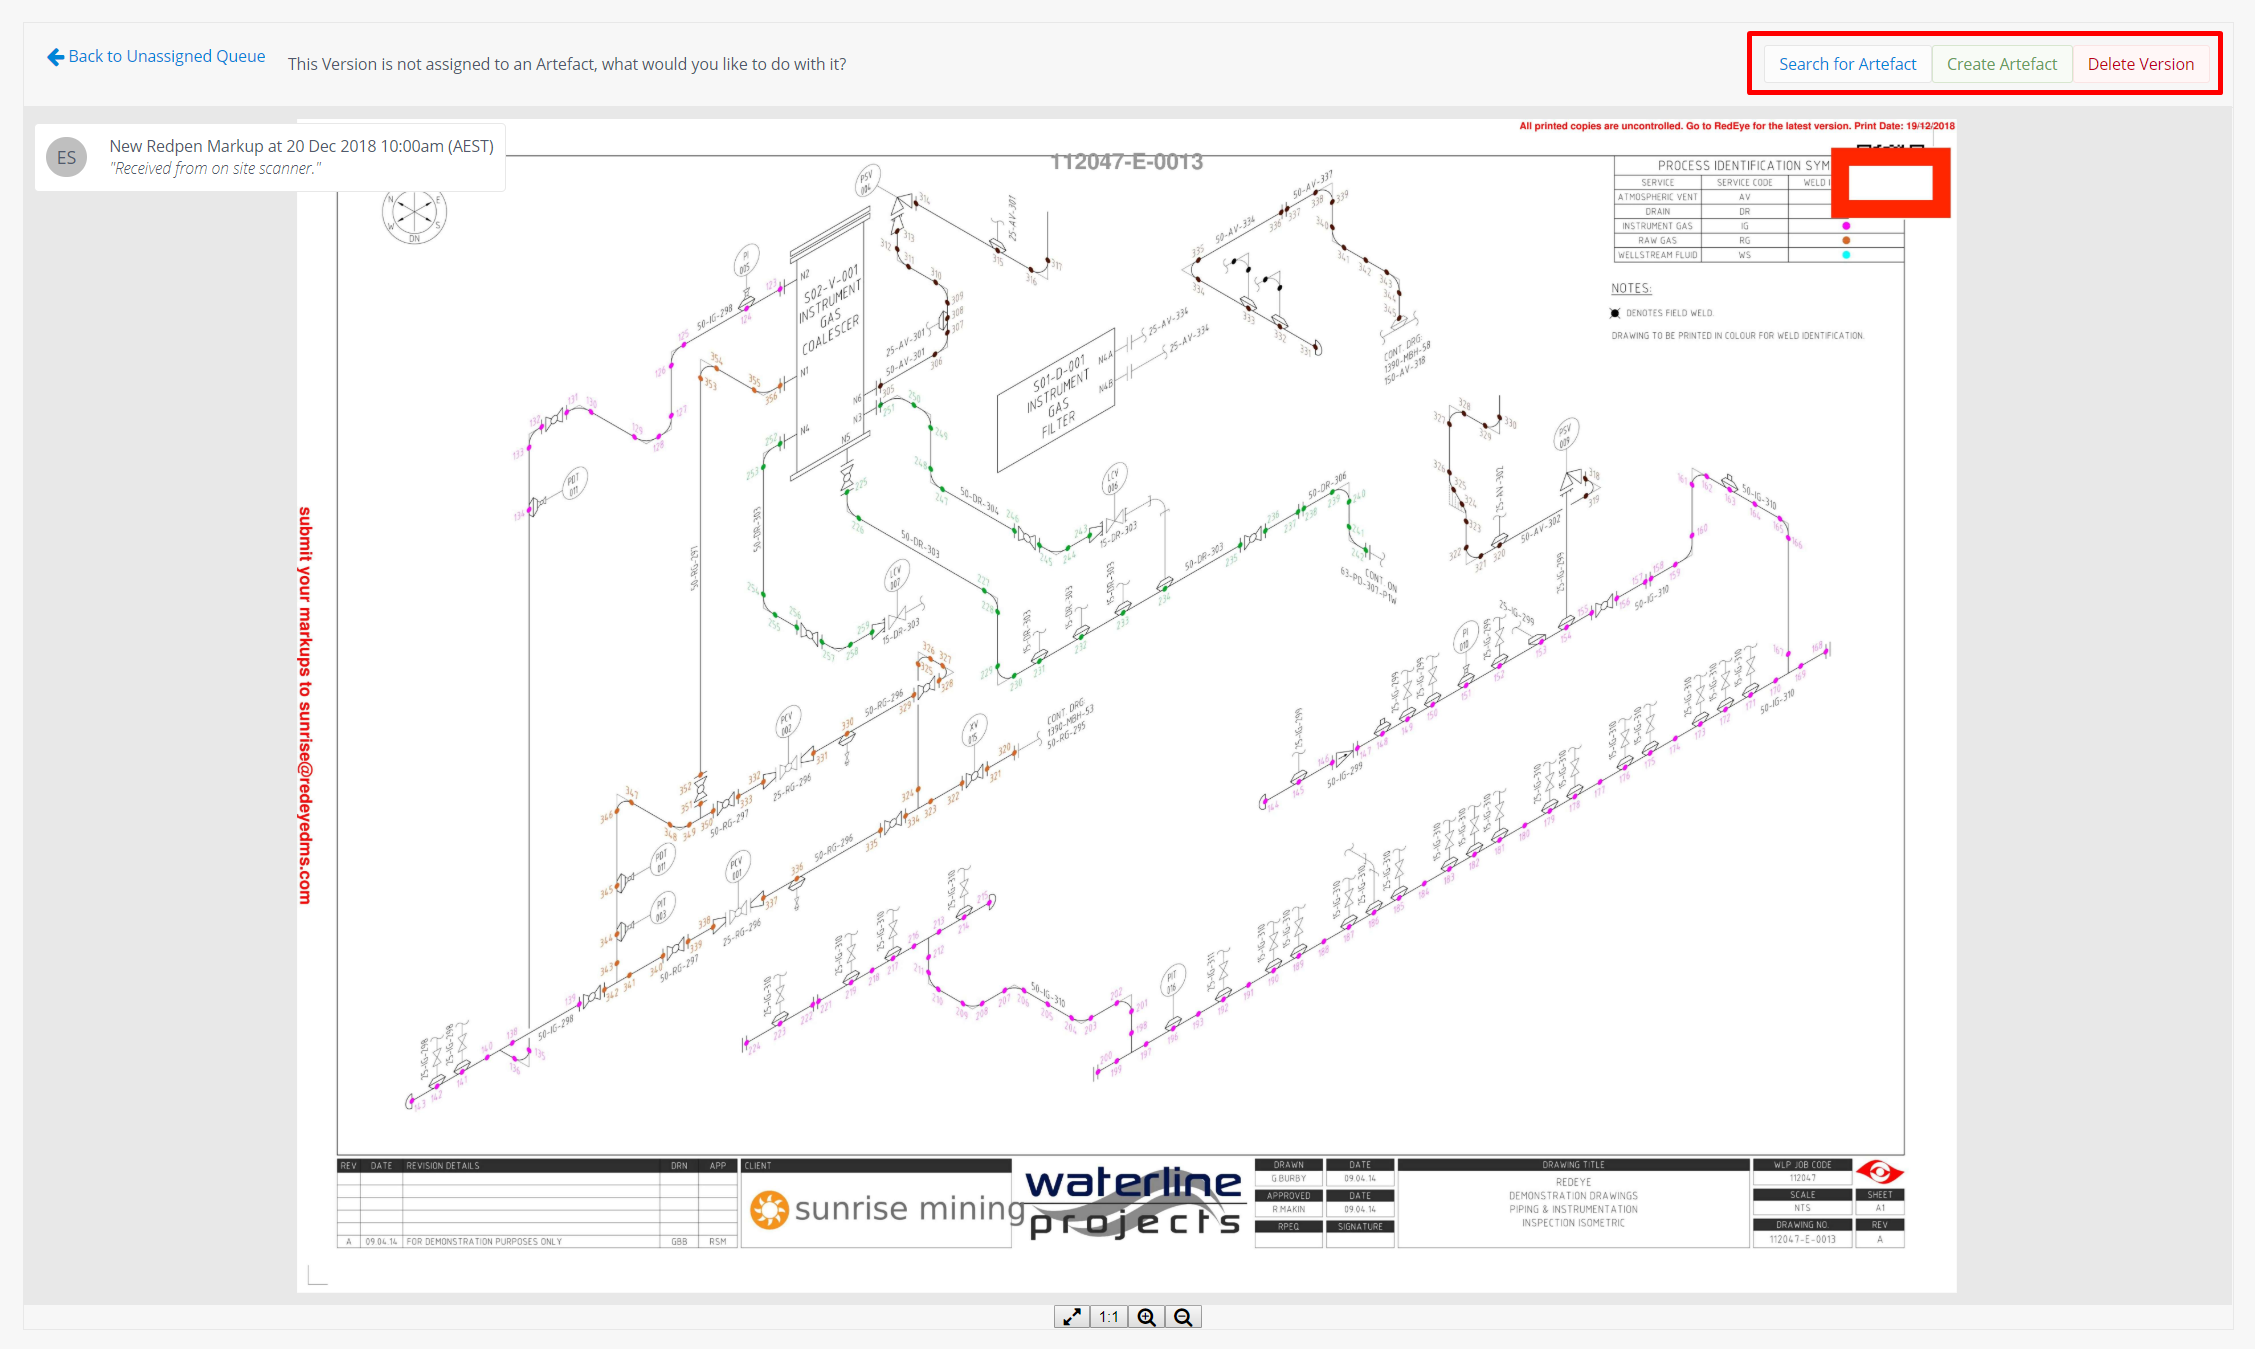
In the below example, the QR code has been dog-eared, so RedEye cannot read it to place the Markup into the correct Artefact.
To resolve problems such as these, RedEye provides Bucket Administrators with access to a single location, where they can identify and resolve the problem Artefacts. This is known as the Unassigned Queue.
To access the Unassigned Queue, navigate to the Approvals page, and then select the Unassigned tab.
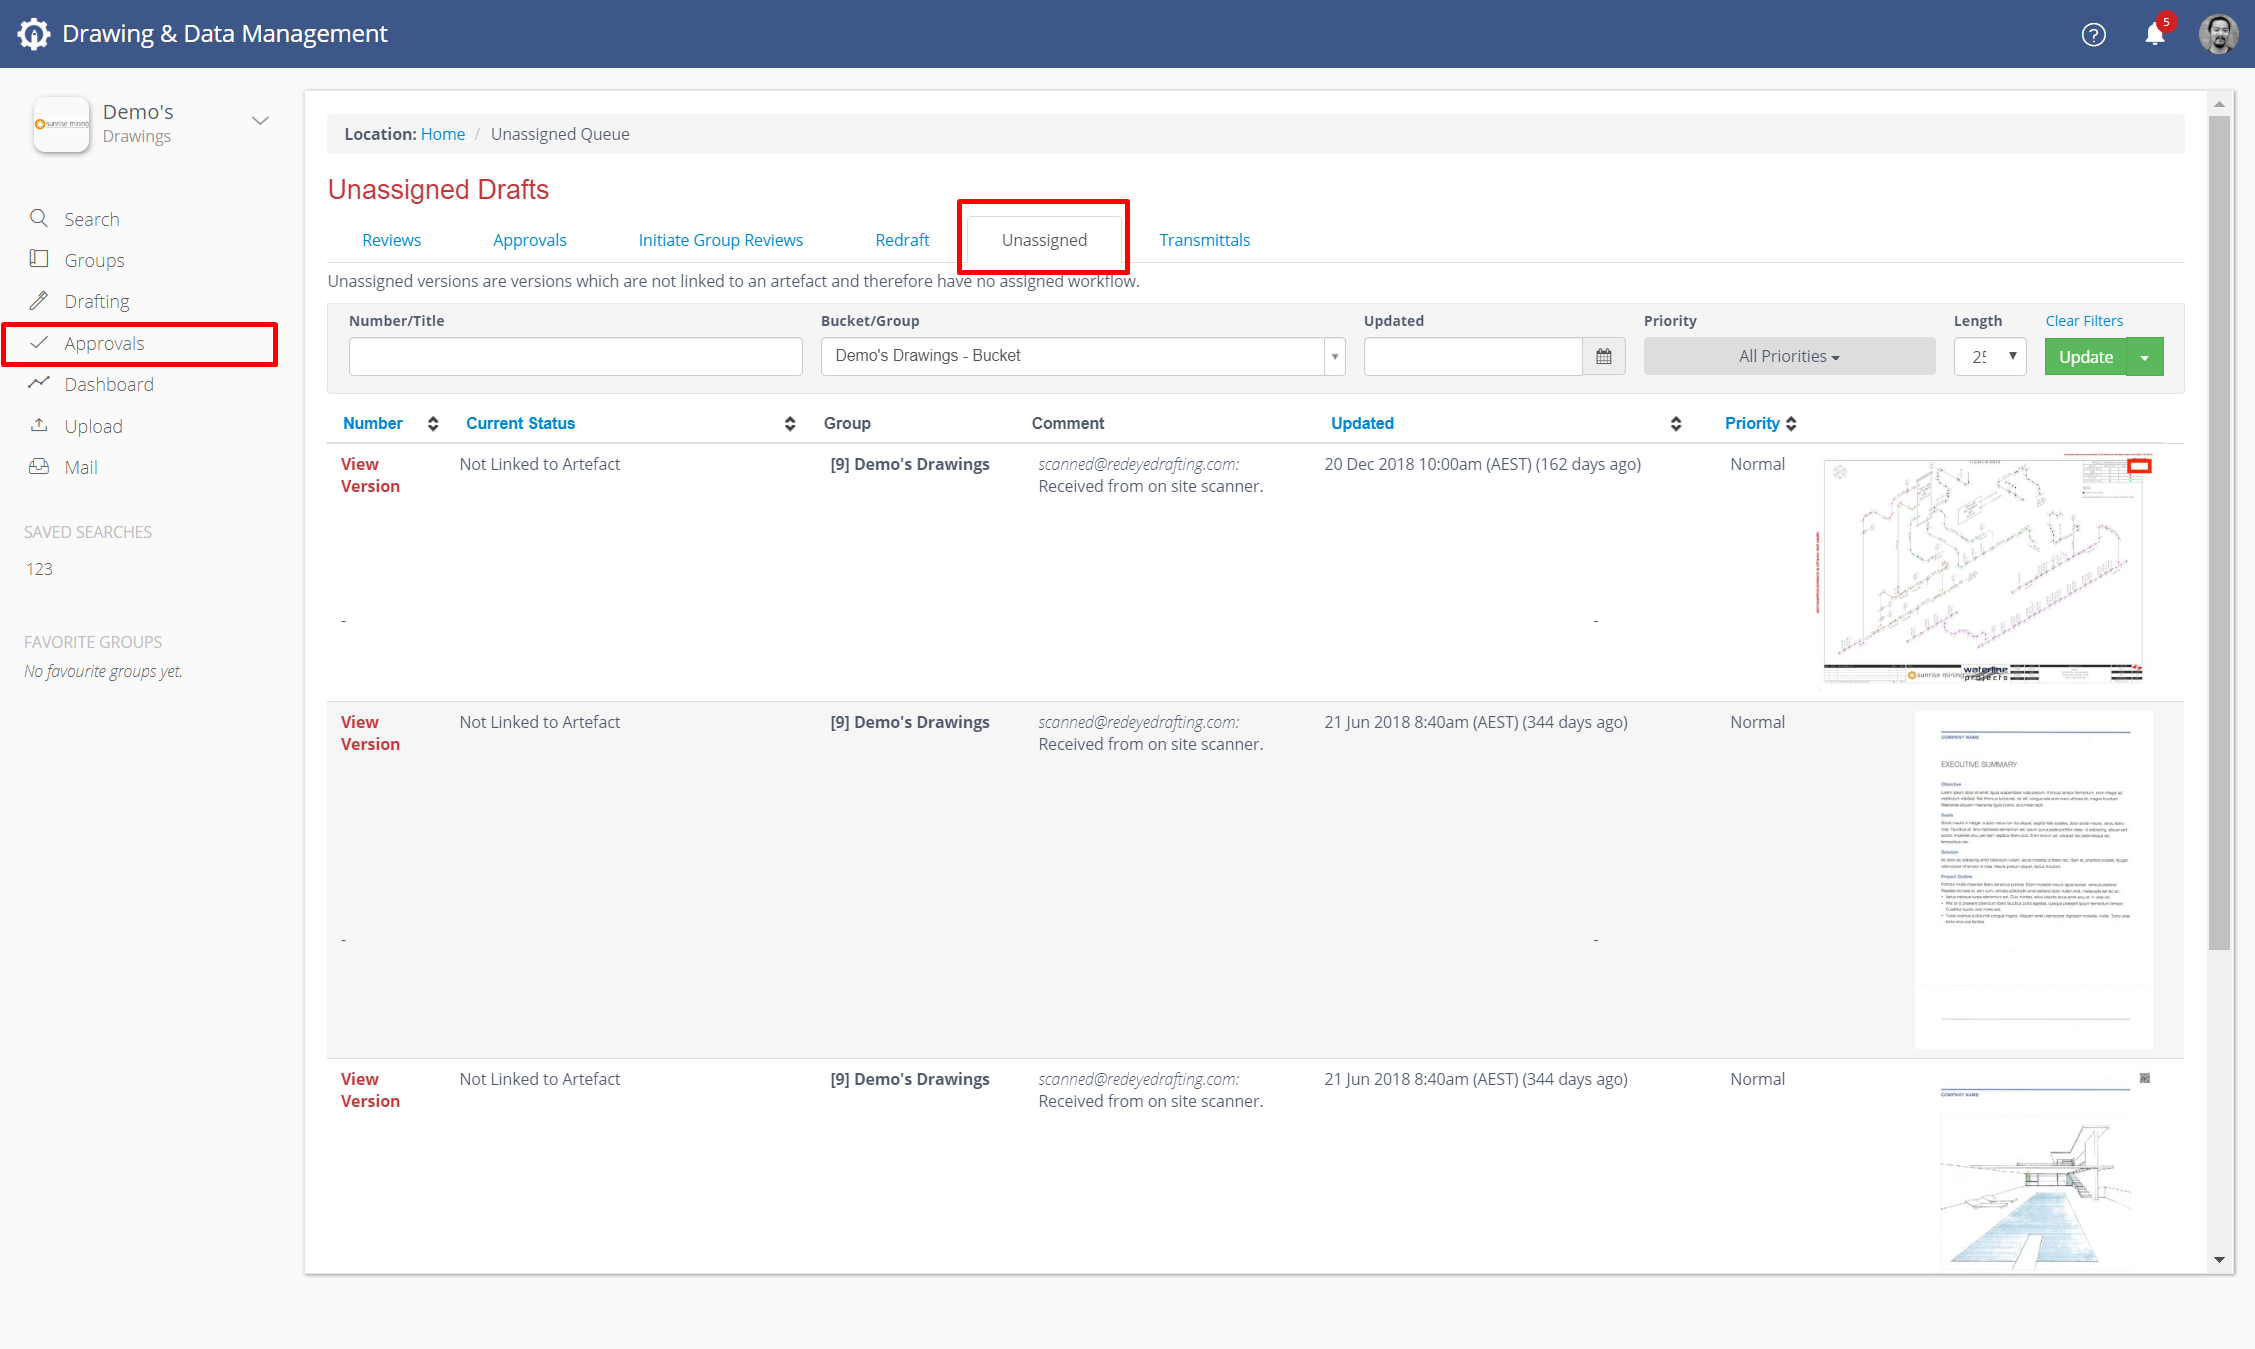
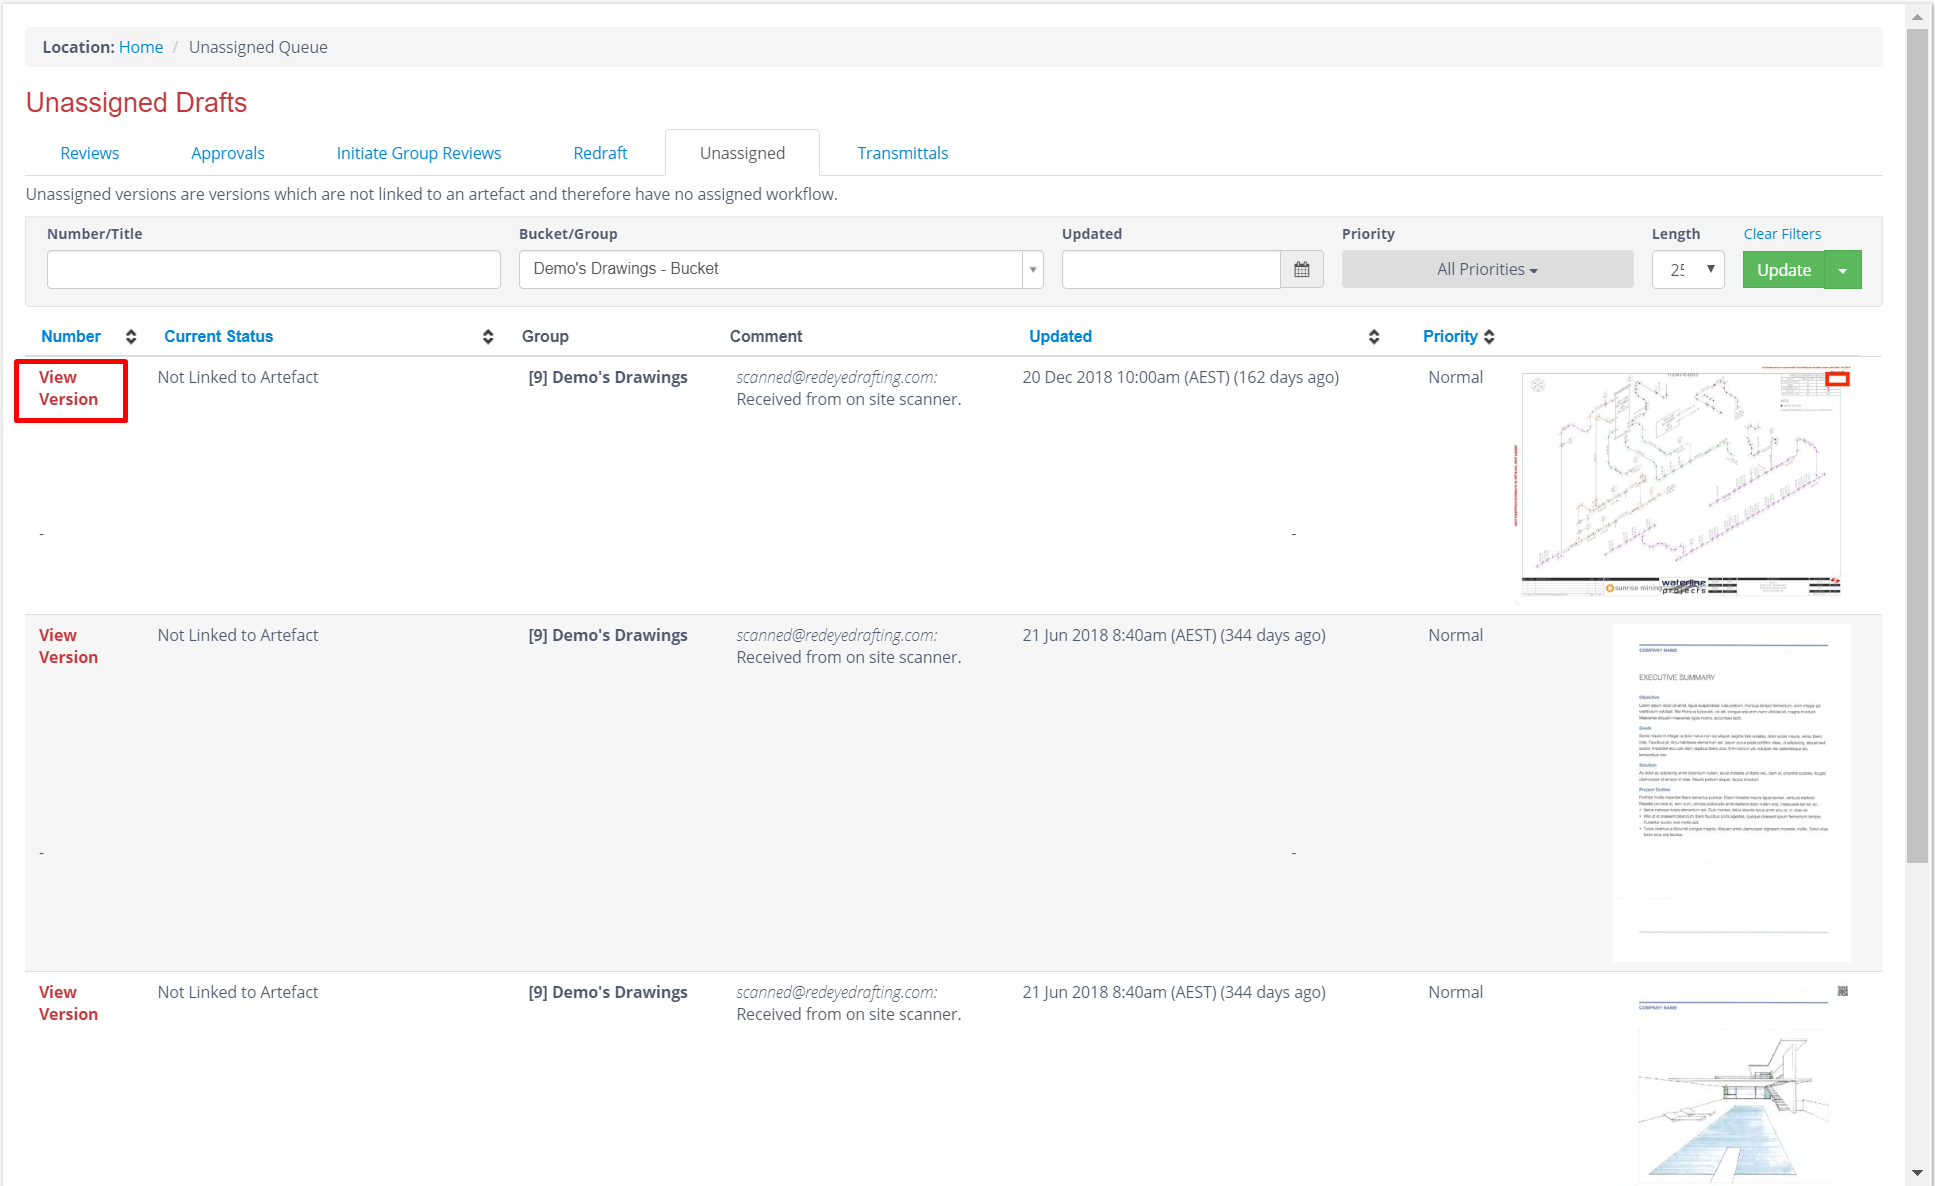
For each artefact in the Unassigned Queue, you may click View Version and select an action to perform. You may either Search for the Parent Artefact, Create a New Artefact, or Delete the Artefact.
Search for Artefact:
Clicking Search for Artefact will enable the user to search for an associated Artefact that is already in RedEye to attach this Markup as a new Version of the same Artefact.
Tip: You can click the Preview image to open the Markup in the Viewer, and look for the Drawing Number on the Drawing.
Click Search for Artefact, and input the Drawing Number you want to search for. Select the matching Artefact and Submit.
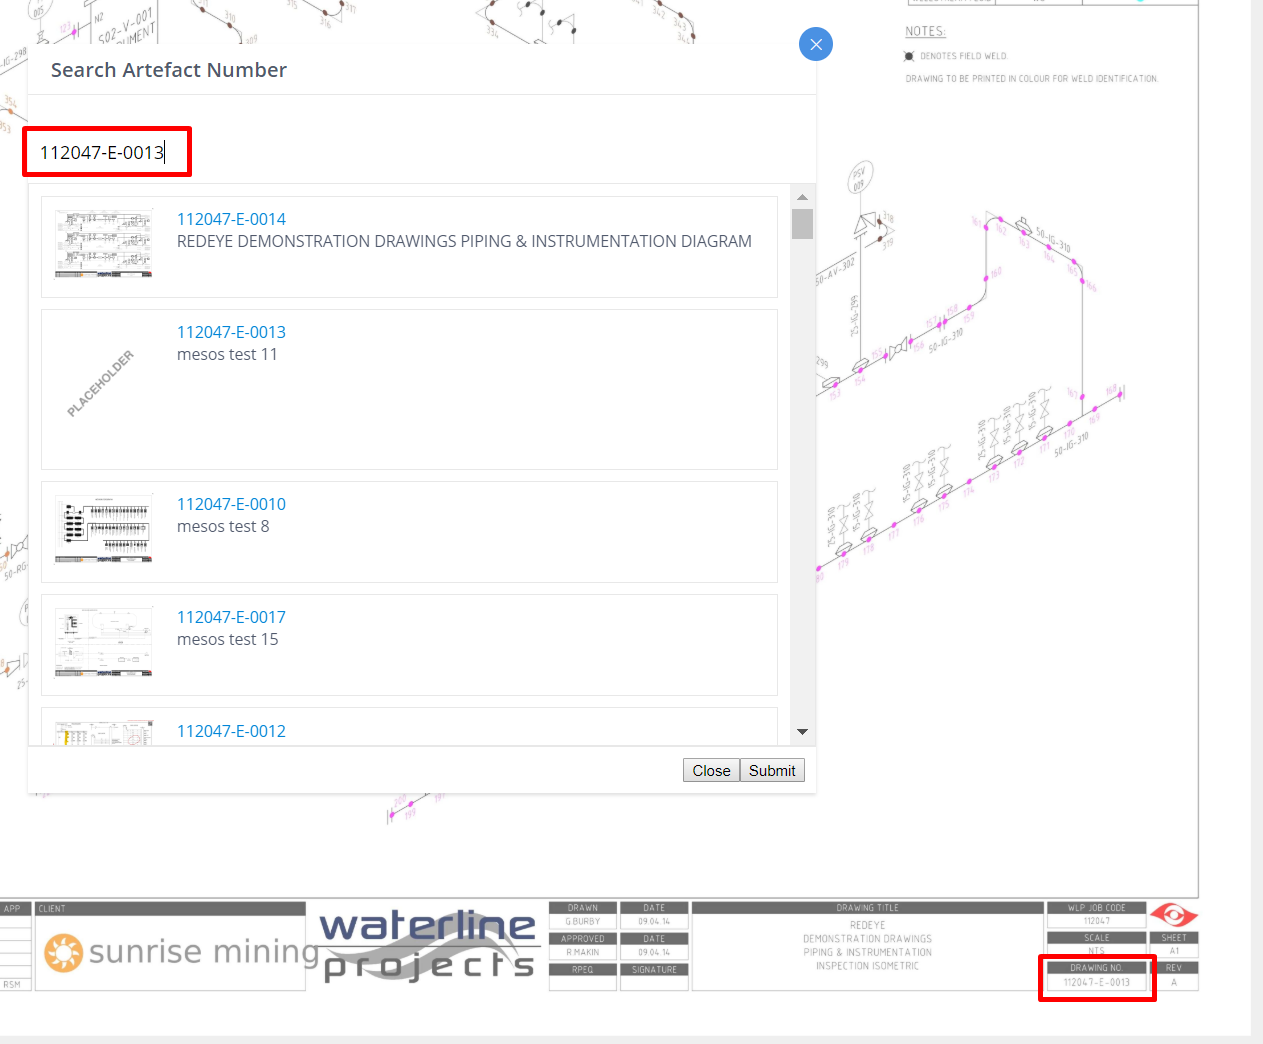
The markup will now become the latest version of the selected Artefact, and will initiate a workflow step if applicable with the Artefacts workflow.
Create New Artefact:
Clicking Create New Artefact will enable the Bucket Administrator to create a New Artefact for the markup. This would be a suitable choice if a user erroneously scans in a new drawing to the Markup address, instead of using the dedicated Upload function.
When you choose the Create New Artefact function, a new artefact will be created in your bucket and you will be taken immediately to its Artefact Page. From here you can input metadata associated with the artefact, establish links to other artefacts, add the artefact to Groups, and assign a Workflow.
Delete Artefact:
Sometimes an Artefact will be incorrectly sent to the Redpen Email address. In such instances, you may simply delete the Artefact from RedEye. Click the Delete Artefact button to remove the Artefact, and then click Confirm Delete.