To view the full Lucernex Online Help, sign in to Lucernex and click Help > Online Help. If you do not have your organization's Lucernex link, contact your Administrator.
Accruent Lucernex 24.12 Release Notes
We're delivering this automatic upgrade to UAT (TRAIN) environments on November 15, 2024 and to production environments on December 6, 2024, with these highlights:
-
Roll Forward Lease Report: New notes column and configure the minus sign for negative values.
-
Dashboard Widgets: Filter and sort out of the box dashboard widgets.
-
Vendor Management: Easily manage multiple sites within a single vendor profile by associating Employers of type Vendor with Site records.
-
SFTP Protocols: Enhanced SFTP protocols for file transfers.
-
Database Schema: We've added fields to LinkTaskMember and EmployerSite.
Roll forward lease report
We've made several improvements to the Roll Forward Lease Report.
Notes column
A new Notes column in the Roll Forward Lease Report contains the SL summary notes you enter when you create the schedule. For example, on this dialog, the text in Notes displays in the report when you create the schedule and run the report with a date range that falls within the schedule.
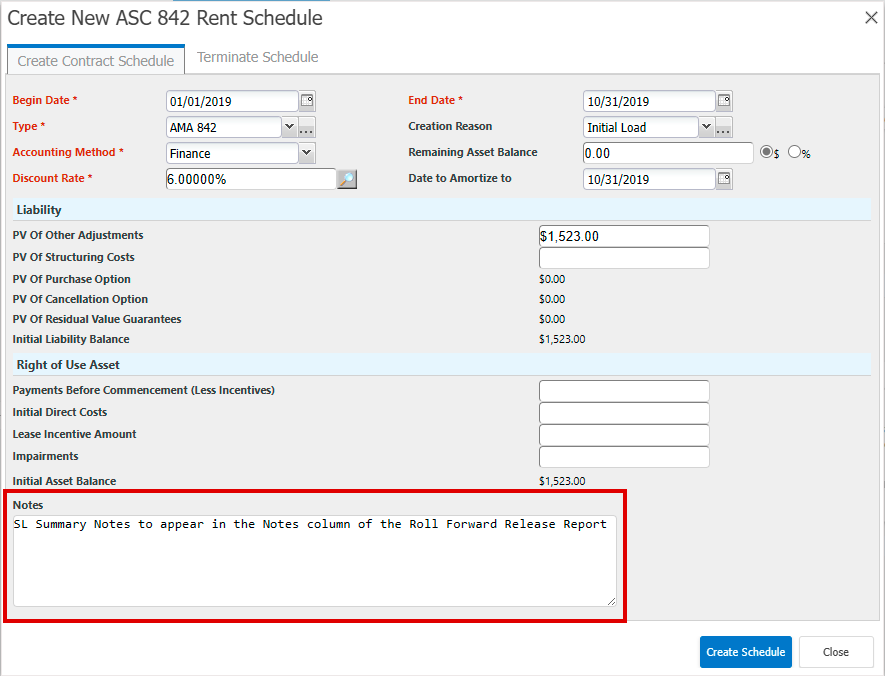
The new Notes column is next to the Schedule Creation Reason column in the report output.

Configure minus sign for negative values
You can configure Roll Forward Lease Reports to display a minus sign using the Show negative values with minus sign option in report display settings.
-
In your Roll Forward Lease Report, click Report Settings > Display Settings.
-
Select Show negative values with minus sign, then click FINISH.
Modify reports created prior to Lucernex 24.12 to show a minus sign for negative values:
-
Click Report Settings > Advanced Filter.
-
Ensure Edit Java Filter Source contains:
-
Two money formats:
Copystatic final String MONEY_FORMAT = "_(* #,##0.00_);[Red]_(* (#,##0.00);_(* \"-\"??_);_(@_)";
static final String MONEY_FORMAT_SHOW_NEGATIVE = "_(* #,##0.00_);[Red]_(* -#,##0.00;_(* \"-\"??_);_(@_)"; -
The cell styles set based on the value of
IReportController.showNegativeSign():CopyString moneyFormat;
if(controller.showNegativeSign()) {
moneyFormat = MONEY_FORMAT_SHOW_NEGATIVE;
} else {
moneyFormat = MONEY_FORMAT;
}
moneyStyle.setDataFormat(format.getFormat(moneyFormat));
-
-
Click Update.
Dashboard widgets
The toggler that lists your dashboard widgets is relabeled from Modules to Widgets to match known terminology for that component and prevent confusion between Lucernex modules.
Filter dashboard widgets
If the enableMyWidgetsGridFilter feature flag is turned on in your firm, you can filter and sort out of the box dashboard widgets that start with My by their column heading. For example if you are a project manager with hundreds of purchase orders to approve, you can filter and reduce the list in the My Approvals widget.
-
If you have not already done so, add the out of the box widget to your dashboard:
-
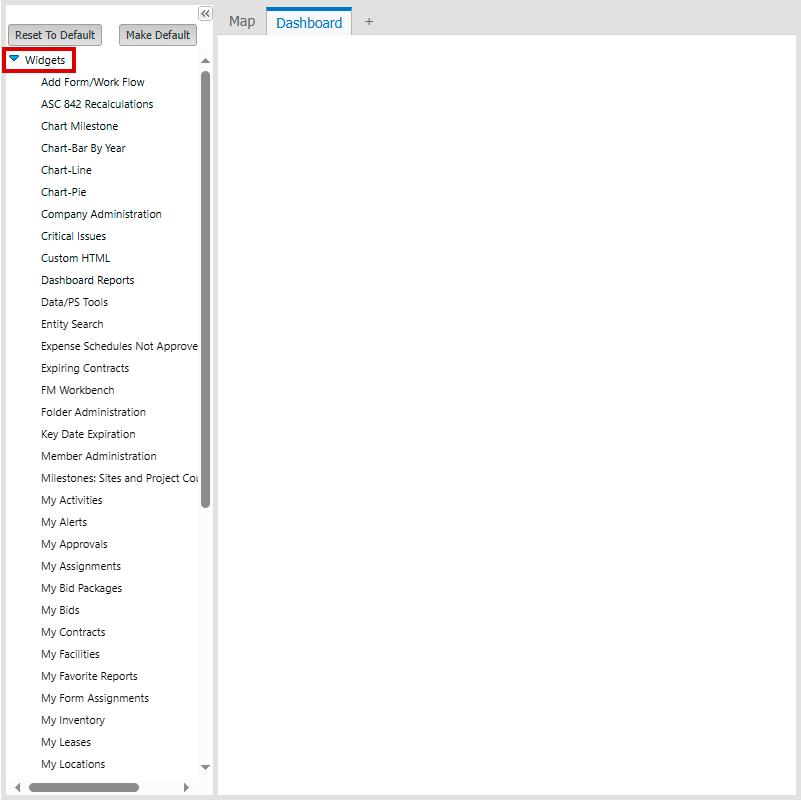
Click Dashboard in the toolbar.

-
Expand the widget pane next to the Map tab, then expand Widgets.
-
Scroll to the out of the box widget you want to add that starts with My. For example, My Approvals.
-
Drag the widget onto your dashboard.
-
-
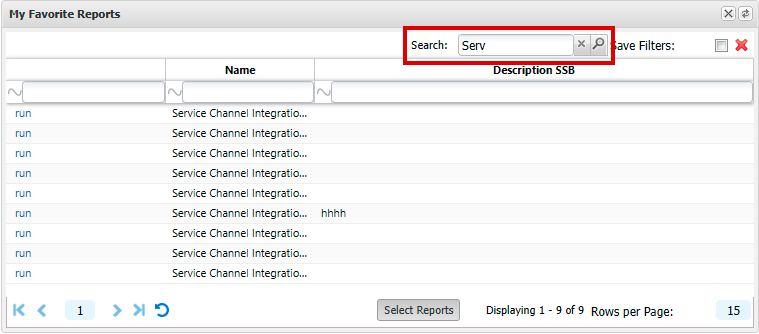
Optionally, search across all columns:
-
In Search, enter a value to search for.
-
Click Search.
-
-
Optionally, filter by column:
-
Enter a value in the column.
-
Choose the logical filter criteria using the buttons to the left of each field.
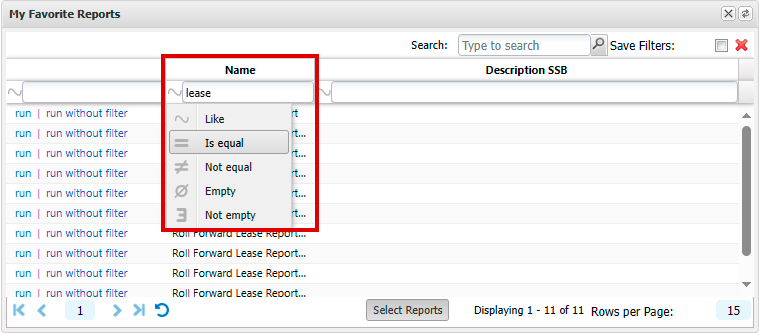
The available options are determined by the data in that column, including:
 Is equal
 Not equal
 Greater than
 Greater than or equal to
 Less than
 Less than or equal to
 Like
Like Empty
Empty Not Empty
If an option is selected, the displays the icon for that option.
If a is displayed to the right of the field, this indicates that you can select specific data to filter the column on such as a date or a specific value from a list:
 Displays the date picker. When you choose a date filter, the date format is shown in the format configured for your user. For example, if the date format specified for your user is mm/dd/yyyy and you choose to filter on February 13, 2023, the filter shows 02/13/2023.
-
-
Select Save Filters to save your filter so that it is retained when you navigate away from the dashboard.
Vendor management
We have introduced a parent-child relationship between vendors and vendor sites to help support any integrations your organization has with entity resource planning (ERP) systems such as Oracle, to support the complex relationships between suppliers and supplier sites.
You can now easily manage multiple sites within a single vendor profile by associating Employers of type Vendor with site records. Other employer types do not allow site records. As a result, you no longer need to create a separate employer record for each vendor site. This streamlines processes, saves time, reduces complexity.
The Manage Vendors page now includes the Manage Vendor Sites tab where you can activate and deactivate vendor sites of parent vendors that are active. Click Activate in the Action column to activate a vendor site. If the parent vendor is not active, the vendor site is not activated. When you deactivate a vendor, the vendor sites associated with that vendor are also deactivated.
We've added fields to EmployerSite to support this.

Create a vendor
If the vendor that you want to create the site for does not already exist, create it.
-
On the System Administrator Dashboard, click Manage Employers in Member Administration.
-
Select Employers.
This is an out of the box global layout.
-
Click Add Employer.
-
In Company Type, select Vendor.
-
Select a Contact Type.
-
Complete the remaining fields.
-
Click Add.
Create a vendor site
-
On the Manage Employers page, click Edit in the row of the Vendor Employer that you want to add vendor sites to.
-
Select Vendor in Company Type if not already selected.
-
Scroll to the Vendor Sites pane then click Add Vendor Site.
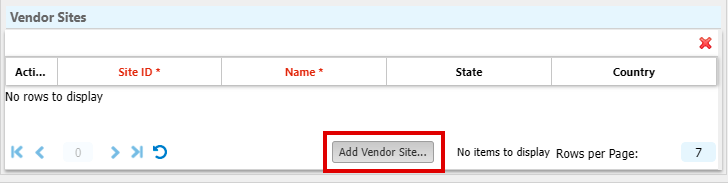
-
Complete the fields and click Add.
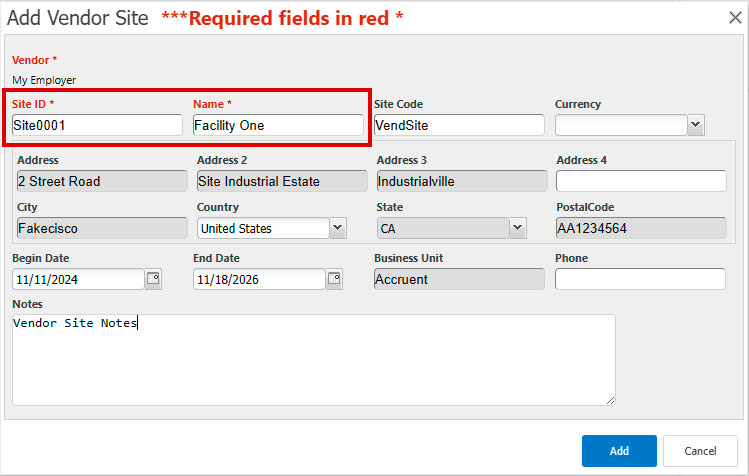
The Vendor Site ID and Vendor Site Name you enter must be unique to the vendor to which this vendor site relates.
-
Click Update in Edit Employer.
The Vendor displays on the Manage Vendor Sites page.
-
To view the newly created vendor site, on the System Administrator Dashboard click Manage Vendors > Manage Vendor Sites.
Secure File Transfer Protocols (SFTP)
As part of our Lucernex security enhancements, we are changing the SFTP protocols that Lucernex uses for file transfers.
From the end of February 2025, Lucernex only supports the protocols that follow. We recommend that you work with your internal IT department to update your systems and once the updates are complete, contact Accruent Support to enable the protocols in Lucernex.
-
SFTP (versions 0-6): SSHD supports all SFTP protocol versions from 0 to 6, providing more features, such as extended file attributes, better error handling, and improved file management operations.
Ciphers in Apache Mina SSHD
- AES (128-bit, 192-bit, 256-bit): Symmetric encryption.
- Blowfish: Supported, though less commonly used today.
- Triple DES (3DES): Less secure.
- ChaCha20/Poly1305: Modern and secure.
- ECDSA/ECDH: Enables faster key exchange and authentication.
- RSA (up to 4096-bit): Supported for key exchange and authentication.
- Curve25519: Provides a modern and faster elliptic curve algorithm for key exchange.
Message Authentication Codes (MACS)
- HMAC-SHA1
- HMAC-SHA256: More secure than SHA1.
- HMAC-SHA512: Supported for even higher security.
- HMAC-MD5: Supported, but considered insecure and generally avoided in modern deployments.
Compression
-
zlib: Supported with more flexible configurations.
-
none: If compression is not required, it can be disabled to improve performance.
Database schema changes
We've added fields to the database schema for enhancements in this release.
Link task member
We've added these fields to LinkTaskMember to support improvements and issues fixed for case 01633905.
|
Field Name |
Type |
UI Label |
Description |
|---|---|---|---|
|
MemberID |
Member ID |
Member |
Member ID of the user assigned to a task. |
|
ModifiedByID |
Member ID |
Modified By |
Member ID of the user who modified the record. |
|
ModifiedDate |
Time |
Modified Date |
Date on which the record was modified. |
|
ProjectEntityID |
Entity ID |
Project Entity |
Base Entity System Identifier for associated tasks, folders, documents, forms, and other records. It is assigned automatically by the system, and is not editable. |
|
TaskID |
Task/Group ID |
Task |
ID of the task. |
Employer site
To support Vendor Management, we've added these fields to EmployerSite.
|
Field Name |
Type |
UI Label |
Description |
|---|---|---|---|
| BeginDate | Date | Begin Date | Begin date for the record. |
| BusinessUnit | Text | Business Unit | Business unit to which the Employer Site belongs. |
| City | Text | City | City of the record. |
| CodeCurrencyTypeID | Dropdown (Currency Type Code) | Currency Type | Currency type to use on the record. |
| CountryID | Text | Country | Country of the record. |
| EmployerID | Employer ID | Employer | Employer to which the Employer Site belongs. |
| EmployerSiteID | Number | Vendor Site RecID | ID of the Employer Site record. |
| EndDate | Date | End Date | End date for the record. |
| Inactive | Boolean | Is Inactive? | Indicates whether the record is inactive. |
| Notes | Text | Notes | Notes about the record. |
| Phone | Text | Phone | Phone number associated with the record. |
| PostalCode | Text | Postal Code | Postal code of the address associated with the record. |
| StateProvinceCountryID | Country, State, County ID | State | State / province of the address associated with this record. |
| StreetAddress1 | Text | Street Address #1 | First line of the street address. |
| StreetAddress2 | Text | Street Address #2 | Second line of the street address. |
| StreetAddress3 | Text | Street Address #3 | Third line of the street address. |
| StreetAddress4 | Text | Street Address #4 | Fourth line of the street address. |
| VendorSiteCode | Text | Vendor Site Code | Code associated with the record. |
| VendorSiteID | Text | Vendor Site ID | ID associated with the record. |
| VendorSiteName | Text | Vendor Site Name | Name of the Vendor Site record. |