To view the full Lucernex Online Help, sign in to Lucernex and click Help > Online Help. If you do not have your organization's Lucernex link, contact your Administrator.
Accruent Lucernex 23.11 Release Notes
We're delivering this automatic upgrade on
-
Cost Tracking: Manage construction costs and invoicing in your projects and capital projects
-
Ad Hoc Budget Template: Associate an Ad Hoc Budget template with an existing Budget Template so that when a one-off line item is added to the budget in a project or capital project, that line item is listed in the related group section instead of being in its own section at the bottom of the budget.
-
Report filters: Filter reports using the field-level filter on the Is Group? field
-
Report grouping and sorting: Hide individual group line items so that only group totals and sub totals are shown in the report
-
Bidding questions: Lock questions on a bid package summary
-
Copy documents: Easily select all the documents you want to copy rather than expanding folders and selecting individual documents to copy
-
Improvements and bug fixes: Improvements and issues fixed in these areas:
-
API Integration Report
-
Add Organization
-
Budget Template
-
Datamart
-
Documents
-
Email Document
-
Facility Location
-
Lock Bidding Questions
-
Reports
-
Schedules
-
Session management
-
State / Province field
-
XML Report
-
Cost tracking
LUC-11041
To turn on cost tracking, reach out to your Accruent representative who can help you configure the required work flows and custom lists.
Lucernex Project Cost Tracking is a purpose-built module that allows you to manage construction costs and invoicing in your projects and capital projects. With cost tracking enabled, you can track purchase order, change order, and invoice activity on your project. You can also apply cost tracking templates to the entity that you are viewing if your Administrator has created templates and made them available to that entity.
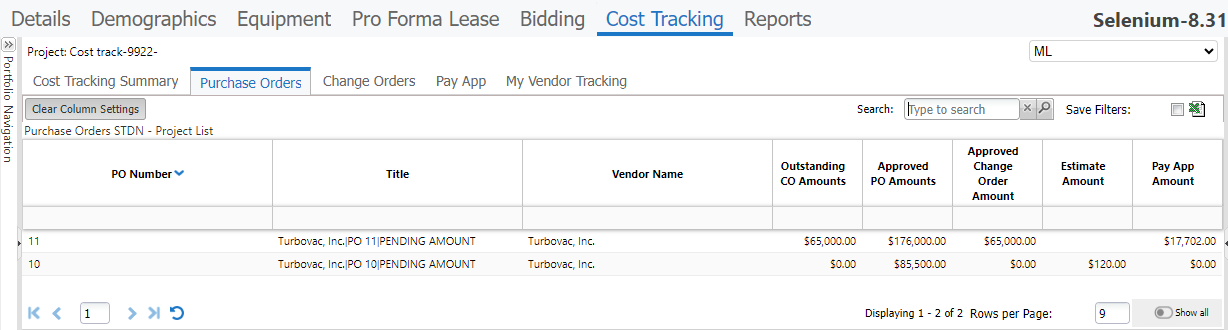
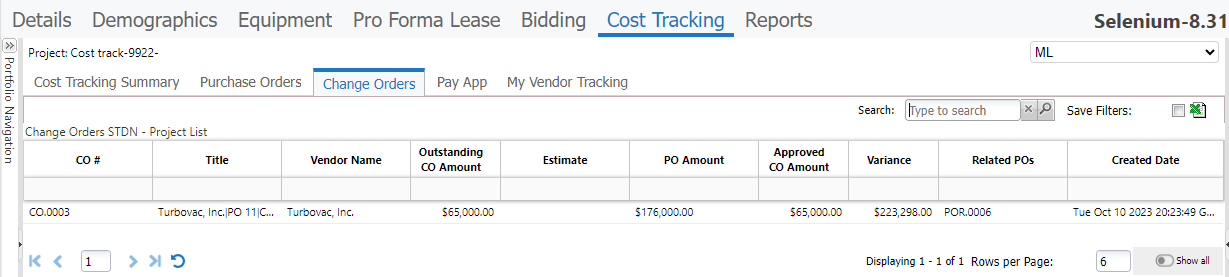
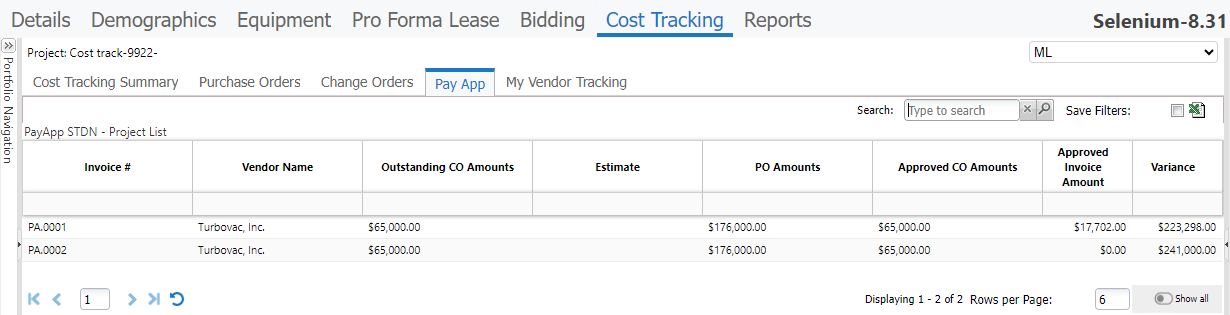
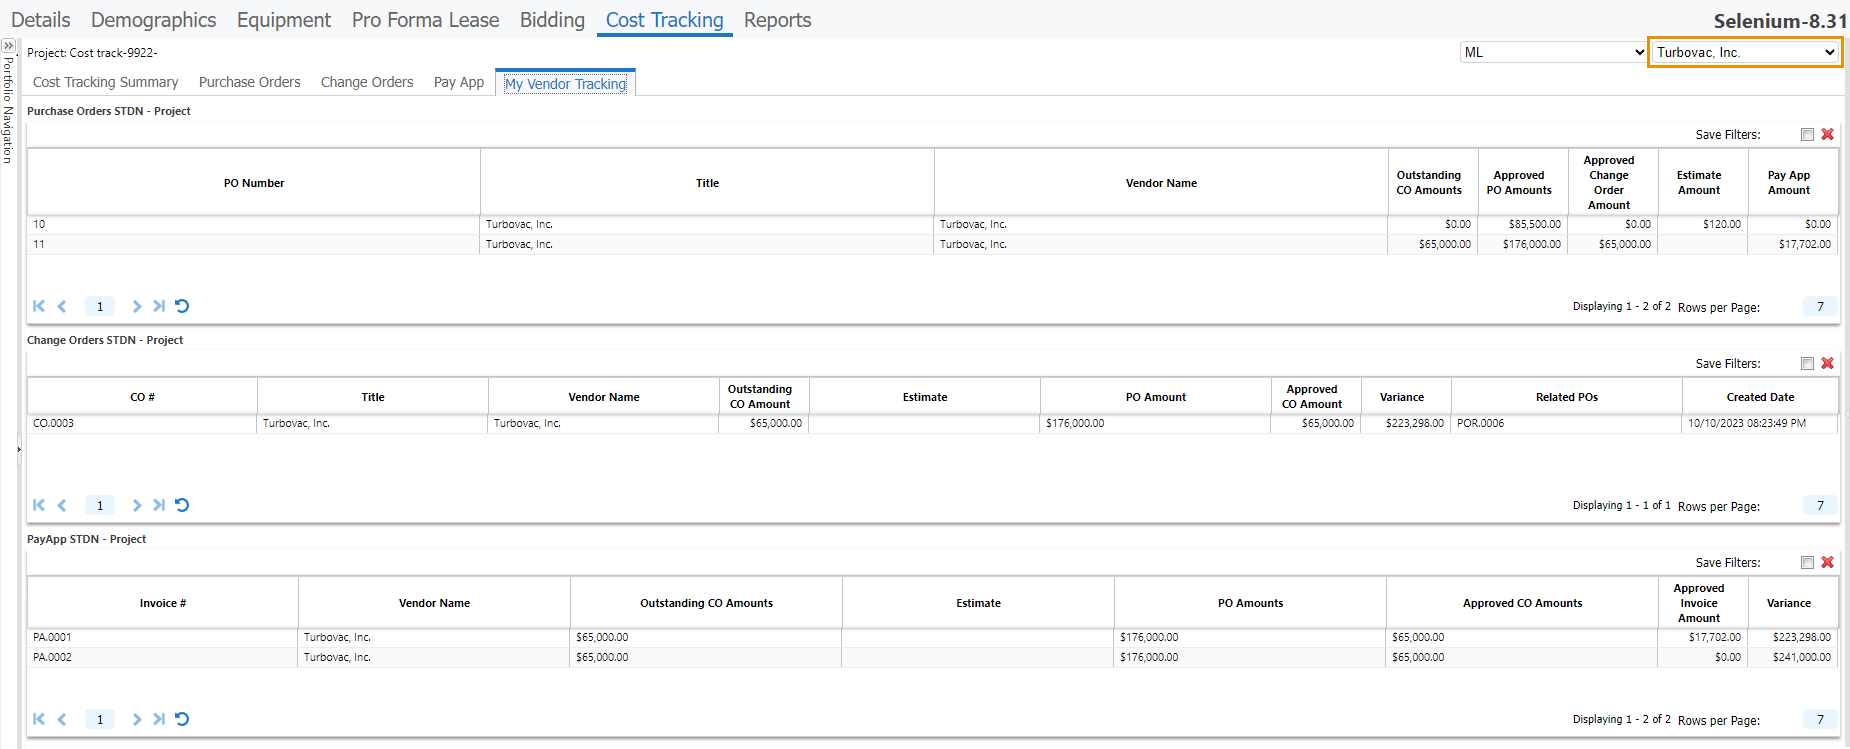
The Cost Tracking module consists of five tabs.
-
Cost Tracking Summary: List of all purchase orders and vendors associated with those purchase orders.
-
Purchase orders: Details of each purchase order.
-
Change orders: Detail of each change order.
-
Pay App: Invoices submitted by vendor, change order amounts submitted against the purchase order or contract.
-
My Vendor Tracking: View a list of purchase orders, change orders and invoices by vendor. Select the vendor you want to view in the upper-right corner of the page.
Templates
As an Administrator, you can add cost tracking templates that specify the fields that are to populate the columns of the Cost Tracking module. Once your Administrator has created templates, you can add the ones you want to the Cost Tracking page of your project or capital project and then select the one you want to view.
Create a template
-
In the Company Administration pane of the System Administrator Dashboard, click Manage Cost Tracking Templates under Cost Management.
-
Enter a Name and Description.
-
Select the budget type columns you want for each dropdown:
-
Estimate Column
-
PO Column
-
Approved CO Column
-
Outstanding CO Column
-
Invoice Column
-
-
Select the check boxes of the entity types that the template is available for.
-
Enter Notes about the template.
-
Select the Portfolios/Capital programs that the template is to be available for.
-
Click Set Cost Tracking Summary Variance, then enter the formula to calculate variance. For example, to get the outstanding balance, enter the formula (PO Column + Approved CO Column) - Invoice Column:
-
Click (.
-
Select PO Column, then click >>.
-
Click +.
-
Select Approved CO Column, then click >>.
-
Click ).
-
Click -.
-
Select Invoice Column, then click >>.
-
Click ).
The window now shows the formula.

-
Click Save.
-
-
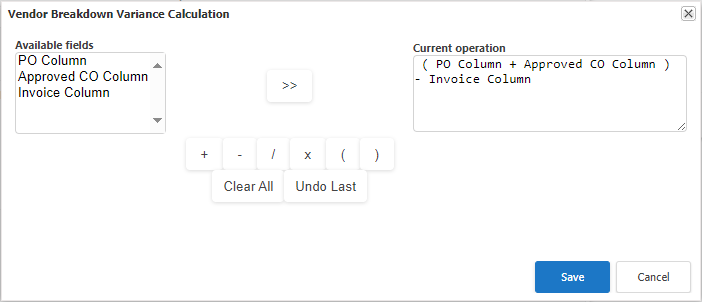
Click Set Vendor Breakdown Variance, then enter the formula to calculate variance. For example, to get the difference between the purchase orders plus change orders against the invoices received from a vendor, enter the formula (PO Column + Approved CO Column) - Invoice Column:
-
Click (.
-
Select PO Column, then click >>.
-
Click +.
-
Select Approved CO Column, then click >>.
-
Click ).
-
Click -.
-
Select Invoice Column, then click >>.
-
Click ).
The window now shows the formula.
-
Click Save.
-
-
Click Update.
Apply a template
-
On the Project or Capital Project, navigate to the Cost Tracking page.
-
In the Actions menu, click Apply Template.
-
In the Add Cost Tracking window that opens, select the Cost Tracking template you want.
-
Click OK.
The Cost Tracking Template dropdown menu is shown in the upper-right corner when one or more templates have been added.
Ensure that the template you want is selected when viewing each tab of the Cost Tracking module.
Remove a template
You can remove a Cost Tracking template from the project or capital project you are viewing.
-
Select the template you want to remove from the dropdown menu in the upper-right corner of the Cost Tracking page.
-
In the Actions menu, click Delete.
-
Click OK.
The template is removed from the project or capital project and another cost tracking template is automatically selected if one is applied to that project or capital project.
Ad Hoc Budgets
LUC-11047
To use this feature the enableAdhocBudgetLineItems feature switch must be turned on for your firm. Reach out to your Accruent representative who can help you configure this feature.
If you are an Administrator, you can now create an Ad Hoc Budget Template. The Ad Hoc Budget template can then be associated with an existing Budget Template so that when a one-off line item is added to the budget in a project or capital project, that line item is listed in the related group section instead of being in its own section at the bottom of the budget.
Create an Ad Hoc Budget Template
-
In the Company Administration pane of the System Administrator Dashboard, click Manage Ad Hoc Budget Templates under Cost Management.
-
Click Add Ad Hoc Budget Template.
-
Enter a Name, Description, and Notes for the template.
-
If required, select an existing template to duplicate from one of the following:
-
Duplicate Ad Hoc Budget Template
-
Duplicate Budget Template from another Budget Template
-
-
Select the check boxes of the entity types that the template is to be available for.
-
Select the Portfolios/Capital programs that the template is to be available for.
-
Click Add.
-
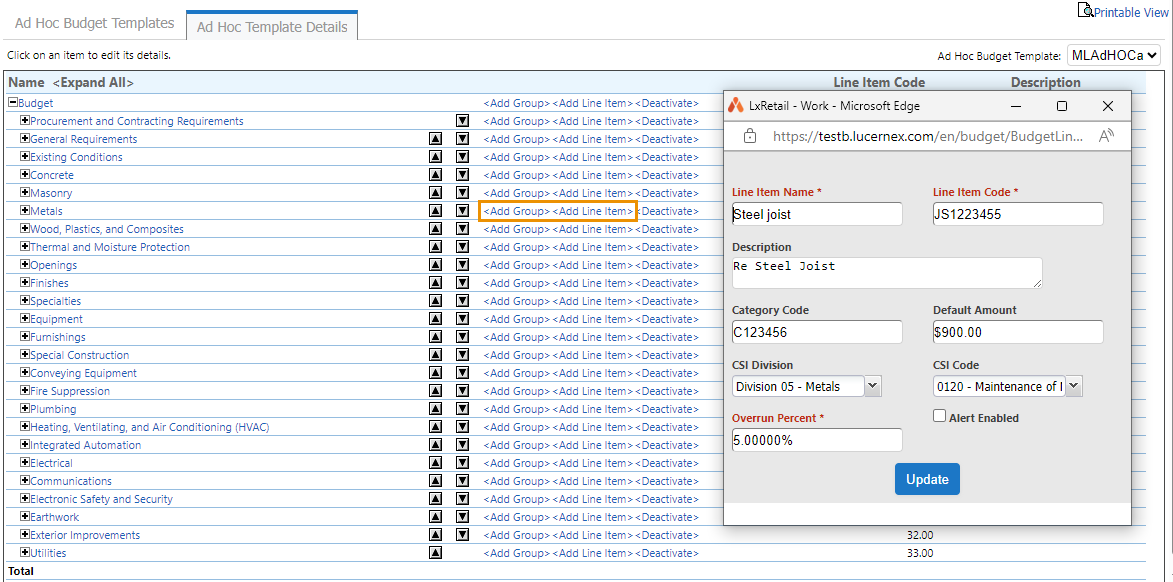
In the Actions column of the template you created, click Layout.
-
Add or Edit Root Groups and Root Items.
Apply an Ad Hoc template to a budget
-
Click Budget tab of the Project or Capital Project.
-
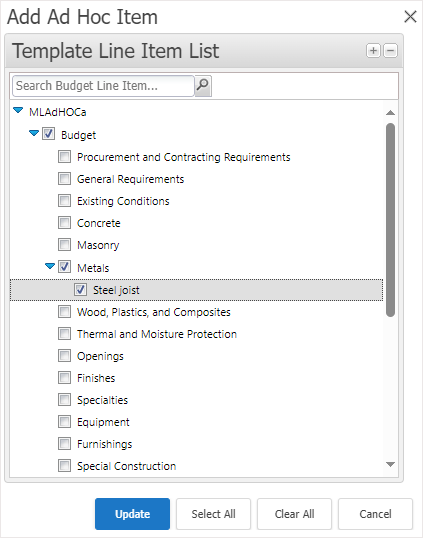
In the Actions column, click Add Ad Hoc Budget Template.
-
In the Add Ad Hoc Item window, expand the line item list and select the check boxes of the budget line items you want to add.
-
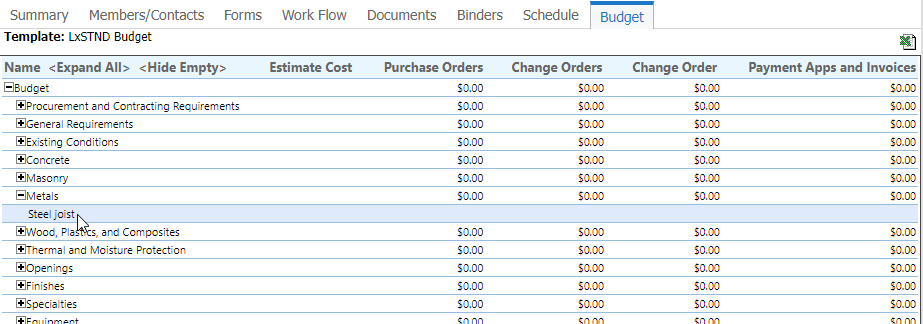
Click Update.
The items are added to the budget.
Org group code
LUC-11236
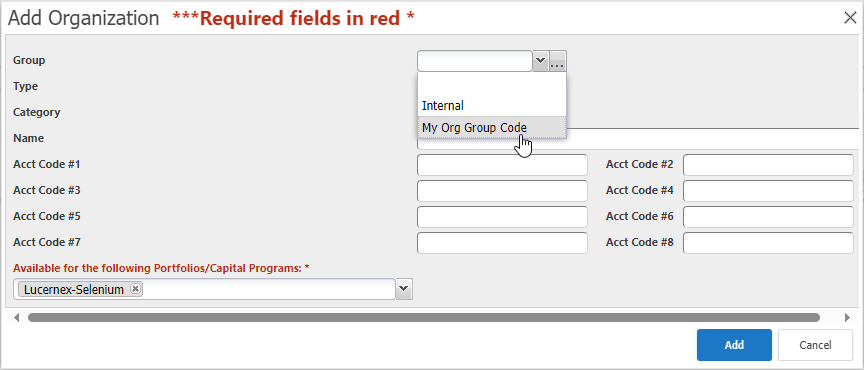
When you create an Org Group Code and make it available to a specific Portfolio or Capital Program, then add an Organization to the same Portfolio or Capital Project, the Group drop down now lists that Org Group Code.
To add an Org Group Code:
-
On the System Administrator Dashboard page, click Manage Firm Drop Downs in the Company Administration pane.
-
In the Action column of Org Group Code, click Edit.
-
Click Add item.
-
Enter a Name and a Description.
-
Select the Portfolio/Capital Programs you want the code to be available for.

-
Click Add.
To add an Organization with the Org Group Code:
-
On the System Administrator Dashboard page, click Manage Organizations in the Portfolio Administration Pane.
-
Click Add Organization.
-
Select the Portfolio/Capital Programs you want the Organization to be available for.
-
Select the Group that you chose earlier.
-
Finish adding the organization as described in Add an Organization.
Is Group? field-level filter
LUC-11224
When you configure a report field-level filter on the Is Group? field, it now displays the correct rows for the option you chose:
-
Click Edit field-level filters and details in the header of the Report Builder.
-
Click Edit in the Actions column of the Is Group? record.
-
Select the filter option you want from the Criteria / Conditions field:
-
selected: Report shows rows where Is Group is Yes.
-
not selected: Report shows rows where Is Group is No.
-
is any value: Report now shows rows where Is Group is Yes or No.
-
-
Complete editing the field as described in Edit fields.
Hide details in report grouping and sorting
LUC-11205
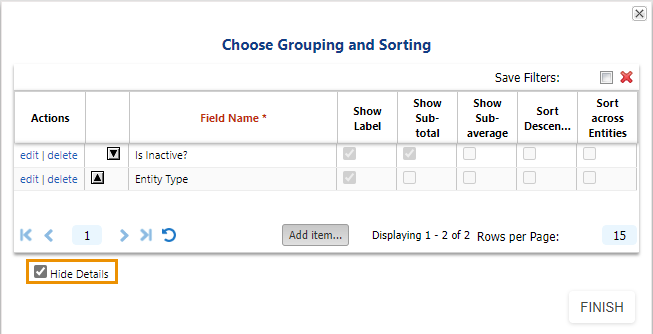
The Hide Details check box in the report grouping and sorting options now hides the individual group line items so that only group totals and sub totals are shown in the report:
-
Click Edit grouping or sorting in the header of the Report Builder.
-
In the Choose Grouping and Sorting window that opens, select the Hide Details check box.
-
Click FINISH.
-
Run the report.
Some report columns may show no data as a result of selecting the Hide Details check box.
State / Province field
LUC-11352
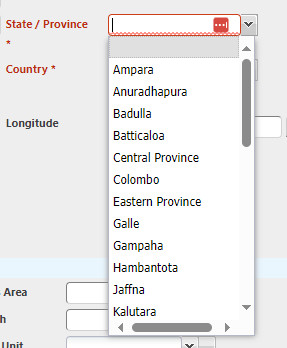
When you select Sri Lanka in the Country field, you can now select the State / Province you want.
Lock bidding questions
LUC-10044
LUC-11390
To use this feature, the enableQandAPublish feature switch must be turned on. In addition, we recommend that you test this feature in your TRAIN environment before using it in Production. Contact your Accruent Support Associate for more information.
Questions on a bid package summary can now be locked so that questions created by the capital project manager or bid administrator cannot be modified by vendors once they are published.
Add question
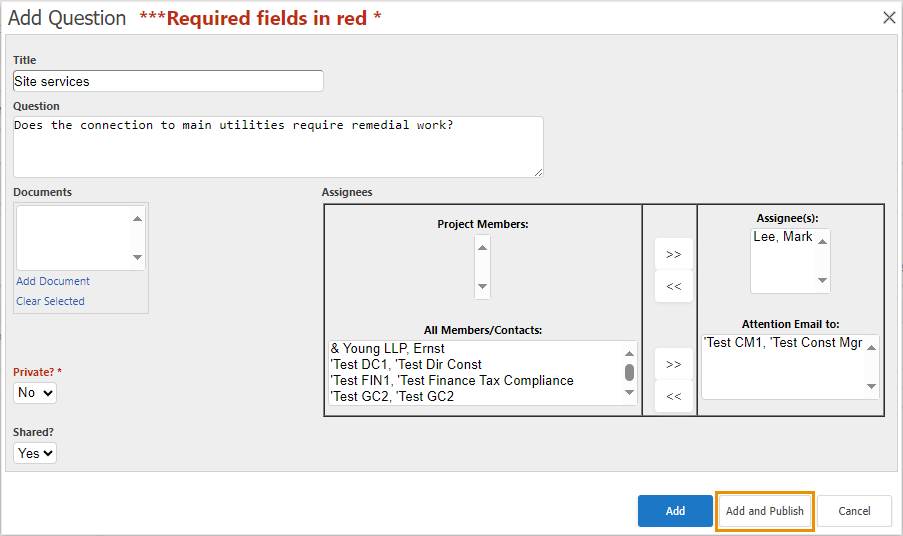
When the enableQandAPublish feature switch is on, the Add Question window displays an Add and Publish button, which saves the new question and publishes it to vendors so they can answer it.
To add a new question:
-
In the Actions column of the Bid Package Summary page, click Add Q&A.
-
In the Add Question window, add the Title, Question, Documents, and Assignees you want.
-
Select whether the question is to be Private and whether it is to be Shared.
-
Do one of the following:
-
Click Add to save the question to the Bid Q&A pane so that you can edit and publish it later.
-
Click Add and Publish to save the question to the Bid Q&A pane and publish it to vendors so they can provide answers.
Once a question is published, it cannot be edited.
-
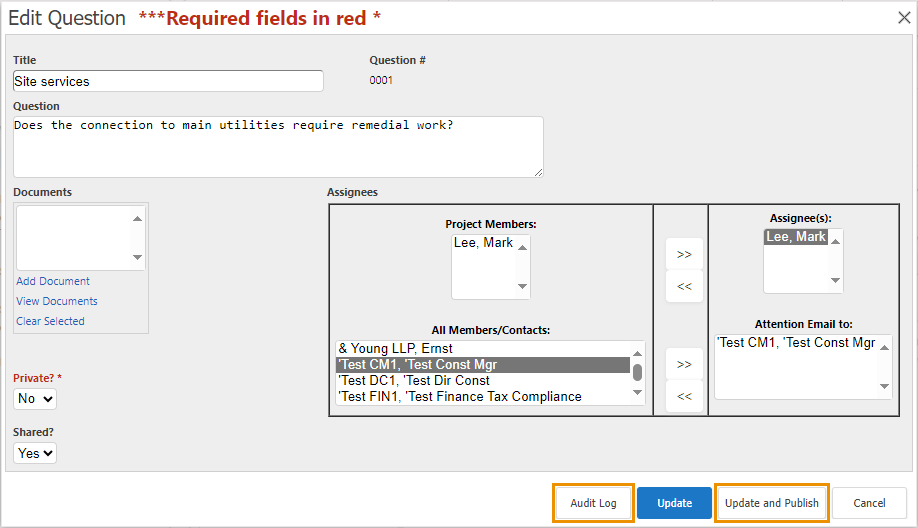
Edit question
The Edit Question window displays an Update and Publish button, which updates the unpublished question and publishes it to vendors so they can answer it.
In addition, the Edit Question window displays an Audit Log button, which displays a log containing the actions recorded against the question.
To edit an unpublished question:
-
In the Bid Q&A pane, click Edit in the question column of the question you want to edit.
-
In the Edit Question window, add the Title, Question, Documents, and Assignees you want.
-
Select whether the question is to be Private and whether it is to be Shared.
-
Do one of the following:
-
Click Update to update the question so that you can edit and publish it later.
-
Click Update and Publish to update the question and publish it to vendors so they can provide answers.
Once a question is published, it cannot be edited.
-
Click Audit Log to view a log of actions taken on the question.
-
API Update: User Permissions for Schedule Tasks
LUC-11291
You can now get user permissions for scheduled tasks so that when developing a user interface, you can omit an Edit Task option when the user does not have permissions to do so. You can get the user permissions for scheduled tasks with this HTTP Request Method:
GET …/rest/scheduletask/securityaccess?projectEntityID=[projectEntityID]
This returns a list of tasks that indicates whether they are editable for the user. When the user has no access, the response is No Access. When the user has view access, the response includes the taskName, taskId and editable is false. When the user has edit access, the response includes the taskName, taskId and editable is true.
For example:
[
				{
				"editable": true,
				"taskName": "Group 1",
				"taskId": 5404774
				},
				{
				"editable": true,
				"taskName": "Task 1",
				"taskId": 5404775
				},
				{
				"editable": true,
				"taskName": "Group 2",
				"taskId": 5404776
				},
				{
				"editable": true,
				"taskName": "Task 3",
				"taskId": 5404777
				},
				{
				"editable": false,
				"taskName": "Task 2",
				"taskId": 5404778
				}
		]
In this example, all tasks except taskId: 5404778 are editable.
Report on RETM Deal Steps
LUC-9955
You can now create a report on RETM Deal Steps and report on individual task details.
-
From the System Administrator Dashboard, create a Schedule Template.
-
On the Template Details tab of your template, add the root groups and tasks you want.
-
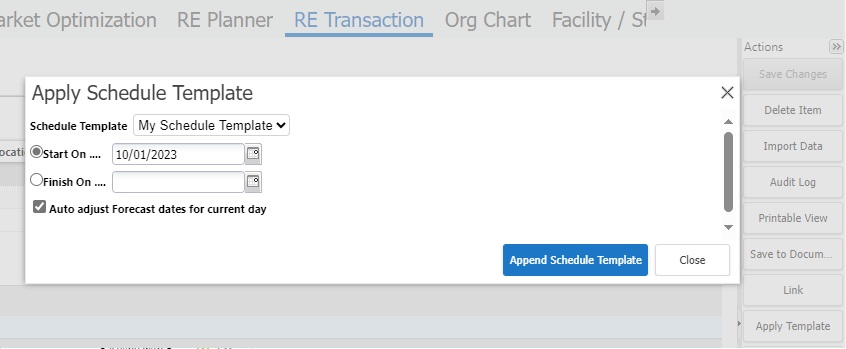
Apply the template on the RE Transaction page of your portfolio:
-
Click Apply Template in the Actions menu.
-
Select the template you want to apply.
-
Select the start and finish dates for the template.
-
Click Append Schedule Template.
-
-
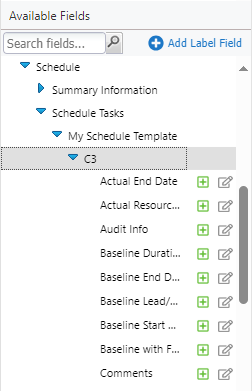
Add the fields you want to report on from the groups and tasks of your Schedules Template in Report Builder:
-
In Report Builder expand Available Fields > Schedule > Schedule Tasks.
-
Expand your Schedule Template.
-
Expand the groups and tasks of your template and add the fields you want to your report.
-
Update and Save your report.
View the Report Builder topic in the Lucernex Online Help for more information about creating and editing reports.
-
Copy documents
LUC-11252
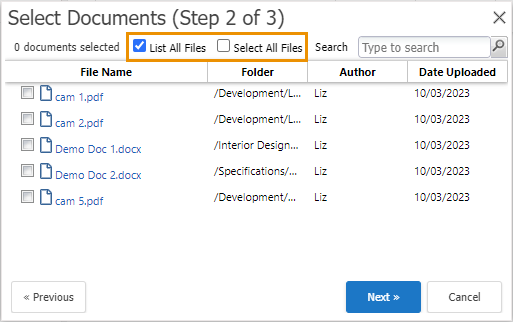
When you copy documents between entities which have an established relationship, on step 2 of the copy documents window, you can use the new List All Files check box instead of expanding folders and selecting files individually. Once you have listed all the files, you can then select the Select All Files check box to select all files that are currently displayed.
-
On the Documents tab of the entity that you want to copy from, click Copy Documents in the Actions column.
-
In the Select column, select the check box of the entity that you want to copy documents to, then click Next.
You must choose an entity that has folders. You can select the Has Folders check box to only list entities that have folders.
-
Select the List All Files check box.
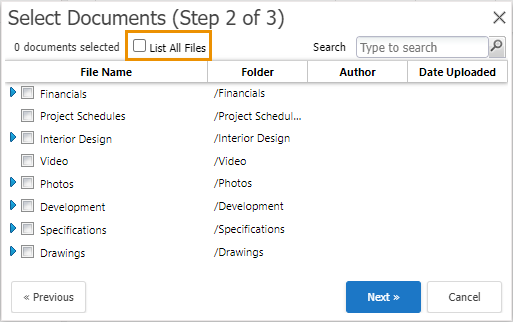
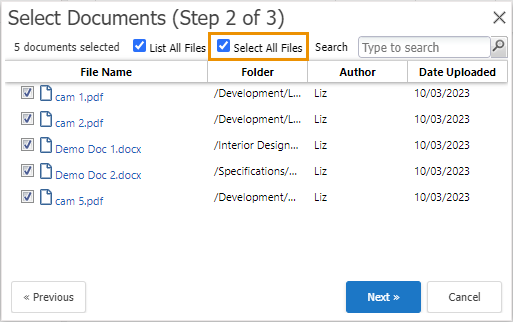
The folder view is replaced with a list of files and the Select All Files check box is shown.
-
Do one of the following:
-
Select the Select All Files check box to select the files that are currently listed.
-
Enter Search criteria and click Search to narrow the number of documents listed, then select the Select All Files check box to select the files that are currently listed.
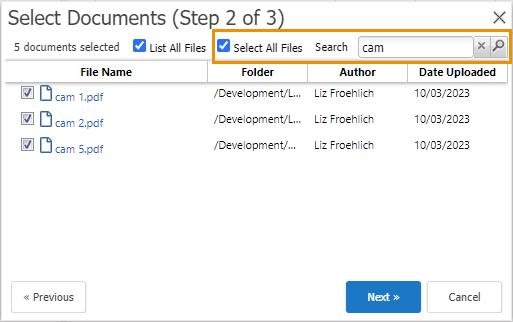
If you clear your search criteria, records that were previously filtered out but not selected are listed, but their check box is cleared. In that scenario, to select those files, you must either select their check boxes individually, or clear and reselect the Select All Files check box.
-
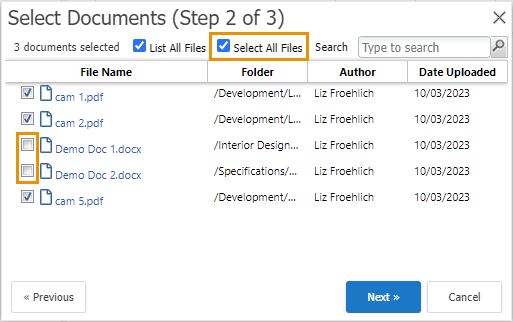
Select the check box next to each file you want to copy.
-
-
Click Next.
-
For unmatched document folders:
-
In the Skip column, select the check box of each file you want to skip.
-
In the To Folder column, choose the folder you want to copy the file to.
-
-
Click Finish and OK.
Improvements and issues fixed
| Component | Summary | Reference # |
|---|---|---|
| Budget Template | An error no longer occurs when you create an Ad Hoc Budget template from an existing budget template. | LUC-11542 |
|
Session management |
We have improved session management so that inactive sessions are removed in accordance with the values in your Company settings such as Inactive Session Timeout (Minutes) and Maximum Session Timeout (Hours). |
LUC-11431 |
| Reports | The correct data is now displayed when you run a report with the filter Match Any Criteria (Or) selected for native Excel. | LUC-11388 |
| Add Organization | When you make a group type available for a specific Portfolio or Capital Project, then add an Organization to the same Portfolio or Capital Project, the Group drop down now lists that group type. | LUC-11236 |
| Reports |
When you configure a report with the Is Group? option, it now displays the correct rows for the option you chose:
|
LUC-11224 |
| Reports | The Hide Details check box in the report grouping and sorting options now hides the individual group line items so that only group totals and sub totals are shown in the report. | LUC-11205 |
| Documents | When you enter a document Description that contains allowed characters, this is no longer reported as suspicious content. | LUC-11087 |
| Datamart | A delta run now updates Datamart with virtual table record changes such as edit and delete. Previously, Datamart was only updated with these changes in a full brush. | LUC-10921 |
| Email Document | If the Include Hyperlink to document check box is selected in the Email Document window and the document is too large to attach, when you click Send, an email is sent with a link to the document. | LUC-9690 |
| Schedules | When in full screen view on a Gantt chart and you click Exit Full Screen, Lucernex now exits the full screen view as expected. | LUC-8659 |
| XML Report | Date calculations now work as expected in the XML report output. For example, the Remaining Life now populates with values as it does in the Excel and Native Excel outputs and no longer shows as an empty XML tag. | LUC-11508 |
| Facility Location | An error no longer occurs if you attempt to change the Location on a Facility record and a Facility RecID exists on that page. | LUC-11323 |
| Reports | Contract Status now appears correctly in report outputs regardless of whether the Contract Status Description is empty. | LUC-11219 |
| State / Province field | When you select Sri Lanka in the Country and then select the State / Province field, that field now lists the states in Sri Lanka that you can select. | LUC-11352 |
| Reports |
You can now create a report on RETM Deal Steps and report on individual task details. |
LUC-9955 |
| Lock Bidding Questions |
Bidding questions can now be locked to prevent the question being modified after it has been answered. |
LUC-10044 |
| API Integration Report |
If your organization has an integration between Lucernex and Workday with an integration report triggered by an API GET, the fields on that report are now updated. Example report fields that are updated:
|
LUC-11385 |