Version 7.0.55 and Earlier
This section describes how to use DataMart.
 DataMart UI Tour
Once you complete the installation, depending on how the user will access the DataMart Web Host / SQL Server configuration, enter the following URL in the web browser:
-
User PC / Laptop:
Web browser URL = FQDN of the SQL Server; for example, http://dm.mycompany.domain:8080
-
DataMart network server (local user login):
Web browser URL = http://localhost:8080
The web browser will load the webpage and display the DataMart UI similar to the example pictured below.

Please note that the DataMart mapping time shown is in the user's local time zone; however, the database records the time events in US Central time zone.
Create a User
Create a user account (member) in your Firm's Lucernex Production Environment (lxretail.lucernex.com and dm.lucernex.com) to use for the DataMart in the mapping steps (entered in the IWMS UserID and IWMS Password fields mentioned in the Create a Mapping procedures below).
When creating a new user name for the DataMart Schedule, please log in to the Lucernex Production environment with the DataMart user name and password to accept the EULA before configuring the mapping schedule. This IWMS user must also have the System Administrator job function to ensure access to all the firm's records.
Our best practice recommendation is to create a user called "DataMart" so you can easily identify the completed DataMart scheduled tasks in the Job Log.
Create a Mapping - Versions 5.0.29 and later
We recommend that you do one of two things:
-
Create mappings for each of type(s) record you want to pull and run them when you deem necessary, OR
-
Create 1 mapping for all record types.
Do not modify a single mapping to change the types of records it includes. If you do, the next delta run will not pick up changes to records that occurred in the timeframe when those record types weren’t included in the mapping.
Here is an example scenario:
-
On Monday, the mapping has Projects and Sites selected,
-
On Wednesday, the mapping has only Sites selected,
-
On Friday, the mapping has Projects and Sites selected again.
In this scenario, the third run will pick the time stamp from the run on Wednesday. This means if there are any changes for Projects between Monday and Wednesday, they will not be reflected in the database. Only changes between Wednesday and Friday will be reflected on Projects table.
A mapping specifies the source and target of the DataMart information flow.
To create a mapping:
-
Click Create Mapping in the toolbar below the Mapping Schedules section.
Step 1 of the New Mapping wizard opens.
-
Complete these fields:
-
URL: Lucernex URL you want to download data from. This URL must be SSL, for example: https://lxretail.lucernex.com. Please note that if https: is not specified, http: will be assumed, which is not supported.
-
Firm: Your firm name.
-
Username: Username for this environment.
This will be the user ID you created in the Create a User procedures above.
-
Password: Password for your username.
-
-
Click Continue.
Step 2 of the New Mapping wizard opens.
-
Complete these fields:
-
Host: Server name for the database.
-
Port: Port where your SQL server lives.
-
Name: Your database target name.
Your Database Target name should be all one word, or separated by underscores or hyphens.
-
Instance: Your database instance.
-
Username: Your database username.
-
Password: Your database password.
Please note that if your firm has password security settings that require passwords to expire periodically, you will need to change your password in the mapping to accommodate the change.
-
-
Click Continue.
Step 3 of the New Mapping wizard opens.
-
Choose between three options:
-
If you want to set an hourly schedule:
-
Click Hourly tab.
-
Enter the number of hours between each run in the Every X Hours field.
-
-
If you want to set a daily schedule:
-
Click Daily tab.
-
Enter the number of days between each run in the Every X Days field.
-
Enter the time you want the run to occur in the At field.
-
-
If you want to set a weekly schedule:
-
Click Weekly tab.
-
Select the days of the week you want the run to occur from the Days of the Week field.
-
Enter the time you want the run to occur in the At field.
-
-
-
Click Continue.
Step 4 of the New Mapping wizard opens.
-
Complete these fields:
-
Name: Enter a name for the mapping in this field.
-
Record Types: Select the record types you want this mapping to pull from this field.
-
PGP Encrypt: Select this check box if you will be using PGP encryption for this mapping.
-
Global Fields First: When selected, DataMart will retrieve global fields before retrieving user-defined fields. This option was added as of v. 7.0.32.
This setting will cause the global fields to be added to the first partitioned table. User-defined fields will always start on the second partitioned table.
-
Only Global Fields: When selected, DataMart will only retrieve global fields for the mapping. This option was added as of v. 7.0.32.
If you modify the Global Fields First or Only Global Fields settings on an existing mapping, DataMart will return the following warning:
“This change will make your next DataMart run a full brush and re-partition your tables. Continue?”
If you click Save button in this warning message, your change will be saved. Your next run will be a full run, and DataMart will re-partition your tables.
-
Auto Schema: Select this check box to enable incremental updates. These updates include schema changes so that your DataMart instance includes both user-defined fields and new global fields without having to do a full-brush refresh.
DataMart checks the number of fields which exist on a database table. If the maximum number has been exceeded, new fields are added to a subsequent table.
-
-
Click Finish.
The mapping is created.
Create a Mapping - Versions older than 5.0.29
A mapping specifies the source and target of the DataMart information flow.
To create a mapping:
-
Click Create Mapping in the upper-left corner of the page.
The Create a New Mapping page opens.
-
Complete these fields:
-
Mapping Name: Enter a name for the mapping in this field.
-
Schedule: To set or edit the mapping schedule:
-
Click Edit button next to the Schedule label.
The Execution Schedule window opens.
-
Choose between two options:
-
If you want to set a daily schedule:
-
Select the interval you want the schedule to run from the Interval field.
The options include once per day, every 3 hours, every 2 hours, every hour, and every 30 minutes.
The once every 30 minutes option is not recommended for large companies.
-
Select the time you want the schedule to run from the At field.
-
Click Save.
The schedule is updated.
-
-
If you want to set a schedule that occurs on certain days of the week:
-
Click Days per Week.
The Days per Week page of the Execution Schedule window opens.
-
Select the check boxes next to the days of the week you want the schedule to run.
-
Select the interval you want the schedule to run from the Interval field.
-
Select the time you want the schedule to run from the At field.
-
Click Save.
The schedule is updated.
-
-
-
-
PGP Encrypt: Select this check box if you will be using PGP encryption for this mapping.
-
Schema auto-update: Select this check box to enable incremental updates. These updates include schema changes so that your DataMart instance includes both user-defined fields and new global fields without having to do a full-brush refresh.
DataMart checks the number of fields which exist on a database table. If the maximum number has been exceeded, new fields are added to a subsequent table.
-
IWMS URL: Enter the Lucernex URL you want to download data from. This URL must be SSL, for example: https://lxretail.lucernex.com. Please note that if https: is not specified, http: will be assumed, which is not supported.
-
IWMS UserID: Enter the User ID for this environment.
This will be the user ID you created in the Create a User procedures above.
-
IWMS Password: Enter the password for your user ID.
-
IWMS Firm: Enter your firm name.
-
DB Host: Enter the server name for the database.
-
DB Name: Enter your database target name.
Your Database Target name should be all one word, or separated by underscores or hyphens.
-
DB Instance: Enter your database instance in this field if you have one.
-
DB UserID: Enter your database User ID.
-
DB Password: Enter your database password.
Please note that if your firm has password security settings that require passwords to expire periodically, you will need to change your password in the mapping to accommodate the change.
-
-
Click Create.
The mapping is created.
Modifying Execution Schedules
DataMart defaults to perform a delta run once per day at 3 am. We recommend that you clear your browser cache and history prior to modifying the schedule. Additionally, please confirm that your normal delta run completes in the allotted time and set your execution schedule accordingly before changing the DataMart execution schedule to a more frequent interval. For example, if your DataMart delta runs in 3 hours, you should not schedule your execution to less than every 3 hours.
With version 4.x, a Delta run now automatically picks up schema changes for both global fields (with a version release) and client-configured fields.
To modify an execution schedule:
-
Open your DataMart Dashboard.
-
Click Edit mapping task schedule
 in the Actions column of the appropriate mapping schedule.
The Edit Mapping window opens.
-
Click Edit button to the right of the Schedule row.
As of the 7.0.32 release, if you modify the Global Fields First or Only Global Fields settings on an existing mapping, DataMart will return the following warning:
“This change will make your next DataMart run a full brush and re-partition your tables. Continue?”
If you click Save button in this warning message, your change will be saved. Your next run will be a full run, and DataMart will re-partition your tables.
-
Choose the appropriate schedule.
-
Click Save.
Execution Schedule Intervals
Automatic execution schedule intervals of DataMart is set up for Delta runs—changes-only—not full sweeps or a full replacement of the schema and database. Execution of a full brush should only be performed outside of normal business hours. A soft brush can be run during normal business hours, but we still recommend running soft brushes outside of them.
Executing DataMart
The items in the Actions column on the Dashboard let you control a particular mapping.
| Button | Description |
|---|---|

|
Run Mapping: Starts a run for the selected mapping. This could be a full brush or a delta run (depending on if you’ve had at least one successful full brush). |
|
|
Edit mapping task schedule: allows you to modify DataMart’s automated execution schedule |

|
Full Brush (Rebuild Database) - removes the current DataMart tables and updates your target database. This feature should only be used if you are starting a fresh installation or if you suspect a data corruption problem. Otherwise, as of Version 4.x, changed or created fields will be picked up during a Delta (incremental) run or a Soft Brush run. As of the 6.0.94 update, if one or more records are not picked up by a full brush, DataMart will fetch the missing records in a final query at the end of each record type. This is currently in place for all record types except Equipment Contracts, which will be coming in a future update. |

|
Database update with database schema update: runs a “soft brush”. This is a unique type of DataMart run. This will take less time than a full brush, but more time than a delta run. A “soft brush” simply clears the data from the database tables and rebuilds them one by one. |

|
Delete Mapping / Run: deletes your mapping |
After the initial run, DataMart is set to pull incremental—delta—changes only. When executing DataMart for the first time using the Run button, DataMart will create the target database from scratch. This may take longer than a simple delta run, as DataMart must pull all data and create the full database schema.
Click the mapping row that is executing to see the real time status of the import job.
Run a Full Brush / Rebuild Your Target Database
The Full Brush action is only used when you need to rebuild your database from scratch. With version 4.x, a Full Brush is no longer needed when you have created new tables or fields in your Lucernex environment, as these will be automatically updated in incremental updates. The Brush action removes your target database, and DataMart will rebuild the target database as well as the data in those tables the next time it is run.
As of the 6.0.94 update, if one or more records are not picked up by a full brush, DataMart will fetch the missing records in a final query at the end of each record type. This is currently in place for all record types except Equipment Contracts, which will be coming in a future update.
Rebuild your target database after normal business hours, or contact your Lucernex representative if you need to schedule a rebuild during the day.
Full Brush for version 7.0.55 and later
To run a full brush:
-
Open your DataMart Dashboard.
-
Click Brush button in the Actions column of the appropriate mapping schedule.
A dialog box opens, asking if you want to clean the current mapping.
-
If you want to reorder your table partitions, select the Re-order table partitioning check box.
Reordering your table partitions could break SQL integrations written on top of DataMart which reference specific fields and their table locations. Reference the information below before selecting this check box.
When the Global Fields First check box is selected:
-
If you select the Re-order table partitioning check box:
-
If a new global field has been added to Lucernex, it will be added to the first table partition in the appropriate alphabetical order.
-
Your user-defined fields, including any added after the previous successful full run, will be rearranged and sorted in alphabetical order starting from the second table partition.
-
-
If you do not select the check box:
-
If a new global field has been added to Lucernex, it will be added to the end of the first table partition.
If there are multiple new global fields, they will be added to the end of the first table partition in alphabetical order. Previously added global fields are not reordered.
-
Any user-defined fields added after the previous successful full run will be added to the end of last partitioned table.
If there are multiple new user-defined fields, they are added to the end of the last partitioned table in alphabetical order. Previously added user-defined fields are not reordered.
-
When the Only Global Fields check box is selected:
-
If you select the Re-order table partitioning check box:
-
If a new global field has been added to Lucernex, it will be added to the first table partition in the appropriate alphabetical order.
-
-
If you do not select the check box:
-
If a new global field has been added to Lucernex, it will be added to the end of the first table partition.
If there are multiple new global fields, they will be added to the end of the first table partition in alphabetical order. Previously added global fields are not reordered.
-
To learn more about table partitioning, see Table Partitioning.
-
-
Select Yes.
A message displays, that says: Rebuilding Database Tables... Please Wait. After this completes, DataMart will perform a full run of both tables and data upon its next scheduled execution.
-
Click Edit mapping task schedule button
in the Actions column to edit the current schedule if the next scheduled run is during business hours. -
Verify that your full brush run was successful on the DataMart Dashboard details.
If the full brush was not successful, check for errors and correct them. You must obtain a successful Full Brush run before DataMart will be allowed to run in Delta mode.
Full Brush for versions before 7.0.55
To run a full brush:
-
Open your DataMart Dashboard.
-
Click Brush button in the Actions column of the appropriate mapping schedule.
A dialog box opens, asking if you want to clean the current mapping.
-
If you want to preserve your existing mapping and add any new fields to the last table partition, select the Preserve table partition attribute mappings check box.
When you run a full brush, DataMart reorders your columns alphabetically and then breaks the data into partitions. Some clients have SQL integrations written on top of DataMart which reference specific fields and their table locations. With the table partitioning feature introduced in 4.0.24, these integrations could be broken when a field is moved by DataMart to another table.
The Preserve table partition attribute mappings check box will keep all fields in their pre-established positions on the tables, and add any new fields to the last table partition. To learn more about table partitioning, see Table Partitioning.
-
Select Yes.
A message displays, that says: Rebuilding Database Tables... Please Wait. After this completes, DataMart will perform a full run of both tables and data upon its next scheduled execution.
-
Click Edit mapping task schedule button
in the Actions column to edit the current schedule if the next scheduled run is during business hours. -
Verify that your full brush run was successful on the DataMart Dashboard details.
If the full brush was not successful, check for errors and correct them. You must obtain a successful Full Brush run before DataMart will be allowed to run in Delta mode.
Run a Soft Brush / Delta Run
You can do a full update of your DataMart data without erasing your current data. This will allow you to continue to make DataMart data available during a full update. This functionality is called a Soft Brush.
If you have had one successful full brush and one successful delta run, any subsequent delta runs that fail will trigger a new delta run which starts from the point where the previous successful delta run completed.
You must have the Audit Log enabled in your environment to do a successful soft brush. Otherwise, DataMart will not know which records have been changed.
Your Accruent representative can enable the audit log for you.
We recommend that you do one of two things:
-
Create mappings for each of type(s) record you want to pull and run them when you deem necessary, OR
-
Create 1 mapping for all record types.
Do not modify a single mapping to change the types of records it includes. If you do, the next delta run will not pick up changes to records that occurred in the timeframe when those record types weren’t included in the mapping.
Here is an example scenario:
-
On Monday, the mapping has Projects and Sites selected,
-
On Wednesday, the mapping has only Sites selected,
-
On Friday, the mapping has Projects and Sites selected again.
In this scenario, the third run will pick the time stamp from the run on Wednesday. This means if there are any changes for Projects between Monday and Wednesday, they will not be reflected in the database. Only changes between Wednesday and Friday will be reflected on Projects table.
To run a soft brush:
-
Open your DataMart Dashboard.
-
Click Database update with database schema update
in the Actions column of the appropriate mapping schedule.A dialog box opens, with a message that reads: You are about to do database update with database schema update. Are you sure you want to do this?
-
Select Yes.
The dialog box closes. The database schema update runs in the background.
Asynchronous Queries
DataMart limits you to 8 asynchronous queries. Any additional queries past this limit will be added to a queue. You cannot customize the limit for asynchronous queries.
If a query is added to the queue, you will be informed by a message in the Execution Events table. Every 30 minutes until the query task begins execution, DataMart will remind you that the query is in the queue.
View Download Errors in an XML File
If there are any errors in your DataMart download, you may view the errors in an XML file. An XML will appear on the DataMart Dashboard. You will also receive an error email from DataMart.
To view any download errors:
-
Open your DataMart Dashboard.
-
Click XML button
 in the Details column of the Execution Events table.
A Browse window opens.
-
Review your DataMart results.
DataMart must have a successful full run before it can go into Delta mode. Please make sure you review any errors that display on the DataMart Dashboard and correct these in your UI. Contact your Lucernex representative if you need further assistance.
Monitoring DataMart Runs
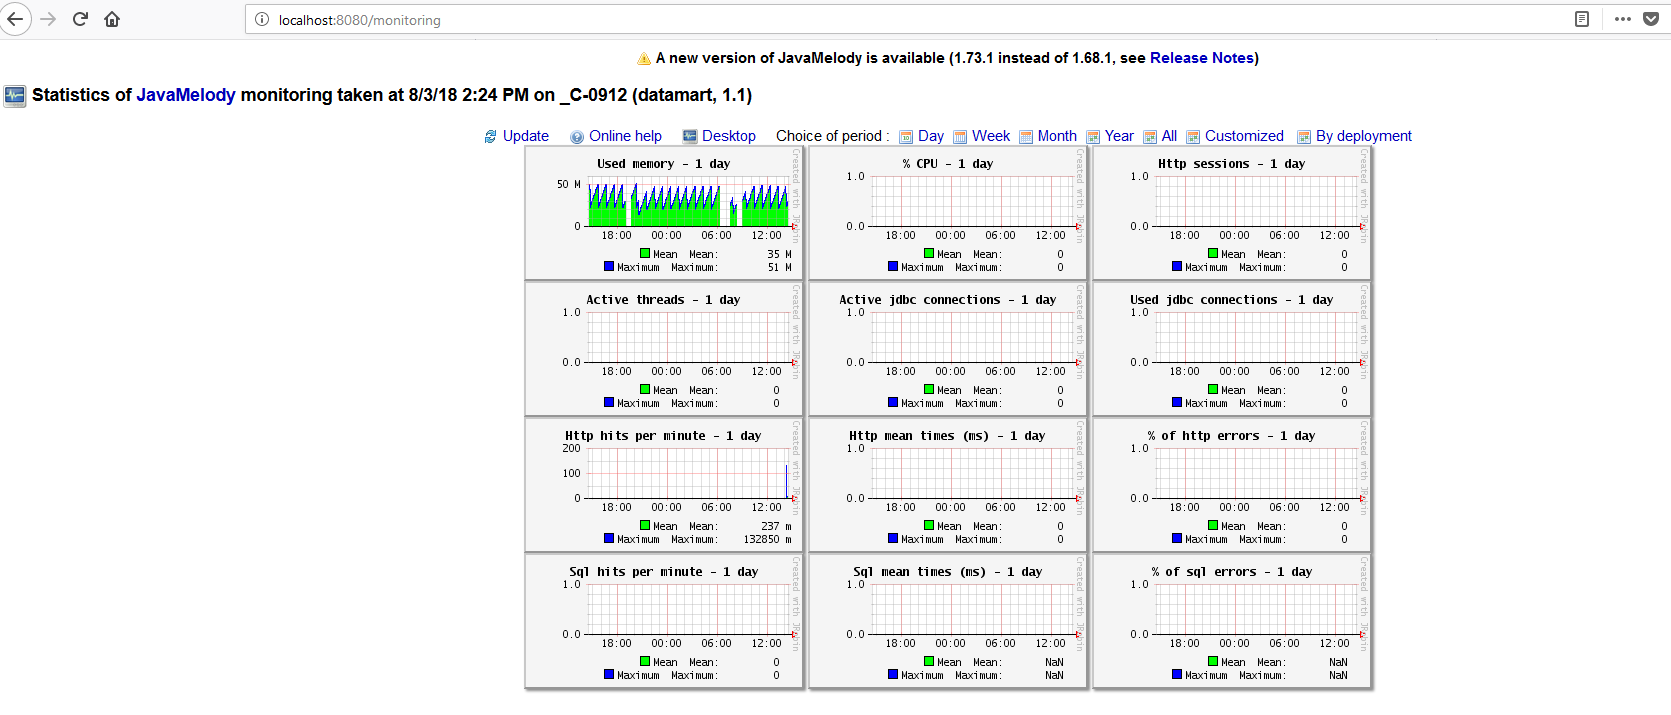
You can review the health of your DataMart runs using the following URL: localhost:8080/monitoring
Pictured below is a screen shot of the DataMart Monitoring page. The page has several graphs displaying statistics about a DataMart instance.
Log Events
Operational, Error, and Database Detail Logs may be reviewed on the Log Events tab. These logs may be downloaded to your local drive for analysis by Lucernex personnel or your IT personnel.
When pulling a long-running record, DataMart posts log events every 30 minutes to let you know that the record is still processing.
If you delete your mapping, it will also delete any associated history for a delta (incremental changes only) run, even if you use the same database as the original mapping.