Add a Layout
Add a layout for use with the form.
-
Select Add Layout in the Actions column of the form type.
-
Complete the Add Layout dialog:
-
Page Layout Name: Enter a short, descriptive name using our recommended naming conventions. This name appears in Select Form when a user adds a form to an associated entity.
-
Description: Add descriptions to every template, layout, or field you create in Lucernex, so future administrators understand the purpose and context of each item.
-
Allow Edit: Select Yes to allow users to edit the values in the form.
One scenario to prohibit editing is when using a form to provide instructions or prompting a user to download a document.
-
Custom Email?: Select to create a custom email for this form. This sends an email to the form assignee or assignee manager when the form is created or updated.
-
Use HTML in email?: Select to allow the use of HTML in the email message.
-
Email Title: Title of the email.
-
Email Message: Body of the message.
-
-
Allow users to create this form?: Select Yes to allow users to create this form on an ad hoc basis. Select No to limit this form for use only in work flows.
-
Is Notification Email Layout?: Select if this layout is for email notifications. This option appears when enableEnhancedWFNotification is turned on in your firm.
-
Initialize layout from existing layout: Existing layout to base this form on.
-
Minimum window width in pixels: Minimum width for this layout in pixels. The system auto-sizes the form for you. We recommend viewing the form prior to setting a minimum width.
-
Large Text for Mobile: Select if users will use this form on a mobile device.
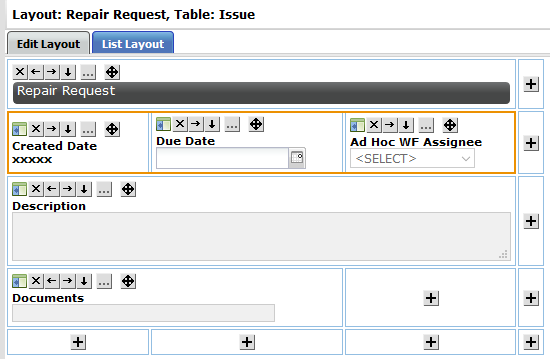
This increases the size of text in forms when the form is viewed on a tablet to improve the experience for users working in the field. We recommend you format your form layouts so that they do not exceed three cell widths in total width. This ensures that your form displays correctly with the increased font size. Here's an example of three cell widths in total width.
-
Available for the following Portfolios / Capital Programs: Select the portfolios / capital programs you want this form to be available for. All Portfolios / Capital Programs is the default. Multiple options are available.
-
-
Select Add Layout.
The layout appears as a child item to the form type when you select plus
 next to the form type name.
