On-Premise Upgrade Detailed Walkthrough
This guide provides step-by-step instructions for upgrading EMS.
Remove existing EMS applications
- Uninstall EMS Platform Services and all EMS-related applications from the web server.
- Preserve any custom CSS, HTML, or other configuration changes.
- Reapply customizations after installing the latest version of each EMS application.
Review upgrade considerations
Before upgrading, review any product-specific customization documentation that applies to your environment.
Review system requirements
- Review EMS SystemReq 225.
- Verify that all required prerequisites are installed on the application server before reinstalling EMS components.
Install required frameworks
- Install the .NET 8.0 Windows Core Hosting Bundle on the web or application server.
- Do not uninstall existing .NET hosting bundles.
- Install ASP.NET Core 8.0 Runtime.
- Verify that .NET Framework 4.8 is installed.
Download the following components if needed:
Apply SQL EMS Patches
As of 226.2.2, installations are deployed with automated PowerShell-based packages. If you're running a version between 220.2 and 224.3, manually deploy SQL patches up through version 225.1 as described here first, then follow the PowerShell deployment process.
-
Download all EMS patches and applications from the EMS Software Customer Login Portal.
-
Navigate to the Software and Docs Library / Software upgrades and patches.

-
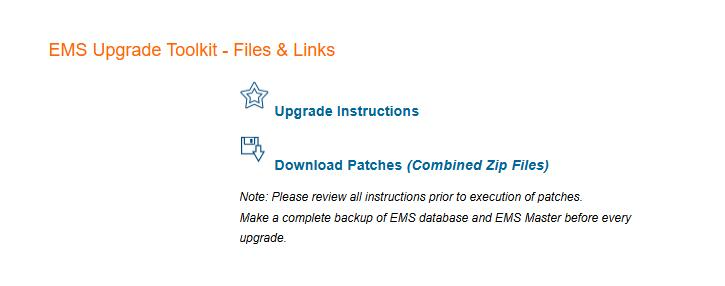
Select the EMS Upgrade Toolkit for multi-version upgrading.

-
Download the PDF and the patches from the EMS Upgrade Toolkit.
-
-
Install patches in the following order:
-
220.2
-
220.3
-
221.1
-
221.3
-
221.4
-
223.1
-
223.3
-
224.1
-
224.3
-
224.4
-
225.1
-
Request the patch zip file from EMS Support if needed.
-
https://access.accruent.com/
Deploy PowerShell package
To deploy an update, download and extract the deployment package, run the Deploy.ps1 script included with the package, and then follow the instructions in the package ReadMe file.
The deployment package automates the deployment process and must be run from the extracted package folder. Database updates are no longer distributed as standalone SQL scripts.
If you need assistance with the deployment process, contact Support.
Download and extract the package
- Download the EMS Patch.zip file from the Portal.
- Copy the file to the target server.
- For best performance and connectivity, place the package on the database server.
- Extract the ZIP file contents to a folder of your choice.
Open PowerShell
- Open a PowerShell window.
- Navigate to the folder where you extracted the package.
- Browse to the following folder:
tools\scripts
This folder contains the deployment script, Deploy.ps1.
Run the deployment script
From the tools\scripts folder, run the following command:
.\Deploy.ps1 -Database "yourdatabase" -ConnectionString "Server=<servername>;Database=<databasename>;TrustServerCertificate=true;Trusted_Connection=true"
Example:
.\Deploy.ps1 -Database "EMS" -ConnectionString "Server=SQLSERVER01;Database=EMS;TrustServerCertificate=true;Trusted_Connection=true"
Understand the database name parameters
The database name appears in two locations:
- The
-Databaseparameter. - The connection string (
Database=<databasename>).
This design helps ensure that the deployment process connects to and updates the intended database. To avoid unexpected results, specify the same database name in both locations.
Verify the deployment settings
Before running the script, confirm the following:
- The server name is correct.
- The database name is correct in both locations.
- You have permission to connect to and modify the target database.
- PowerShell is open in the
tools\scriptsfolder.
Deployment actions
After the script starts, it automatically performs the following actions:
- Validates the database.
- Applies pending migrations.
- Updates database objects.
- Records deployment version information.
Troubleshooting connection issues
If the example connection string does not work in your environment, review the documentation and parameter descriptions included in Deploy.ps1. The script supports additional connection methods and deployment options that might be more appropriate for your environment.
Run EMS Environment Utility
This step applies to EMS 222.3 and later.
- Run the utility from a server with direct access to SQL Server.
- Use a Microsoft SQL Server account with SA-level permissions.
- Navigate to the Environment Utility folder.
- Run
EmsEnvironmentConfigTool.exe. - Enter the required information.
- Select OK.
- Close the application after the success message appears.
Install EMS Platform Services
- Install EMS Platform Services.
- Verify that the service is running by opening the Platform Services status URL.
Install EMS Desktop Web Deploy
- Install EMS Desktop Web Deploy.
- Select HTTP or HTTPS during setup.
If you use HTTPS, install EMS Desktop Client from the EMS Desktop Web Deploy site (https://[yourserver.com]/emsdesktopwebdeploy)
Install EMS Web App
- Sign in to the Platform Services Admin Portal using a web user account with an Admin Security Template.
- Navigate to Integrations > Clients > EMS Web Application.
- Select Reset Secret.
- Copy and save the new secret.
- Install EMS Web App.
- Open the installation folder, which by default is
C:\Inetpub\wwwroot\EmsWebApp. - Open the
web.configfile. - Replace
pasteSecretHerewith the new secret value. - Save the file.
Install remaining EMS applications
Install any remaining EMS modules and services included in your license.
Configure EMS Kiosk
If you use EMS Kiosk, complete the following steps.
- Sign in to the Platform Services Admin Portal using a web user account with an Admin Security Template.
- Navigate to Integrations > Clients > EMS Kiosk.
- Select Reset Secret.
- Copy and save the new secret.
- Install EMS Kiosk.
- Open the installation folder, which by default is
C:\Inetpub\wwwroot\EmsKiosk. - Open
appsettings.json. - Update the file with the new secret.
- Save the file.
Complete the upgrade
After you complete these steps, verify application functionality and confirm that all EMS components are operating correctly.