Troubleshooting Skype for Business
Skype for Business in the EMS Web App
If Skype for Business has been properly configured, Everyday Users creating a reservation in the EMS Web App should see the Add Skype to Reservation toggle.
If you do not see this toggle, Skype for Business has not been properly configured and Skype for Business will not be added to the reservations made in the EMS Web App.
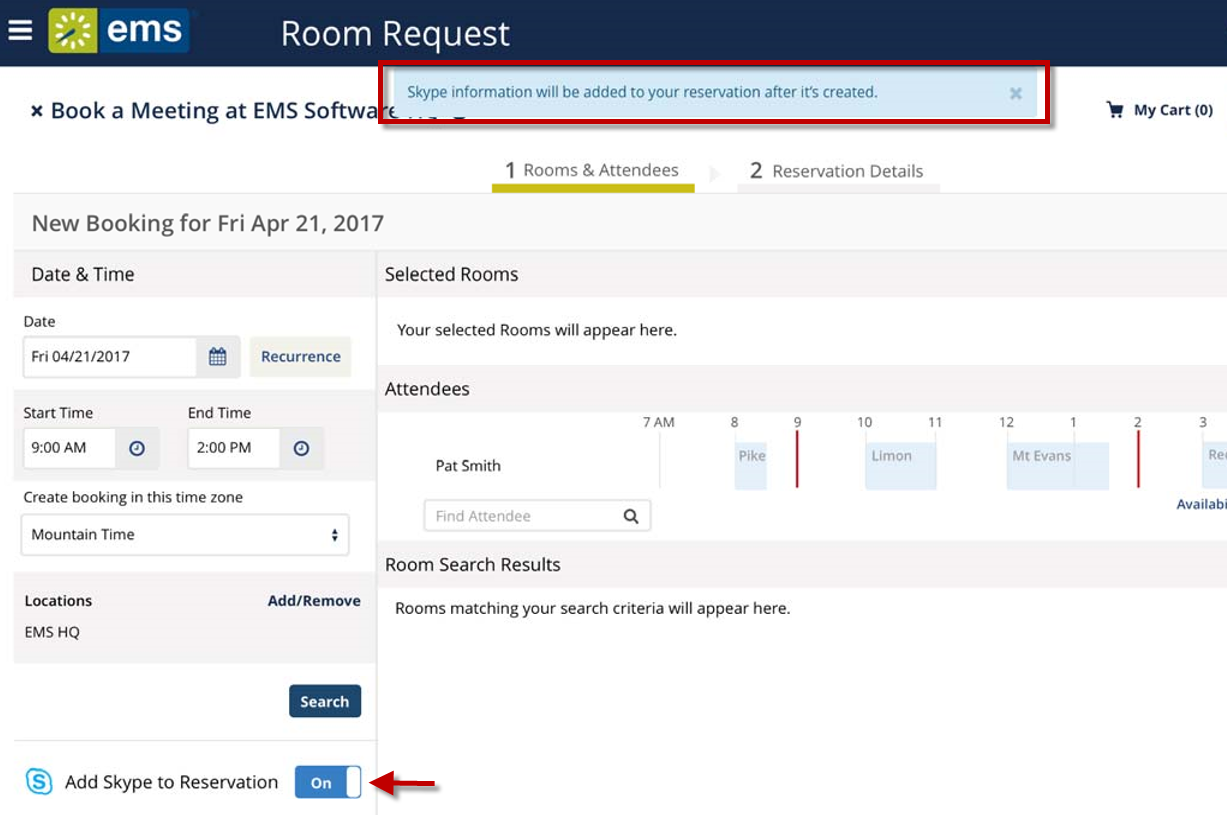
You can ensure that Skype for Business has been successfully added to your reservation by navigating to My Events > Reservation Tasks > Send Invitation > Join Skype link. A Meeting ID will also appear in the Reservation Details under Skype Meeting Info. 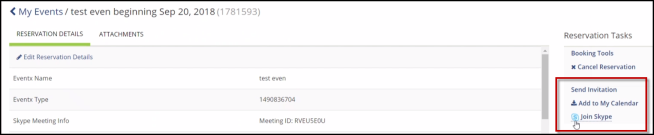
Troubleshooting Skype for Business Issues in the EMS Web App
To troubleshoot Skype for Business:
-
Start with the Autodiscover URL.
Every user exists in a Pool, which can be a physical server. In large organizations, users are typically grouped by region (e.g., Asia Pool, etc.). When troubleshooting, you must perform these steps within the Pool where the user exists. The purpose of Autodiscover URL is to determine the location of the Pool.
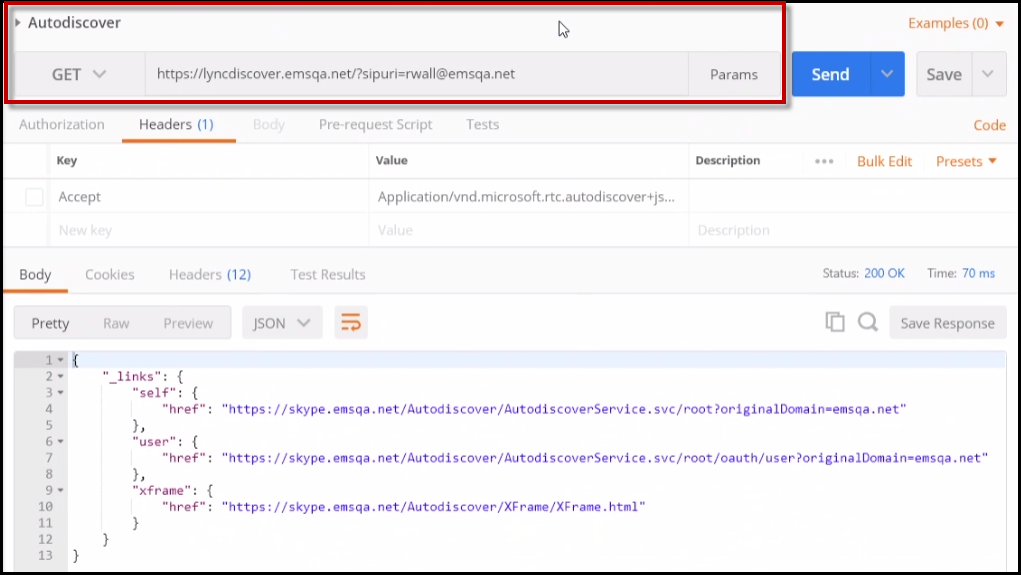
Autodiscover URL in Postman
-
To perform a GET request for the Autodiscover URL, click Send.
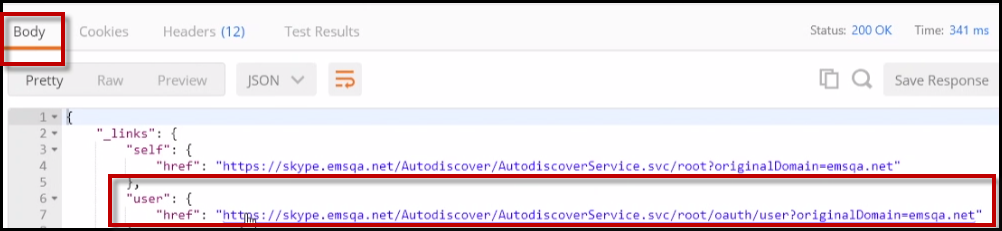
In the Body section of Postman, a "user href" value displays. This user href value provides the location of the user's Pool.
-
Copy the user href value into a GET request using the Autodiscover OAuth.
A 401 Status displays.
-
Skype AutoDiscover URL can change depend on where the request is made. Ensure requests are made from the client machine and the server to determine why they are communicating differently. Postman will allow you to isolate all interactions independent of EMS.
-
Navigate to the Headers section to view the authentication information. This information provides where to go to authenticate, as well as which authentication methods are available. The grant_type provides information on how Skype is configured to authenticate.
This grant_type informs users on which authentication method they should be using.
-
Use the www-authenticate URL to authenticate as the user. Perform a POST request using this URL for the correct authentication method.

-
This POST request will provide an access token.
-
Perform a GET call using the access token to receive a 200 OK status.
-
Navigate to the "applications href" URL. Copy and POST this URL into the Create Application section.

-
A 201 Created status should appear.
A 502 status during this step reflects a Microsoft reverse proxy issue with Skype requests; a valid response has not been created.
-
Navigate to the "startMessaging" URL. The ID number in the middle of the href identifies the application that has been created.

-
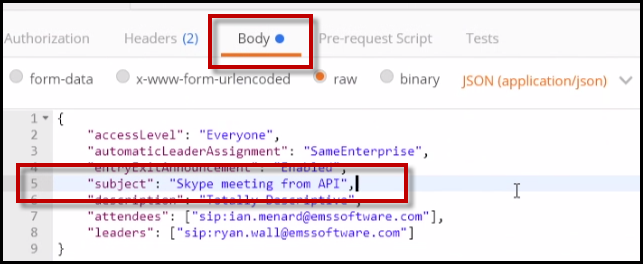
Navigate to the Create Meeting section and POST the startMessaging URL. The Body information provides information on how the event was created in Skype.
-
Navigate back to EMS Web App and locate the conferencing ID. It should match the ID created during the Create Meeting above.
Skype-Related issues in the EMS Web App
-
Download and launch a browser tool that monitors network traffic.
We recommend using DevTools.
-
In the EMS Web App, toggle the Add Skype to Reservation to On.
-
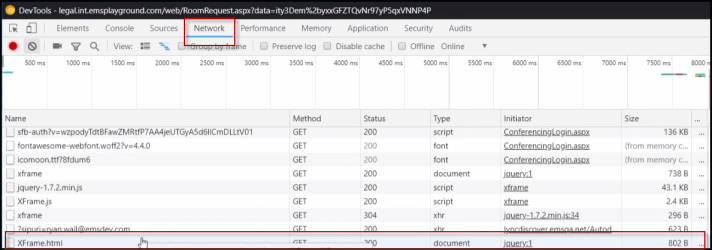
Navigate back to DevTools > Network section.
The Skype sign-in screen appears.
-
Enter your Sign-in address and Password.
Important Log Components
Call IMPORTANCE SetConferencingAPIToken Most important call to check. Check Request Payload and ensure that the access token is the same.
If the tokens are the same, this means that the EMS Web App has successfully communicated with Skype for Business. If the token is not the same, the problem is guaranteed to be in the EMS Web App and proceed accordingly (e.g., check the URLs that AutoDiscover is providing).
XFrame.html URL that Microsoft provides to circumvent browser security. Essential to navigating around cross domain calls. ?sipuri= 200 GET call that provides AutoDiscover URL. user?originalDomain=emsqa.net 401 GET call provides the user URL from AutoDiscover. oauthtoken Authentication call that provides the access token.
Troubleshooting in EMS Platform Services
Once a reservation is created in the EMS Web App, reservation information is sent to EMS Platform Services.
To troubleshoot in EMS Platform Services:
-
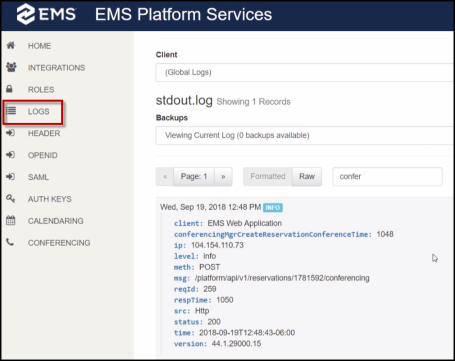
Begin troubleshooting by navigating to the Logs section of EMS Platform Services.
-
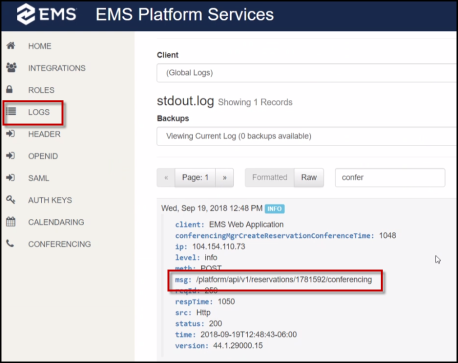
Check the Conferencing route in the msg: line. If this call does not exist in the Log, the EMS Web App did not communicating properly with EMS Platform Services when the reservation was created.
If you do not see the Conferencing call below, check the Log for Client Authentication calls, as authentication is the first thing EMS Web App does. If there is an error with the Client Authentication, this is most likely a Configuration issue. The Secret will need to be reset and inserted into the web.config file.
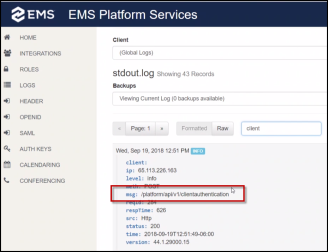
To troubleshoot further, view the Log in Splunk and ensure there are no errors with the following items:
- Client authentication call
- Access Token (ensure a token has been generated for the EMS Web App and authentication was successful with a 200 status)
- Conferencing route
-
Export Log from EMS Platform Services. Navigate to the C Drive > inetpub > wwwroot > EMSPlatformServices (for a standard installation).
For other installations, you may need to navigate to C Drive > Program Data > EMS Software, LLC > EMS.Platform.Api.
-
Changes may need to be made in default.json or web.config files.
Depending on client configuration, the Web.config may be used to override changes made in the default.json.
-
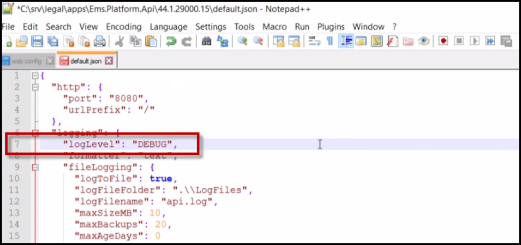
Navigate to the logLevel in the default.json file.
-
Set the logLevel to "DEBUG." When DEBUG is configured, the log will write a lot of data.
Only use DEBUG when testing; turn DEBUG off when not testing.
-
Restart the application so that the new logLevel is picked up.
-
Create a reservation in the EMS Web App and add Skype for Business.
-
Go back to the Log and search for the Conferencing route with the most recent time stamp. If this Conferencing route failed, you will be provided with Debug-level log information.