How To: Copy Graphics to External Documents
While working in the system, you may generate Dashboard charts or other graphics that you want to paste into a monthly report or PowerPoint presentation. This topic shows you how to take a screen capture of a chart or graphic from the Dashboard and use it in other documents to be distributed to others.
You start the process by performing a Windows screen capture to save the contents of your screen to the Clipboard. Once captured, the graphic can be pasted directly into Microsoft Word and cropped there, or pasted and cropped into the Windows Paint application and saved as a graphics (jpeg, bmp, png, gif) file.
 Capture the Screen
Performing a Windows screen capture copies the contents of your screen to the Windows Clipboard. While Windows allows you to copy the entire screen (all windows) to the Clipboard, we'll use the key sequence to capture only the contents of the currently active browser window.
-
Display the graphic you want to capture in your browser.
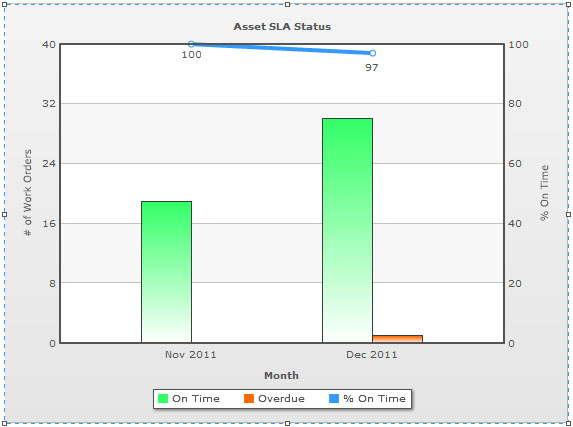
In this example, we’ll use the Asset SLA Status chart from the Dashboard.
-
Press the CRTL+ALT+Print Screen buttons on your computer keyboard.
This takes a screen shot of everything that is currently displayed on your screen in the active window and copies it to the Windows Clipboard.
Use the Image in Microsoft Word
This procedure uses Word 2010, but the process is similar in all Word versions.
-
Open the Word document you want to add the screen capture to.
-
Place your cursor in the document at the location you want to paste the picture.
-
Paste the picture (using either Edit > Paste or CRTL+V).
This pastes the entire window – the graphic that you want as well as the browser window and toolbar that you don’t want. You'll now use Word's tools to crop out the parts of the graphic that you don't want.
-
Click the pasted graphic.
The Word Picture Tools menu appears in the menu bar.

-
Click Format to display the picture formatting tools.
-
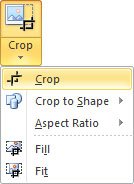
From the Crop menu, select the basic picture cropping tool.
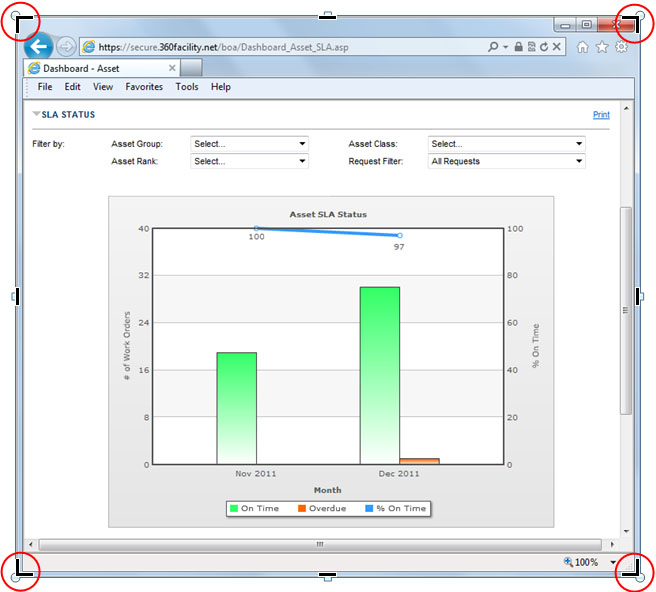
Cropping Tool marks appear on the corners of the pasted graphic.
Image
-
Drag the top-left cropping mark to crop out everything on the top and left side that you do not want to include.
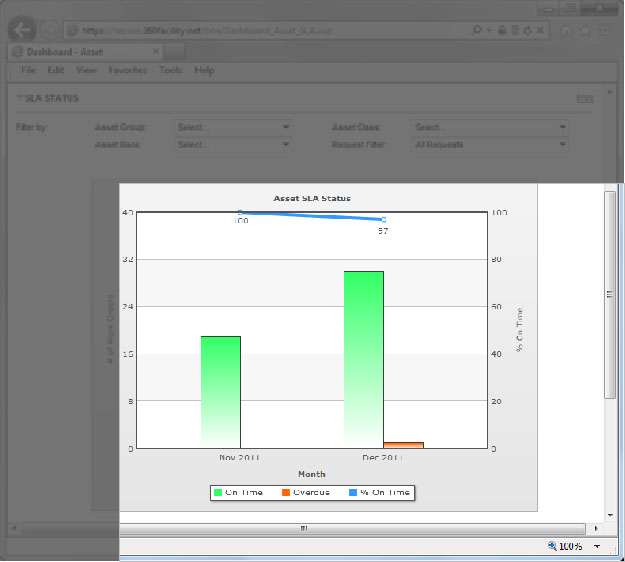
As you drag, a large gray box will cover the portion of the picture you are cropping out.
-
Repeat the procedure by dragging the bottom-right cropping mark to crop out the rest of the graphic that you do not want to include.
-
Once you have finished cropping, click anywhere outside of the cropped graphic and the part of the image behind the gray boxes will disappear.
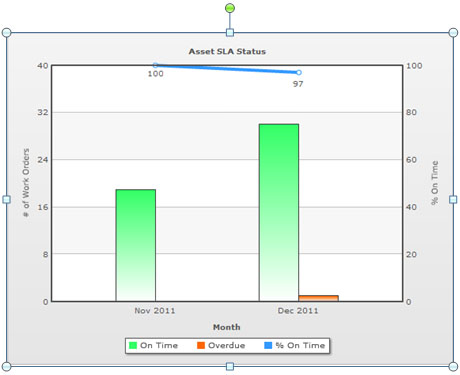
You can now manipulate this image in Word as you normally would – resize it, copy and paste it to another location, add arrows or call-outs, etc. If you want to change how the graphic is cropped, select the cropping tool again. The gray cropped areas will reappear and you can make adjustments.
Save the Image as a Graphics File using Microsoft Paint
To use the captured screen image in an application other than Word, you can paste the screen capture into Microsoft Paint, edit it, and then save the image as a graphics file to use wherever needed. You can save a copy in PNG, BMP, JPEG, or GIF format.
-
Open Microsoft Paint by selecting Start > All Programs > Accessories > Paint.
-
Paste the screen capture from the Windows Clipboard into a new file.
This pastes the entire window – the graphic that you want as well as the browser window and toolbar that you don’t want.
-
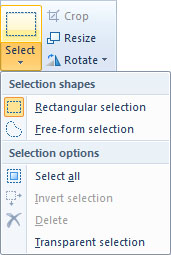
Select the Rectangular section tool.
-
Select the portion of the screen image you want to include in the graphics file.
-
Copy the selection.
-
Create a new file by selecting File > New.
A dialog box opens asking you if you want to save the original Untitled file (the one containing both the image and the browser window).
-
Click Don't Save.
-
Paste the copied selection into the new file.
-
Select File >Save As and select the format for the graphics file.
-
Enter a file name and click Save.
You now have a stand-alone graphics file that can be imported into Word, PowerPoint, Photoshop, Visio, or any other application that allows you to insert graphics.